


51
MAINTENANCE
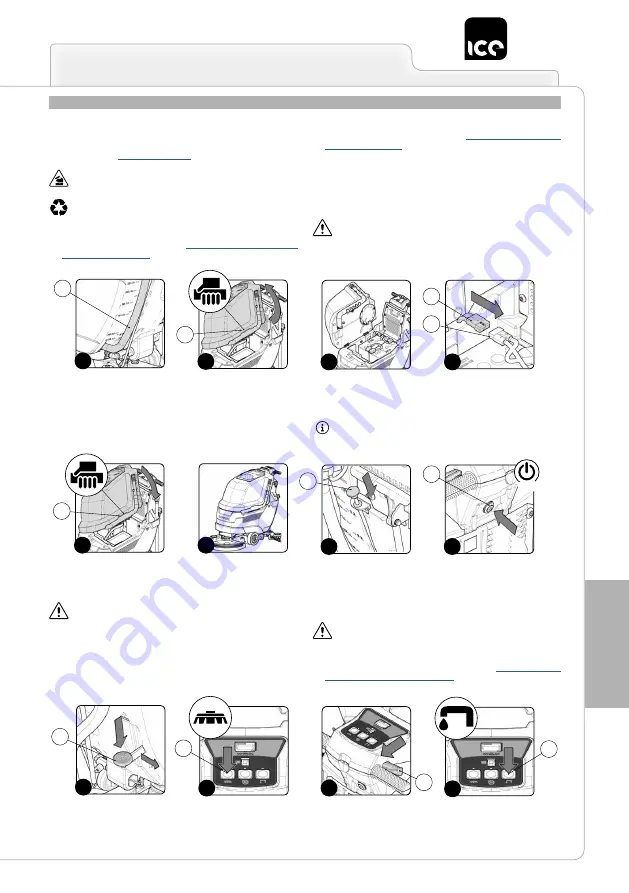
CLEANING THE WATER SYSTEM (50D versions)
Prior to any extended periods of disuse, do the following:
1. Take the device to the dedicated maintenance area.
2. Take all necessary steps to ensure that the device is in a safe
ATTENTION:
users are advised to always wear protective
gloves, to avoid the risk of serious injury to hands.
ATTENTION:
the place designated for this operation must
comply with current environmental protection regulations.
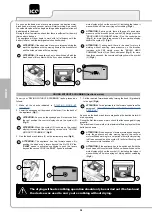
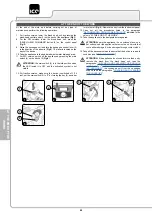
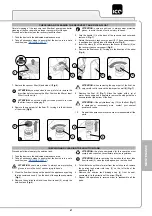
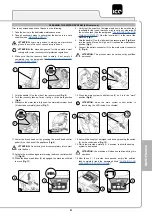
3. Make sure that the recovery tank is empty, if not, empty it
completely (see the paragraph “
4. Verify that the quantity of detergent solution in the solution tank
is suitable for the type of work you wish to carry out, otherwise fill
the solution tank (see the paragraph "
”). View the level tube (1) in the rear of the
machine (
Fig.1
).
5. Grip the handle (1) on the left side of the recovery tank (
Fig.2
) and
turn the tank as far as it will go, until it reaches the maintenance
position (
Fig.3
).
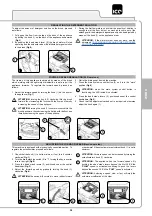
6. Connect the battery connector (3) to the main system connector
(2) (
Fig.4
).
ATTENTION:
This process must be carried out by qualified
personnel.
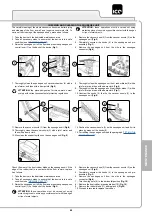
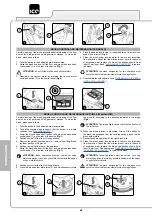
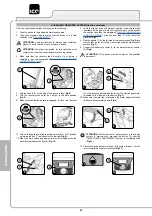
7. Grip the handle (2) on the side of the recovery tank (
Fig.5
).
8. Turn the recovery tank as far as it will go, to the work position
(
Fig.6
).
9. Make sure the water tap is fully open; the water adjustment knob
(4) should be completely down (
Fig.7
).
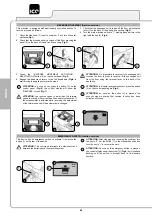
10. Press the main system control button (5) so it is in the “work”
position (
Fig.8
).
ATTENTION:
when the main system control button is
functioning, the LED inside it is activated.
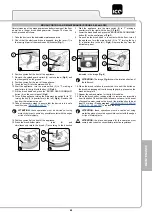
11. Lower the brush head unit by pressing the brush head control
pedal (6) on the back of the appliance (
Fig.9
).
ATTENTION:
Do not bring the brush completely into contact
with the floor.
12. Activate the brush head gearmotor using the brush control switch
(7) (
Fig.10
).
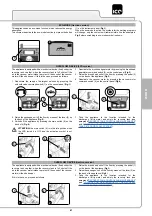
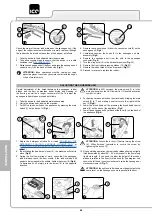
13. When the dead man's lever (8) is engaged, the machine will start
to move (
Fig.11
).
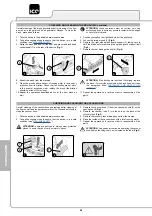
14. Activate the supply of detergent solution by pressing the switch
(9) on the control panel (
Fig.12
).
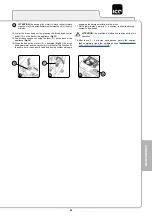
15. Wait a few minutes, normally 2 – 4 minutes, to allow the dosing
system to be washed.
ATTENTION:
the machine will dispense solution during this
operation.
16. After these 2 - 4 minutes have passed, empty the solution
tank completely (read the paragraph titled “
”).
1
1
3
2
2
4
3
2
2
6
5
7
4
5
8
ON
6
9
8
7
9
11
10
12


