FlipScreen Owner’s Manual
6
Setting Up Your iCEBOX
Before you turn on your iCEBOX, you will need to install the batteries in the
remote and keyboard and set up the connections to support the many fea-
tures of the iCEBOX. These connections may include:
•
Your television cable or antenna
•
Any additional video sources (such as a camera and/or satellite cable)
•
The included FM Radio antenna
•
A PCMCIA Network card and an Ethernet cable or phone line.
The final thing you should do is plug in the power cord before turning on
the device. Figure 5 shows the rear panel connections on the iCEBOX.
Installing the
Batteries
The remote requires two AAA batteries (supplied), and the keyboard
requires two AA batteries (supplied). Alkaline batteries are recommended.
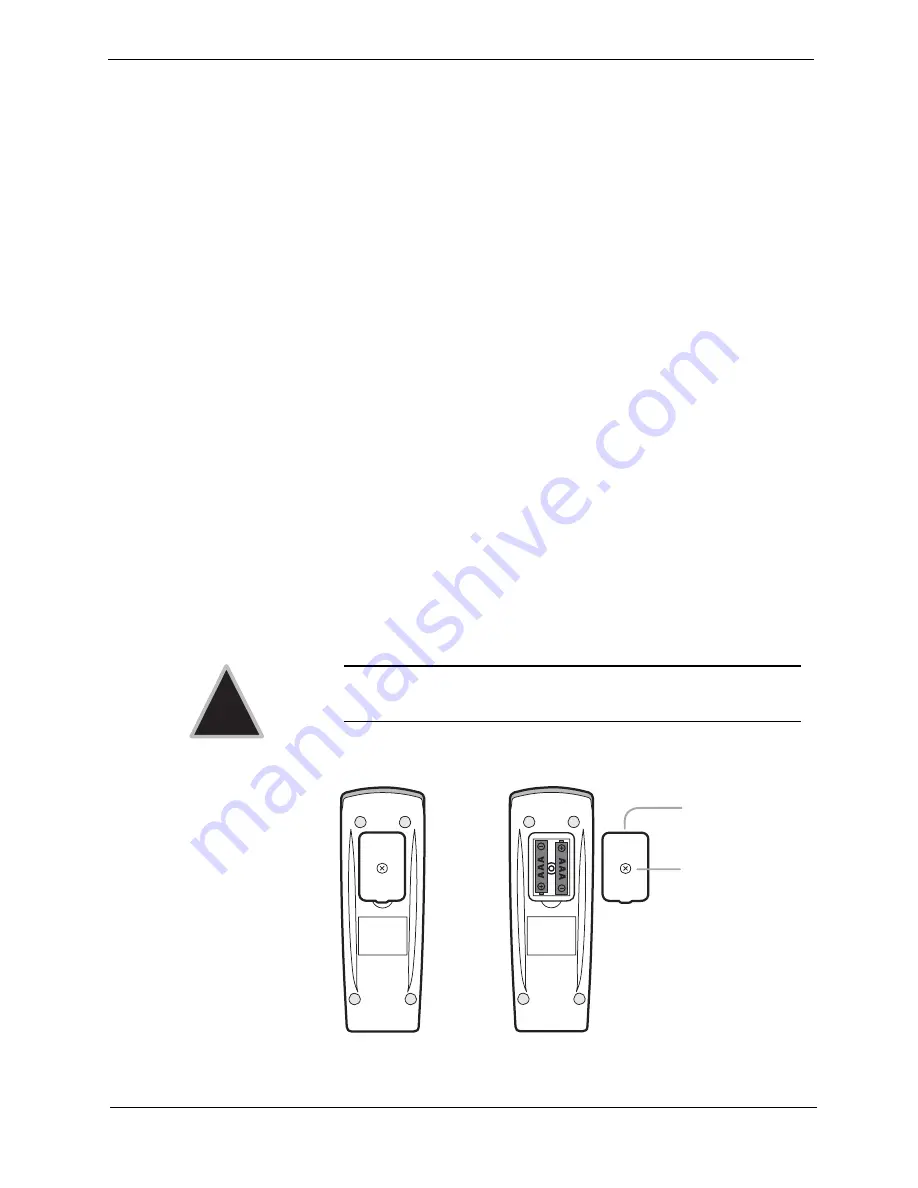
To install the batteries for your remote
1.
On the back of the remote, remove the battery cover by loosening the
small screw in the center of the panel ( fig. 3). Keep the attached
washer with the screw.
2.
Install two AAA batteries, ensuring that the polarity (+ and –) on the
batteries matches the + and – markings in the battery compartment.
3.
Reattach the battery cover, making sure that the cover is seated
properly.
4.
Insert the screw, with the washer still attached, and tighten the screw
until it is snug.
FIGURE 2.
Remote Battery Installation
Caution:
Do not overtighten the screw. You may damage the
washer and the remote will no longer be washable.
!
Secured Screw
Battery Cover
Summary of Contents for iBOX flipscreen
Page 1: ...Owner s Manual Version 2 EU...
Page 2: ......
Page 6: ...FlipScreen Owner s Manual iv...
Page 10: ...FlipScreen Owner s Manual 4...
Page 20: ...FlipScreen Owner s Manual 14...
Page 32: ...FlipScreen Owner s Manual 26...
Page 48: ...FlipScreen Owner s Manual 42...
Page 56: ...FlipScreen Owner s Manual 50...
Page 62: ...FlipScreen Owner s Manual 56...
Page 67: ...61 Index...
Page 68: ...FlipScreen Owner s Manual 62...
Page 71: ......
Page 72: ...BFS04 401N EU...


