56
AA0655 - #8 X 3/4 Square pan head screw Use the 6 holes with pilot holes that match the metal plate.
X’s 6
STEP 57:
Install the power inlet module with six AA0655 screws. Also apply DECALS from parts box
(“CAUTION”, “WARNING”, “SUITABLE”) .
STEP 56:
Slide 2F front podium to the cabinet assembly. Unlock the center door and plug in ball gate harness.
Latch the front cabinet to the back cabinet using the provided latch tool.
Summary of Contents for DB1100X
Page 7: ...7 Assembly for Steps 1 9 Chapter 1...
Page 16: ...16 Assembly for Steps 9 16 Chapter 2...
Page 22: ...22 Assembly for Steps 17 22 Chapter 3...
Page 28: ...28 Assembly for Steps 23 26 Chapter 4...
Page 33: ...33 Assembly for Steps 28 46 Chapter 5...
Page 44: ...44 Assembly for Steps 47 54 Chapter 6...
Page 49: ...49 STEP 52 Tower harnesses Insert cables from each tower assembly into the bottom holes B...
Page 53: ...53 Assembly for Steps 55 58 Chapter 7 HARDWARE NEEDED AA0655 8 X 3 4 Square pan head QTY6...
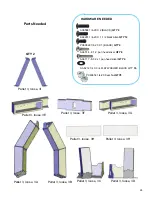
Page 54: ...54 Parts Needed Pallet 2 loose 2F...
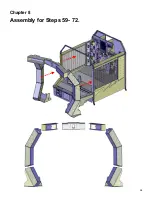
Page 58: ...58 Chapter 8 Assembly for Steps 59 72...
Page 84: ...84 Tower Covers Part Numbers...
Page 85: ...85 DECAL PART NUMBERS...
Page 91: ...91 DB3277X ball gate Assembly NS1022 P802 black NS1022 P509 blue ZS2015X Actuator...


