background image

Section 3. Operating the Appliance 


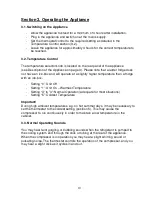
3.1. Switching on the Appliance 


-

  Allow the appliance to stand for a minimum of 4 hours after installation.


-

  Plug in the appliance and switch on at the mains supply.


-

  Set the thermostat control to the required setting as detailed in the 

Temperature Control section (3.2.).


-

  Leave the appliance for approximately 4 hours for the correct temperature to 

be reached.


3.2. Temperature Control 


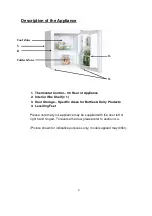
The temperature selector knob is located on the rear panel of the appliance 


(see Description of the Appliance on page 3). Please note that a larder fridge does 
not have an ice-box and will operate at a slightly higher temperature than a fridge 
with an ice-box. 


-

  Setting “0”: Unit Off


-

  Setting “1”: Unit On – Warmest Temperature


-

  Setting “3” to ”4”: Normal Operation (adequate for most situations)


-

  Setting “5”: Coldest Temperature


Important! 


During high ambient temperatures e.g. on hot summer days, it may be necessary to 
set the thermostat to the coldest setting (position 5). This may cause the 
compressor to run continuously in order to maintain a low temperature in the 
cabinet. 


3.3. Normal Operating Sounds 


You may hear faint gurgling or bubbling sounds when the refrigerant is pumped to 
the cooling system and through the coils or tubing at the rear of the appliance. 


When the compressor is in operation you may hear a slight whirring sound or 
pulsating noise. The thermostat controls the operation of the compressor, and you 
may hear a slight click as it cycles in and out. 


10

Summary of Contents for TT47WE

Page 1: ...ully before attempting to install or use this appliance It is advisable to keep these instructions in a safe place for future reference Iceking Henry John House Northway Industrial Estate Northway Lan...

Page 2: ...ference Included is some important safety information in addition to guidelines and recommendations that will enable you to take full advantage of all the functions available This quality appliance ha...

Page 3: ...ot exclusively cleaning of filters or defrosting Cost of Call out for work required to correct the alignment of doors following door reversal procedures carried out by you Use of the appliance by anyo...

Page 4: ...way and understand the hazards involved y Children aged from 3 to 8 years are allowed to load and unload this appliance y Children should be supervised to ensure that they do not play with the applian...

Page 5: ...It is dangerous to alter the specifications or modify this product in any way Any damage to the cord may cause a short circuit fire and or electric shock y This appliance is intended to be used in hou...

Page 6: ...ut 1 y Store pre packed frozen food in accordance with the frozen food manufacture s instructions 1 y Appliance s manufactures storage recommendations should be strictly adhered to Refer to relevant i...

Page 7: ...circulation should be around the appliance lacking this leads to overheating To achieve sufficient ventilation follow the instructions relevant to installation y Wherever possible the spacers of the p...

Page 8: ...reated as household waste Instead it should be taken to the appropriate collection point for the recycling of electrical and electronic equipment By ensuring this product is disposed of correctly you...

Page 9: ...Interior Wire Shelf x 1 3 Door Storage Specific Areas for Bottles Dairy Products 4 Levelling Feet Please note that your appliance may be supplied with the door left or right hand hinged To reverse the...

Page 10: ...CONTENTS Section 1 Installation Section 2 Safety Advice Section 3 Operating the Appliance Section 4 Maintenance 7...

Page 11: ...pliance This is quite normal and does not indicate that there is a fault with the appliance However condensation droplets may also enter the appliance and damage the insulation N B Condensation or rel...

Page 12: ...ion and ventilate the room in which the appliance is situated Do not damage the refrigerant circuit Do not allow children to play with plastic bags tear the bag s immediately and ensure that they are...

Page 13: ...erature than a fridge with an ice box Setting 0 Unit Off Setting 1 Unit On Warmest Temperature Setting 3 to 4 Normal Operation adequate for most situations Setting 5 Coldest Temperature Important Duri...

Page 14: ...ruits etc see Description of Appliance on Page 3 Do not overload the fridge the cooling air that circulates to keep the fridge cold gets blocked and pockets of warm air form Do not put hot food into t...

Page 15: ...he outer cabinet with warm soapy water Do NOT use abrasive products There may be sharp edges on the underside of the product so care should be taken when cleaning Once or twice a year dust the rear of...

Page 16: ...d prop it up securely at the front Remove the bottom door hinge screws and remove the bracket Remove the door from the upper hinge Swap the upper door pin to the opposite side of the appliance Now ins...

Page 17: ...re that the appliance has been installed correctly see section 1 YOUR GUARANTEE IS VALID ONLY IN THE UK SOUTHERN IRELAND To Register your Appliance simply complete the card in your appliance pack and...

Page 18: ...sposed of correctly you will help prevent potential negative consequences for the environment and human health which could otherwise be caused by inappropriate waste handling of this product The symbo...

Page 19: ......

Page 20: ...CKICK J03 A...

Reviews: