


13
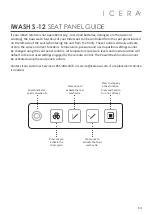
iWASH S-12 FEATURES
& REMOTE GUIDE
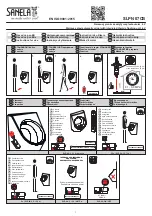
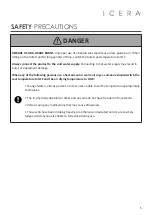
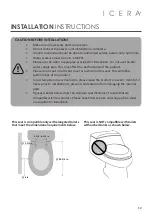
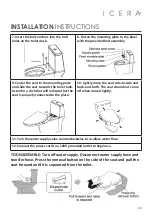
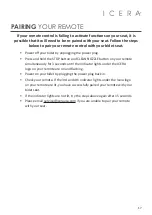
Ensure your seat is plugged in. If the power indicator light on the side panel
are on, your seat is ready to use.
S-12 REMOTE INLAY - TOP
S-12 REMOTE INLAY - FRONT
TEXT
Pantone
Cool Gray
11 C
LED CUT
Black
0, 0, 0,100
TOP
DECAL
BACKGROUND
SILVER
FRONT
DECAL
BACKGROUND
Pure White
S-12 REMOTE INLAY - TOP
S-12 REMOTE INLAY - FRONT
TEXT
Pantone
Cool Gray
11 C
LED CUT
Black
0, 0, 0,100
TOP
DECAL
BACKGROUND
SILVER
FRONT
DECAL
BACKGROUND
Pure White
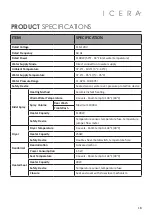
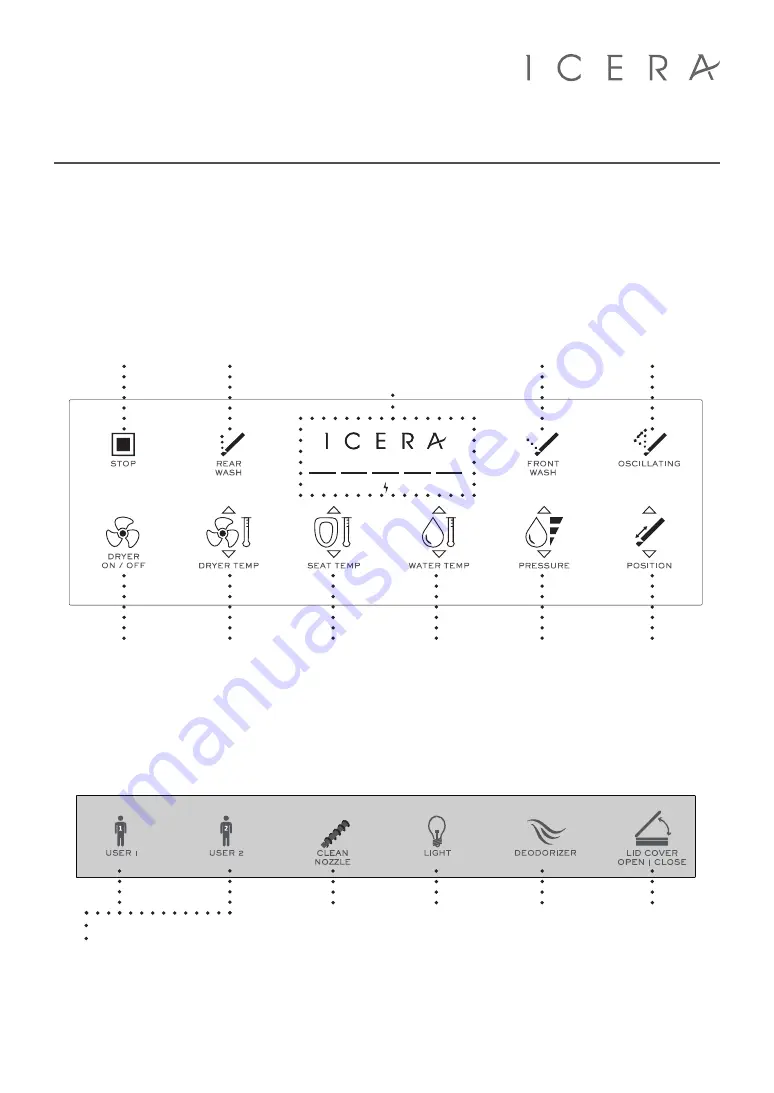
Press and hold for
3 sec. for STANDBY
mode. While the
unit is on, press
once quickly to
stop any active
function.
Press to start the
dryer cycle.
Set dryer temp, seat temp, water
temp & pressure, nozzle position to
desired settings. Press and hold USER
button for 3 seconds to save. Beep
sound indicates settings are saved.
Press to activate user settings.
When Rear or
Front Wash cycles
are active, press
once to activate
oscillating function.
Nozzle will move
back and forth
for a more
complete cleanse.
Press the up arrow
to move the nozzle
forward or the
down arrow to
move the nozzle
backwards during
the rear or front
wash cycles.
Press to open or
close the seat lid.
Press five times
quickly, immediately
after seat is
powered on, to
turn off auto-open.
Press once to
activate the rear
wash cycle. While
rear cycle is active,
press again to
activate oscillating
function.
Press the up /
down arrows to
control the dryer
temperature.
Choose from 4
levels.
Press the up /
down arrows to
control the seat
temperature.
Choose from 4
levels.
Press once to
use self-clean
cycle. Press
twice to extend
nozzle manual
cleaning. See pg
15 for detailed
instructions.
Press the up /
down arrows to
control the water
temperature.
Choose from 4
levels.
Press to turn
nightlight
on or off.
Press the up /
down arrows to
control the water
pressure. Choose
from 5 levels.
Press to turn
deodorizer on / off.
When on, deodorizer
auto-activates when
seat is occupied
and stop when seat
is unoccupied for
several minutes.
LED light bar will indicate the
selected temp or pressure levels.
Press once to
activate the
front wash cycle.
While front cycle
is active, press
again to activate
oscillating function.
Summary of Contents for S1201
Page 2: ......