18
7.3.3 Sterilizing the product
7.3.4 Assembling the product
Sterilization is performed before operating the product. After sterilization, do not leave
the product for a long time.
①
Wash your hands with an anti-bacterial soap.
②
According to the food safety regulations and manufacturer specifications,
prepare five liters of warm (45 to 60
℃
) sterilization solution (dilute a spoon of
chloride condense liquefaction or sodium chlorate with two liters of water (100 ppm)).
③
Soak the parts in the sterilization solution for five minutes.
④
Place the sterilized parts on a clean and dry place for drying them.
⑤
Wipe all the surfaces of the product.
⑥
Do not spill any liquid on the cover of the motor that is on the rear of the product.
①
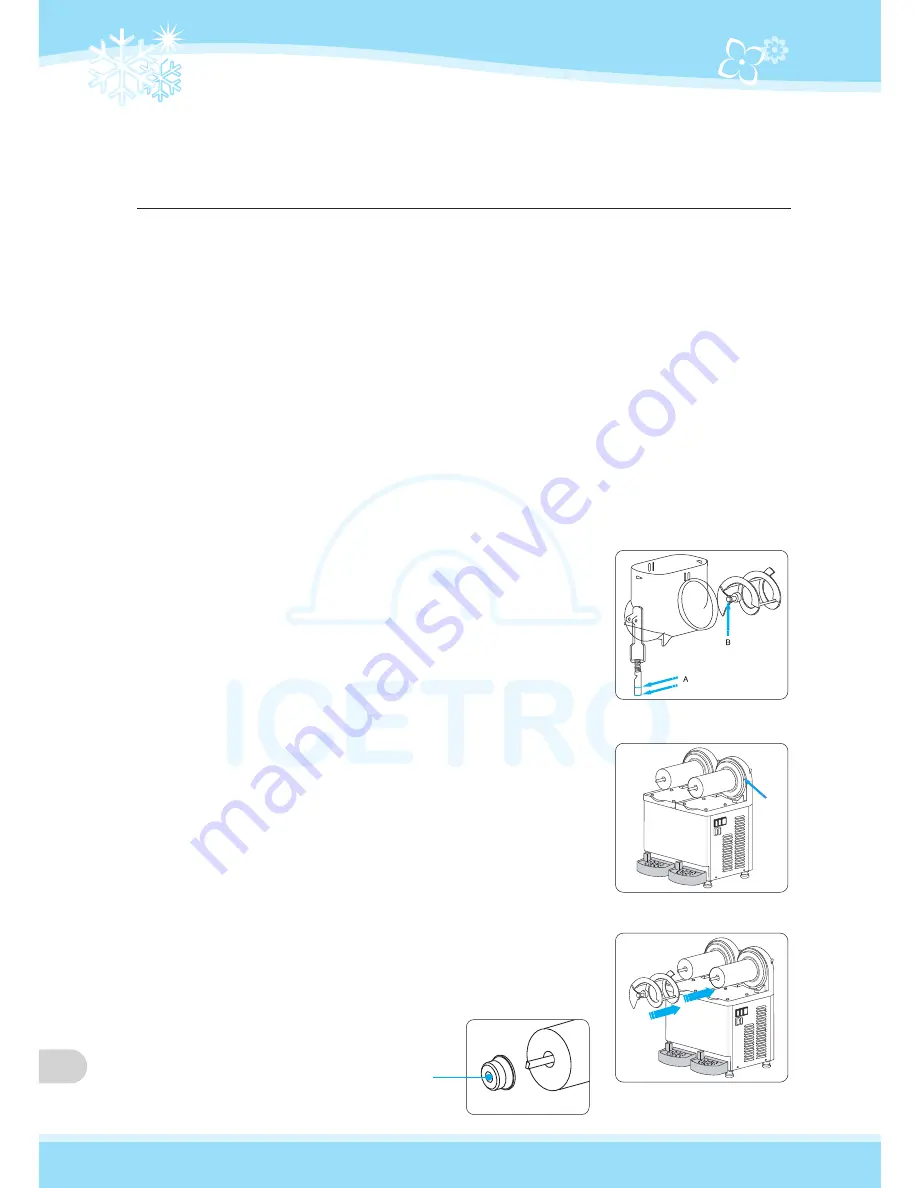
Attach the drip tray to its original position.
②
Paint two piston rings and spiral with the grease provided
by the manufacturer or the approved edible grease.
(See A and B in Figure 11.)
③
Attach the slush supply in the reverse order of disassembly.
(See Figure 10.)
④
Attach the rubber cushion.
Caution : Be sure for the wide border of the gasket to face
the wall.
(See Figure 12).
(Figure 12)
⑤
Attach the packing cushion and spiral.
(See Figure 13.)
Caution Before attaching the packing cushion, paint the
inner part with edible grease.
After assembly, paint the outer area
with edible grease.
(Figure 13)
(Figure 11)
Packing Cushion
Summary of Contents for SSM- 420
Page 3: ...1 Names of Parts Exterior and parts MODEL SSM 52 3 ...
Page 4: ...4 MODEL SSM 180 ...
Page 5: ...5 MODEL SSM 280 ...
Page 6: ...6 MODEL SSM 420 ...
Page 7: ...7 MODEL SSM 560 SSM 52 See the part list ...
Page 22: ...22 10 Circuit Diagram SSM 52 SSM 180 CIRCUIT DIAGRAM CIRCUIT DIAGRAM ...
Page 23: ...23 SSM 280 SSM 420 SSM 560 Two SSM 280s are applied CIRCUIT DIAGRAM CIRCUIT DIAGRAM ...
Page 36: ...Online Internet Service http www icetro com 3240193 00 001 ...


