4 - 2
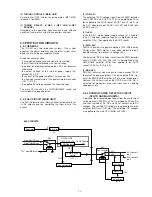
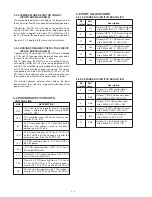
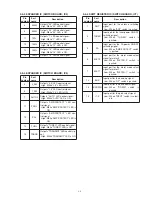
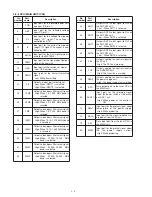
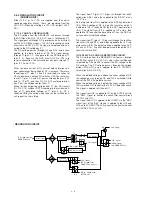
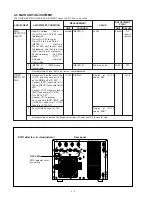
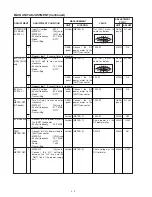
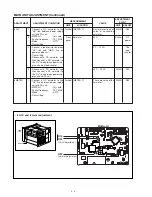
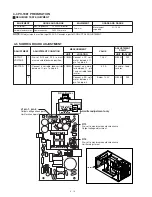
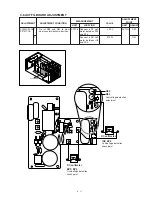
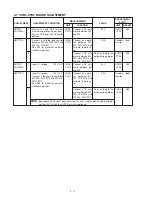
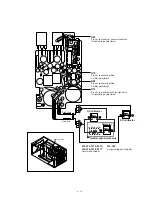
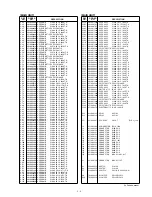
4-2 PA AND FRONT UNITS ADJUSTMENT
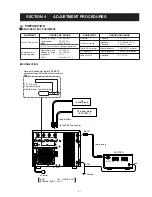
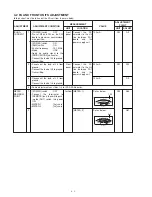
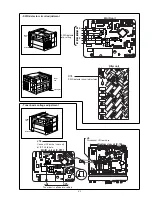
Idling current must be taken out the PA unit from the main body.
IDLING
CURRENT
METER
MAXIMUM
POINT
ADJUSTMENT
ADJUSTMENT
ADJUSTMENT CONDITION
MEASUREMENT
VALUE
POINT
UNIT
LOCATION
UNIT
ADJUST
1
2
3
4
1
2
• [POWER] switch
: OFF
• Pre-set R9 and R10 on the PA1
board to maximum counterclock-
wise position.
• [POWER] switch
: ON
• [AMP] switch
: ON
• Exciter frequency
: 14.1 MHz
• Mode
: USB
• Apply no audio signal to the
[MICROPHONE] connector.
• Connect the lead of L6 to ground.
• Transmitting.
• Disconnect the lead of L6 from
ground.
• Connect the lead of L5 to ground.
• Transmitting.
• Disconnect the lead of L5 from
ground.
• Connect the lead of L6 to ground.
• [POWER] switch
: OFF
•
Connect the terminator to
[REMOTE] jack, then while push-
ing the [ANT] switch, turn power
ON.
• METER-1
: [P
O
] scale
• METER-2
: [V
D
] scale
Front
panel
Front
panel
Controller
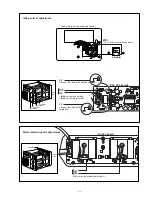
Connect the DC
ammeter to the HV
line between PA1
board and the
power supply unit.
Connect the DC
ammeter to the HV
line between PA1
board and the
power supply unit.
[METER-1]
[METER-2]
100 mA
200 mA
100 mA
Set as below :
Set as below :
PA1
PA1
SW
R9
R10
R9
R56
R57
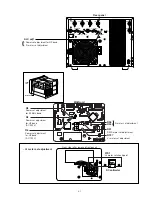
• Same adjustments as steps 1–4 for PA2–PA4 boards.
0
P
O
I
D
0
100
250 500
1K
1.5K
10
20 30 40
50
60
TEMP
HOT
A
W
METER-1
1.5 k
METER-2
0
10
20
30
40
50
60
SWR
ALC
V
ALC adj
V
D
1
1.5
2
3
60
Summary of Contents for IC-PW1
Page 1: ...SERVICE MANUAL ADDENDUM CONTENTS PARTS LIST 1 BOARD LAYOUTS 16 VOLTAGE DIAGRAM 18 Mar 2011 ...
Page 24: ...SERVICE MANUAL ADDENDUM CONTENTS PARTS LIST 1 BOARD LAYOUTS 16 Jun 2010 ...
Page 42: ...SERVICE MANUAL ADDENDUM CONTENTS PARTS LIST 1 BOARD LAYOUTS 16 VOLTAGE DIAGRAM 18 Apr 2010 ...
Page 96: ...HF 50 MHz ALL BAND LINEAR AMPLIFIER iC PW1 ...
Page 175: ...MNF F1 EP2 TO REGRELAY BOARD MLF EP1 F2 TO REGRELAY BOARD EP35 I N FG 8 19 FIL AC BOARD 8 20 ...
Page 201: ...A 5449MZ S 3 1999 Icom Inc 1 1 32 Kamiminami Hirano ku Osaka 547 0003 Japan Count on us ...


