■
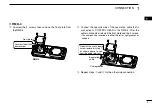
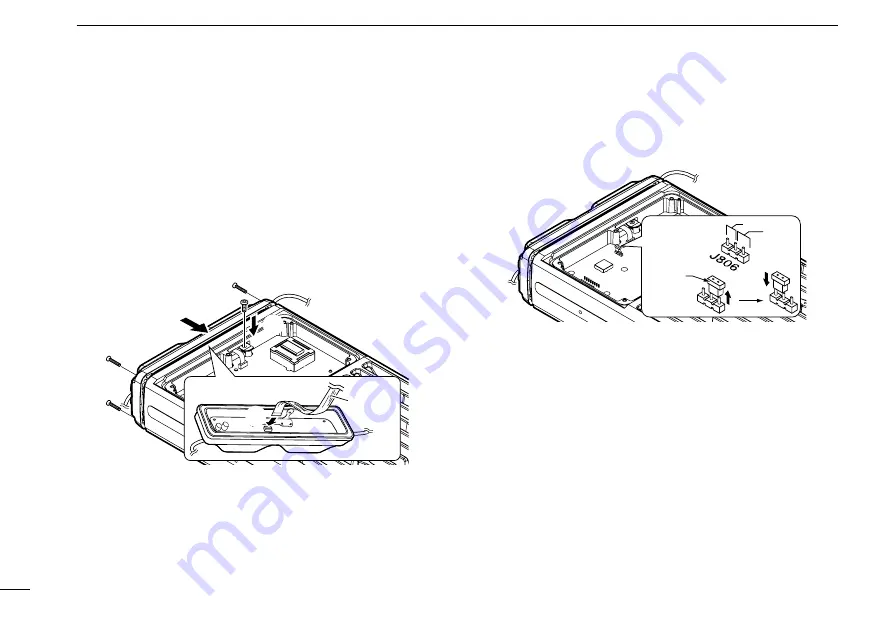
Attaching the RMK-4
q
Carefully connect the flat cable of the transceiver’s main
unit to the RMK-4 as shown below (
q
).
Then, attach the RMK-4 to the transceiver’s main unit
using 4 front screws that were removed from the main unit
in step
r
in p. 1. (
w
)
• Ensure the flat cable and the RMK-4 are connected/attached
correctly, and not upside down.
w
Replace the screw that was removed from the main unit in
step
e
in p. 1 to the chassis. (
e
)
Main unit
RMK-4
RMK-4
w
e
Flat cable
q
e
Move the jumper connector from the [VOL] position to the
[FIX] position of J806 on the transceiver’s main unit.
VOL
FIX
Jumper
connector
r
Replace the top cover and 6 top screws removed in step
w
in p. 1, then reconnect the DC power cable.
4
1
CONNECTION


