2
USING THE RS-AP3
1-10
3. Starting the RS-AP3 (Continued)
4. Setting wireless access point IP address
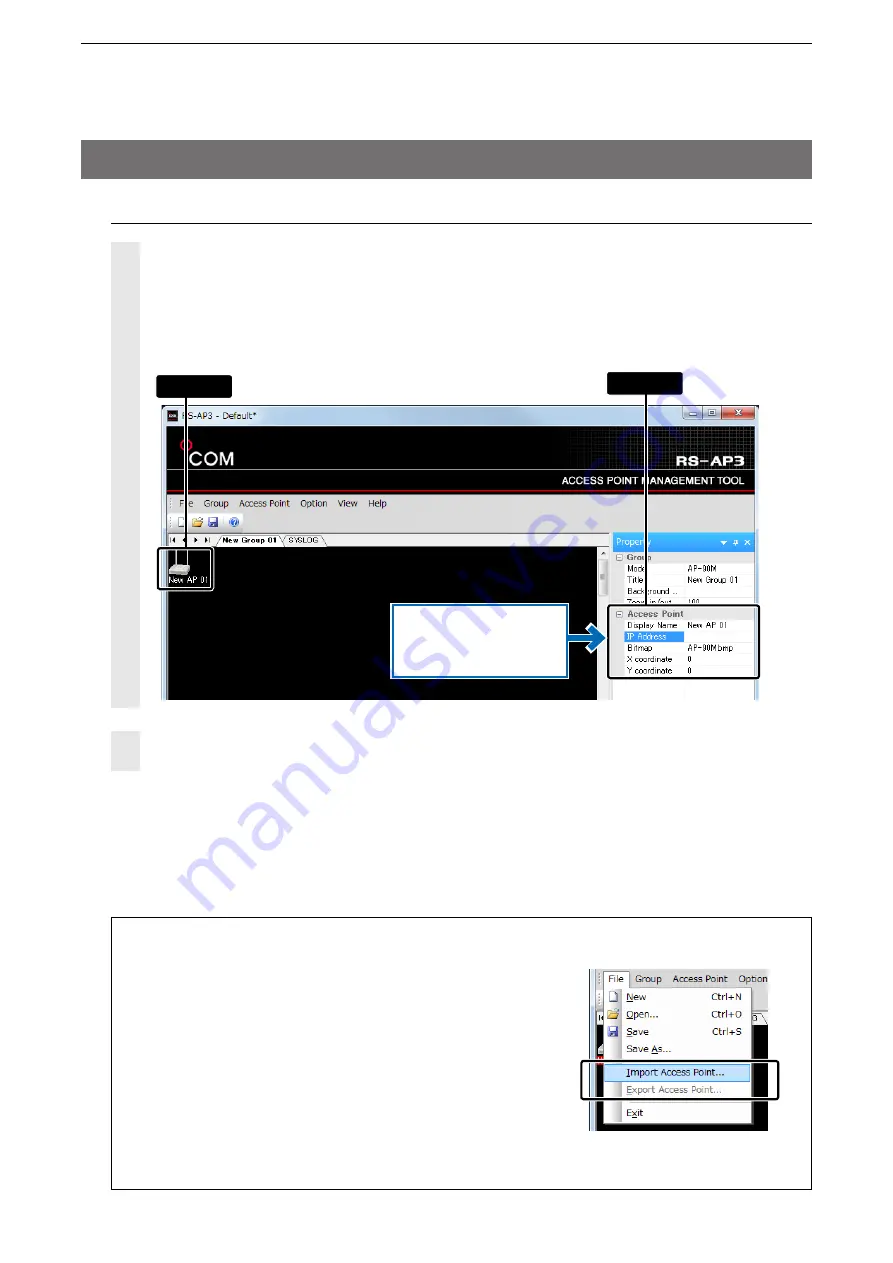
Select the added access point, and then enter the IP address.
Enter the “Display Name” (of up to 32 characters) and select the icon from the “Bitmap” list.
• To manage the access points with the RS-AP3, you need to enter an IP address.
• Selecting an access point icon on the map screen will display the access point’s name and information in the
“Property” display.
Repeat “Adding wireless access points” (
+
p.1-8) and the above settings to add access points to in
the group.
1
2
q
Click
w
Set
If necessary, enter
“Display Name,” “Bitmap,”
and “X/Y Coordinate.”
Importing/Exporting access point information
The registered access point’s information* can be exported in the
CSV format, or the exported file can be imported into the RS-
AP3.
• If the access point’s IP address is the same as other group’s IP ad-
dress, the information cannot be imported or exported.
• If the information is the same as the registered access point, the infor-
mation is overwritten.
• An exported file can be edited with a text editor.
• Importing other files than the exported files is not guaranteed.
* Access point information includes group and model title, IP address,
display name and coordinates (positioning) on the map screen.


