15
BRIDGE MODE APPLICATION
1
2
3
4
5
6
7
8
9
10
11
1
S����� 9 O����������
q
Set transceivers A2 and B2 AF volume to the 12 o’clock position.
’clock position.
clock position.
w
Turn transceivers A1 and B1 power ON, and select the same operating channel
as transceivers A2 and B2.
• See the transceiver’s instruction manual when setting the channel, if necessary.
e
While holding down transceiver A1’s [PTT] in Area A, speak into the microphone
at your normal voice level to call transceiver B1 in Area B.
Release transceiver A1’s [PTT] to receive.
r
While holding down transceiver B1’s [PTT] of Area B, speak into the microphone
at your normal voice level to reply to transceiver A1 in Area A.
Release transceiver B1’s [PTT] to receive.
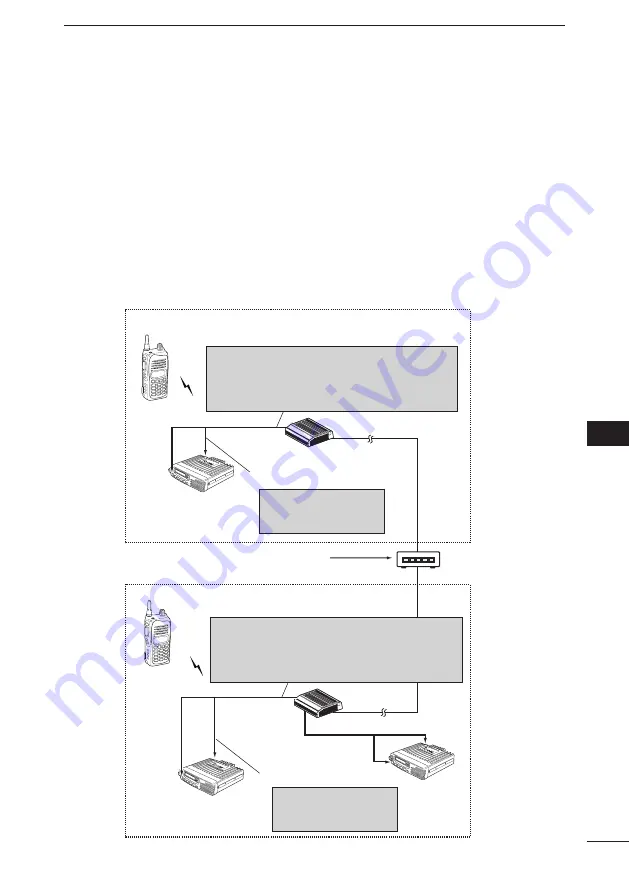
Example: Operating VE-PG2 in local area network.
Transceiver B3
[TRX2]
Transceiver A2
[TRX1]
(Port number: 21500)
HUB
Transceiver A1
[TRX1]
[Area A]
[LAN]
192.168.0.2
VE-PG2
1
2
3
4
5
[Area B]
Transceiver B2
[TRX1]
(Port number: 21500)
[TRX1]
Transceiver B1
[LAN]
192.168.0.3
VE-PG2
If you connect the VE-PG2 to a global network (internet),
you can communicate anywhere through the IP network
without using hub.
CAUTION:
To connect the transceivers or repeaters, use only the following cables:
OPC-2073 (For the transceivers) or OPC-2074 (For the repeaters).
Connect the specified cables to [TRX1], [TRX2] or [TRX3] only.
Using another cable, like an Ethernet cable may damage the VE-PG2,
transceivers or repeaters.
Connect to the transceiver A2’s speaker jack.
Connect to the transceiver B2’s speaker jack.
NOTE:
First, connect the transceiver
to the VE-PG2 using the optional
OPC-2073. Then turn ON the power
to the transceiver and the VE-PG2.
NOTE:
First, connect the transceiver
to the VE-PG2 using the optional
OPC-2073. Then turn ON the power
to the transceiver and the VE-PG2.
Turn the transceivers’ power ON, and
then set the Transceiver A2’s volume
control to the 12 o’clock position.
Turn the transceivers’ power ON, and
then set the Transceiver B2’s volume
control to the 12 o’clock position.


