background image


Iconasys 2013- 2018 © 

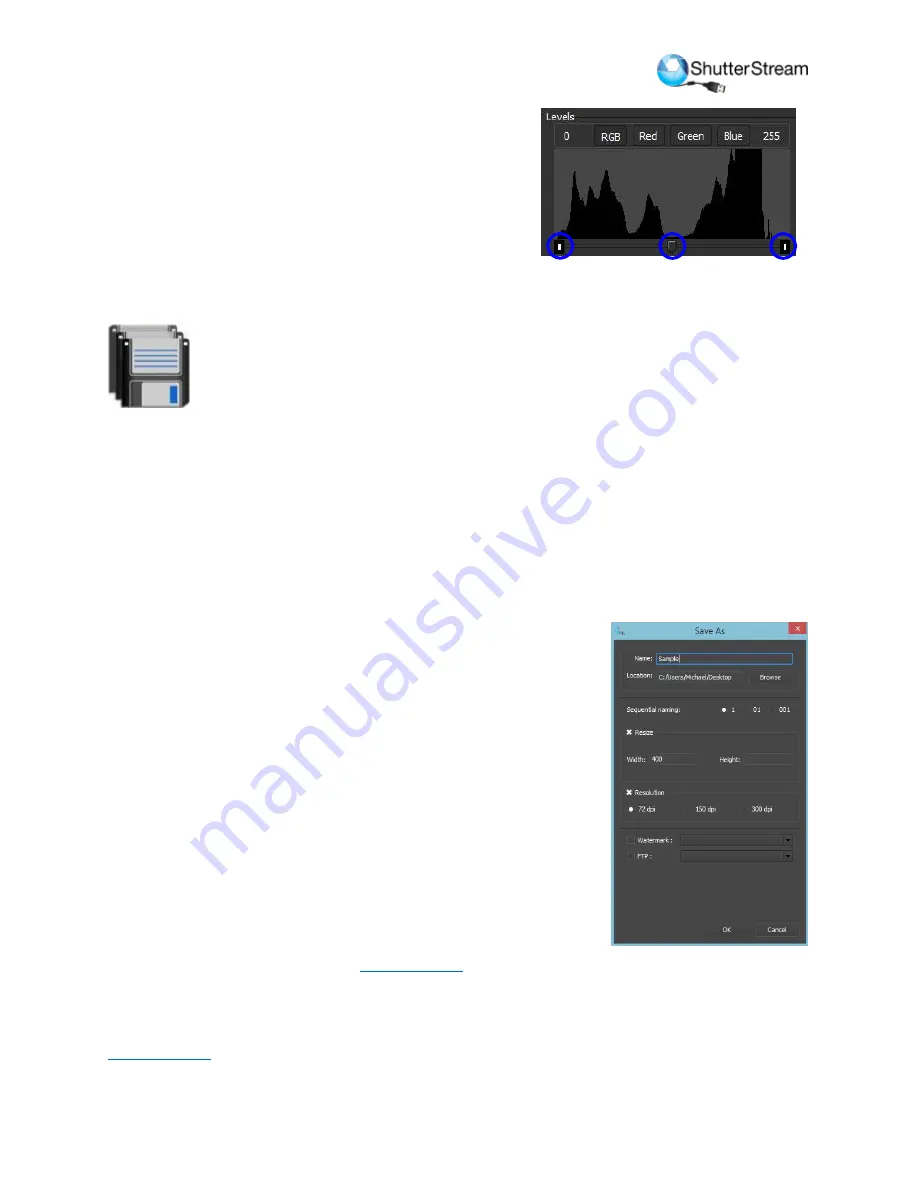
levels value, users will see three ‘reference points’ 
immediately below the histogram that are adjustable 
by clicking and dragging. Provided you have sufficient 
lighting, you will want to drag the right reference point 
to the left – this will turn all colors to the right of the 
repositioned reference point white. 


‘reference points’ highlighted by blue 

circles 

 Step 10 – Output and Resize (2

nd

 button in from the left in top 

left of Editing Window) 

Multiple product images can be saved with one click to a specific directory (local or network). 
Included in the ‘Batch Save’ feature is batch image resizing, resolution adjustment (web or 
print) renaming and watermarking. Please be sure to include a placeholder after name (ex. 
Filename- or Filename_), use ‘01’ or ‘001’ sequential naming options and output JPG format if 
using the Iconasys 360 View Creator Software for 360 image composition. 
 
Name: The field which the user will enter the desired image 
name. It is suggested to put a ‘-‘ after the product name. 
Location: This will be the Save To Directory. Users can change this 
by clicking the ‘Browse’ button to the right and locating/selecting 
the desired output folder. 
Sequential Naming: Multiple images will be named sequentially 
in a numerical format. Users can define their numerical 
preference - 1, 01 or 001. (Iconasys 360 View Creator software 
will require sequential naming in ‘01’ or ‘001’ format). 
Resize: To enable resizing, click the ‘x’ box to the left of Resize 
text then specify a pixel width or height. 
Resolution: To enable resolution, click the ‘x’ box to the left of 
Resolution text then specify a DPI. 
Users can also chose to auto apply a previously saved Editing 
Profile and/or transfer images to their FTP site and/or add a 
previously saved Watermark by clicking the ‘x’ box and selecting 
a profile option in the drop down. Feature Video 
 
Users can also use the ‘Dynamic Save’ tool to save an image or set 
of images at multiple different size, resolutions, formats etc…  
Feature Video 


Summary of Contents for 360 Jewelry Photography Turntable

Page 1: ...Install platform on the table place 2 or 3 level washers underneath the platform first The Jewelry Turntable also includes 2 additional platters designed for vertical object positioning If you prefer to stand objects vertically please follow these steps 1 Remove protective film from the platform ...

Page 2: ...ttom side with small hole This will be used to secure the platform to the main platform 3 Take a small piece of wax and fill the beveled hole on the top surface Wax should remain flush with surface of table 4 Stick this platform to the main platform directly on top of it ...

Page 3: ...Bit dpinst amd64 exe Mac OS X There is no need to install drivers for Mac OS X 2 Download Shutter Stream 360 using either of the following links Windows www iconasys com Downloads ShutterStream Windows exe Mac www iconasys com Downloads ShutterStream Mac pkg 3 Connect Turntable through USB to computer then Launch Shutter Stream Click 360 button in top right of UI Select Arduino option it should th...

Page 4: ...ct the COM port for the Ardunio device select Tools Port then select the available port there should only be one option 4 Next launch the Serial monitor select Tools Serial Monitor 5 Enter v be sure it is lowercase into the text field and hit enter this should display information on the turntable and ensure it is recognized ...

Page 5: ...Iconasys 2013 2018 6 Please relaunch Shutter Stream enter into the 360 area and select Arduino option it should be recognized in the Version field ...

Page 6: ... View Creator Software Registration info will be processed in our licensing server and within 72 hours user will receive their license file and instructions sent via email to address used at time of registering the software The software will remain fully functional in the meantime 2 Setting up your Compatible Camera Please select your specific camera model from this page for the required settings ...

Page 7: ...era has been connected via USB to computer and powered on before launching software 360 Product Photography Workflow Step 1 Place an object in cameras field of view and click the Live View button top left corner of software Live View will stream the cameras live view to the monitor screen in real time so users can view the subject they wish to shoot before actually capturing the image Feature Vide...

Page 8: ...of a second is slower than 1 30 as in the Shutter is open for longer therefore the resulting image at 1 15 would be brighter than an image shot at 1 30 Step 4 Adjust and Set Focal Point Shooting a 360 using Auto Focus will cause the camera to re adjust the focal point at every frame This can cause some strange effects when users compose and view the 360 output It is suggested to Adjust the focal p...

Page 9: ... outside of the options provided in the dropdown please highlight the number and type in a value up to 200 Start Will start the shooting process If the turntable is not recognized by your computer Shutter Stream it will not specify any Version and simply say Cannot detect any Arduino In this case refer to page 3 and 4 and if need be please escalate to support iconasys com Step 6 Pre Rotate Turntab...

Page 10: ...umbnail gallery click the check box in the bottom right corner of the Thumbnail Gallery Window It is suggested to select all images captured over the 360 rotation Step 9 Editing Third button down under Image Processing Tools There is a wide variety of editing tools for background removal color adjustments image quality changes It is suggested to review the User Guide to get a complete understandin...

Page 11: ...ion Name The field which the user will enter the desired image name It is suggested to put a after the product name Location This will be the Save To Directory Users can change this by clicking the Browse button to the right and locating selecting the desired output folder Sequential Naming Multiple images will be named sequentially in a numerical format Users can define their numerical preference...

Page 12: ...an object is placed at the exact same angle for the first shot Composing a 360 Image Please see the Iconasys 360 Product View Creator User Guide for instructions on composing a 360 product view http iconasys com Downloads 360 Product View Creator User Guide pdf Product Training Shutter Stream includes many advanced features above and beyond the standard workflow features It is strongly suggested t...

Reviews: