background image


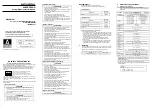
mio4 Hardware Layout 


1. 

Power button


- Sleep Mode: Hold for 2 seconds 
until the green LED goes out, then 
release. 

- Wake: Touch button briefly. 
- Hard-reset: Hold button for 7 
seconds; all LEDs light up; release 
button. 

- Bootloader mode to receive 
firmware updates: Hold button 4 
seconds until power LED turns red; 
release button. MIDI 1 and MIDI2 
lights alternate on and off.  Press 

and hold to abort bootloader 
mode. 
 

2. Power LED 

Green indicates mio is powered up 
normally. 
 

3. MIDI DIN 1 - 4 LED

Indicate that MIDI data is being 
sent/received at corresponding 
MIDI DIN jacks. 
 

4. USB Host jack LED 

Indicates that MIDI data is being 
sent/received over the USB MIDI 
hosting jack. 
 

5. USB Device Jacks LED 

Indicates MIDI is being sent to/from 
a computer in one of the two USB-B 
computer device jacks. 


6. Network jack LED 

Indicates that MIDI is being 

sent/received over the network. 
 

7. MIDI DIN 1 in/out jack 

pair (front 

panel) 


8. MIDI DIN 2- 4 in/out jack pair

(rear panel) 
Connect standard 5-pin MIDI DIN 
equipment. 


9. USB Device jack 1 

USB computer device jack for a Mac 
or PC, using a standard USB-B cable. 

Does not power the device or 
support firmware loading. 
 

10. USB Device jack 2 (power) 

USB computer device jack for a Mac 
or PC. Powers the device over the 
USB bus. Supports firmware 
loading.  Accepts a USB-B cable. 
 
Note: mio4 may also be powered 

by the optional iConnectivity power 
adapter. 
 

11. USB Host jack 

USB MIDI hosting jack accepts 
Class-Compliant USB MIDI devices 

only.  In general, USB MIDI devices 
that require a software driver to 
operate are 

not 

Class-Compliant. 

(Optional) Accepts a powered USB 

2.0 or 3.0 hub to access up to eight 
Class-Compliant MIDI devices. 
 
Note: We recommend looking for 

the "USB Certified" sticker to 

ensure your hub meets power 
requirements.  


12. Network jack 

Ethernet jack for Network MIDI. 

Supports up to four Network MIDI 
sessions, each with a single bank of 
16 MIDI channels. 
- May be connected to a Wi-Fi 

router for wireless MIDI.  
- Please see the


Network MIDI


section for set up instructions. 
 

13.


Power supply jack


mio4 may also be powered by the 
optional iConnectivity power 
adapter (9V @2A 18W, 2mm). This 
allows operation without a 

computer, and also powers a USB 
device in the USB Host jack. 
 

14. Security lock port

 (right side)

Summary of Contents for mio4

Page 1: ...Version 1 0 OWNER S MANUAL ...

Page 2: ...Version 1 0 ...

Page 3: ...e manufactured assume as their warranty period for only the remaining time of this warranty This warranty does not apply to damage caused by improper use accident abuse improper voltage service fire flood lightning or other acts of God or if the product was altered or repaired by anyone other than iConnectivity Technical Service Center Consequential and incidental damages are not recoverable under...

Page 4: ... Since the correct method of disposal will depend on the applicable laws and regulations in your locality please contact your local administrative body for details FCC USA IC Canada Regulation Warning This equipment has been tested and found to comply with the limits for a Class B digital device pursuant to Part 15 of the FCC Rules These limits are designed to provide reasonable protection against...

Page 5: ...those data streams let you use a substantial number of modern and vintage MIDI devices get them all talking to each other and also bring in guest equipment and computers very quickly when you collaborate with other musicians on stage or in the studio Because of your mio4 s built in MIDI filtering routing merging stand alone hardware units aren t needed for those functions MIDI can also be routed t...

Page 6: ...ice Info Page 7 Abbreviations and Port Naming 8 MIDI Info Page 9 MIDI Routing and Processing Pages 10 MIDI Port Routing Page 11 MIDI Port Filters Page 12 MIDI Channel Remap Page 12 MIDI Controller Filters Page 13 MIDI Controller Remap Page 13 Using mio MIDI Management to Optimize Your Rig 14 mio4 Block Diagram 16 ...

Page 7: ... needs Custom settings can be saved on the interface for next use mio4 requires no driver software to operate on either Mac OS X or Windows The exception is that Network MIDI on Windows computers requires the rtpMIDI driver http www tobias erichsen de software rtpmidi html 3 Connect your MIDI devices and or an additional Mac or PC to the interface Your interface can also operate stand alone withou...

Page 8: ...SB computer device jack for a Mac or PC using a standard USB B cable Does not power the device or support firmware loading 10 USB Device jack 2 power USB computer device jack for a Mac or PC Powers the device over the USB bus Supports firmware loading Accepts a USB B cable Note mio4 may also be powered by the optional iConnectivity power adapter 11 USB Host jack USB MIDI hosting jack accepts Class...

Page 9: ... sent through an output port allowing you to manage the content and volume of MIDI traffic For details on port filter settings refer to the MIDI Port Filters section Channel Remap Each MIDI port has 16 channels of MIDI data Specific events on any one channel can be remapped to another channel on the same port allowing more customization and control Channel mapping can be applied to inputs as well ...

Page 10: ... to a Network MIDI Session 1 Connect an Ethernet cable from the mio to the computer 2 Access the MIDI Network Setup screen In Mac OS X open the Audio MIDI Setup Program in the Utilities folder and click Window and show MIDI Studio Double click the Network icon In Windows open the rtpMIDI program 3 Follow the four steps listed below referring to the following MAC screen shot In this example we re c...

Page 11: ... appears under the tabs at the top of the iConfig application Device Info Page This page displays overall information about the mio4 and is used to configure its Ethernet settings Device Information The Device Name field is editable so you can give the mio4 a unique name Ethernet Information IP Mode Dynamic IP Static IP Every device on a network has a unique IP address number to identify it When s...

Page 12: ...USB host port 2 is named HST 2 In the case of USB computer device jacks the ports have been named according to the routing in the mio4 i e USB device jack 1 port 1 is routed to DIN 1 so it has been named DIN 1 The reason for this naming choice is for convenience when viewing the ports on your computer s DAW software As shown in the Pro Tools example on the right the computer software lists the por...

Page 13: ...multi port device Number of Ethernet Jacks Shows the number of available Ethernet jacks on the product Number of RTP MIDI Sessions Ethernet Jack The Ethernet Jack can support separate MIDI sessions with multiple networked computers This number shows the maximum number of sessions Number of RTP MIDI Connections RTP MIDI Session This indicates how many devices can be connected via each Ethernet sess...

Page 14: ...ilters MIDI Channel Remap MIDI Controller Filters and MIDI Controller Remap pages Note MIDI filtering and remapping functions are performed in a specific order on the MIDI inputs and outputs Please refer to the mio4 block diagram General Page Layout The iConfig pages for MIDI routing and processing share a common layout with a PORT panel on the left and a SETTINGS panel on the right as shown below...

Page 15: ... more destinations For example a DAW track routed to 5 pin DIN 1 could be routed to an additional DIN jack to layer a synth sound In the Port Routing example below MIDI sent to port DIN 1 from the first computer on USB Jack 1 is being routed both to the DIN 1 jack and to the other computer s Port 5 on USB Jack 2 ...

Page 16: ...e This setting allows MIDI data to be re assigned from one channel to another on either the input or output path Choose specific message types on specific channels by clicking on the corresponding box in the matrix Edit the Remap to Channel entry below the channel number to indicate which channel the messages should be re assigned to In the example below Pitch Bend messages on channel 8 of port 1 ...

Page 17: ... example below shows Modulation Wheel messages ID 01 being removed at the input from USB 1 port DIN 1 on MIDI channel 1 MIDI Controller Remap Page This setting allows MIDI Controller messages to be changed so that they apply to a different controller In this example two controller messages have been remapped at the input on USB 1 port DIN 1 MIDI Channel 1 Modulation wheel messages are being used t...

Page 18: ...MPK controllers Suppose you have eight of these controllers connected to the USB host jack every time you press a key on any one of these controllers that key event is sent to the other seven controllers which wastes data bandwidth because they don t respond to key events You can use your mio to save seven times the bandwidth and processing simply by disabling the MIDI outputs for those eight cont...

Page 19: ...controller that is sending out after touch messages whenever you press on the keyboard or is sending out sysex messages whenever you touch something on the front panel or is sending out MIDI clock messages all the time If those messages aren t required by something else in your setup then filter them out at the source by adding a filter to the MIDI input see MIDI Port Filters Page Similarly if you...

Page 20: ...r Remap Filter Remap Port 13 Filter Remap Filter Remap Port 14 Filter Remap Filter Remap Port 15 Filter Remap Filter Remap Port 16 Filter Remap Filter Remap Filter Remap Filter Remap Filter Remap Filter Remap Filter Remap Filter Remap Filter Remap Filter Remap Filter Remap Filter Remap Filter Remap Filter Remap Filter Remap Filter Remap Filter Remap Port 1 Port 2 Port 3 Port 4 Port 5 Port 6 Port 7...

Page 21: ...lease submit a ticket on our on line support ticket system http www iConnectivity com support Email Support iConnectivity com 1 403 457 1122 Monday to Friday 8 30 am MST to 4 30 pm MST iConnectivity 100 925 26 Street NE Calgary AB T2E 7P6 Canada ...

Reviews: