11
PN8M-090T PN8M Panel PC Series with 9” WSVGA TFT LCD
1.5 Panel Mounting Instruction
1.
Cut a mounting hole in the panel. (Refer to PN8M-090T Dimensions
on page 7) (Note 1)
2.
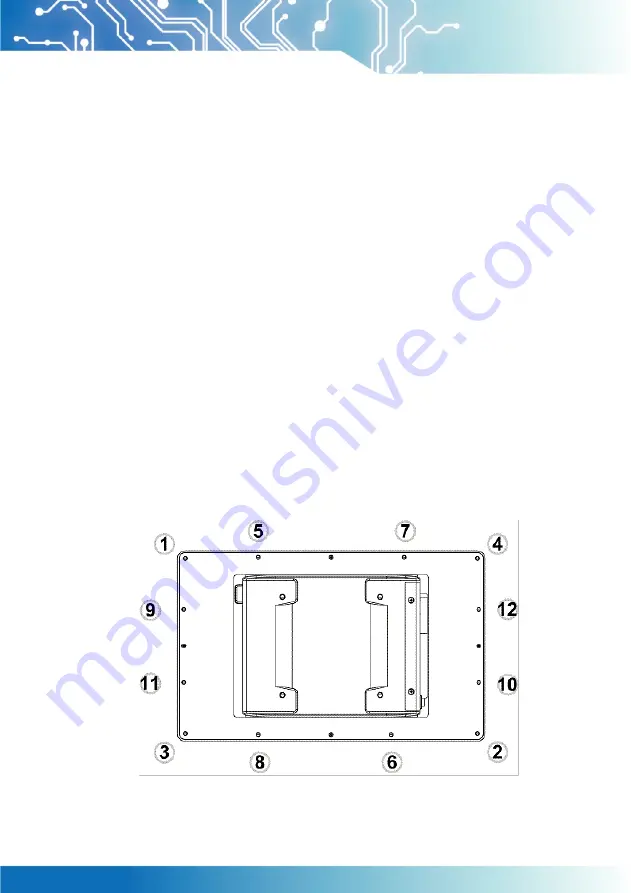
Check and remove the twelve M3 screws in a diagonal pattern as
image below if necessary.
3.
Place PN8M-090T face-down on a clean, flat surface.
4.
Slide the panel cutout around the back of PN8M-090T, until the
panel rests directly on the gasket. Make sure the screw holes align
with the screw holes on PN8M-090T.
5.
The screw size is M3*L (L=wall thi 6.0mm) (Note 2)
6.
Insert all twelve M3 screws into the screw holes. (Note 2)
7.
Finger-tighten the M3 screws. Finish tightening the M3 screws in a
diagonal pattern using an M3 screw driver (see the image as below);
maximum torque 1.18Nm (12 kgf-cm).


