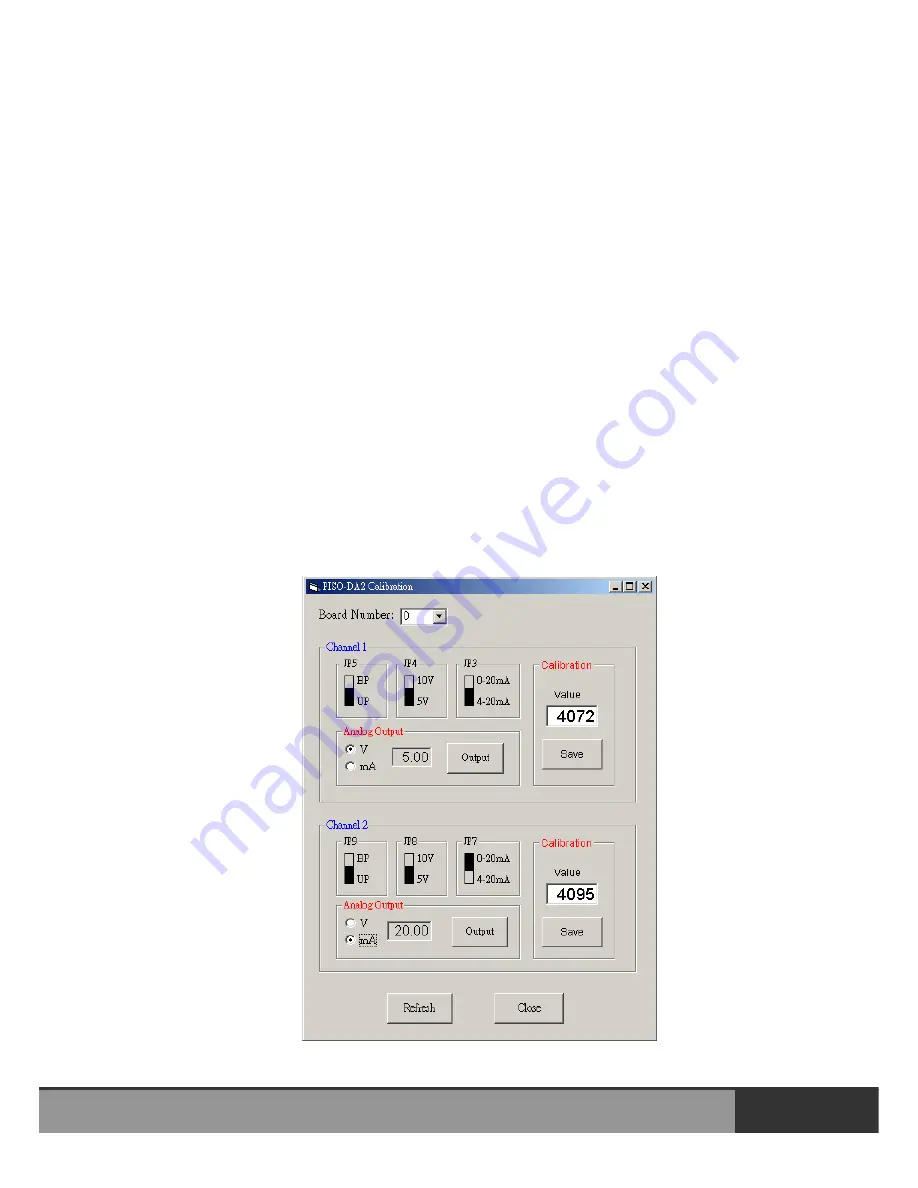
Step 3: If we want to calibrate channel 1, for example, then let the
calibration value set as 4095 and click “save” to save this value to
the corresponding EEPROM.
Step 4: Click output button and then use precise multi-meter to measure the
analog output.
Step 5: If the analog output is smaller or bigger than the allowance
maximum value of analog output channel 1, then go to step 3~4 to
change the saved value in EEPRON and output voltage value until
the value is equal to the allowance maximum voltage output value.
Step 6: If the analog output is equal to the maximum allowance analog
output, it means that the calibration process is finished for the
setting range of analog output for channel 1. If user want to
calibrate the other analog output range, please go to step 1~5 to
proceed the individual calibration process.
Note that the maximum and minimum calibration process of the current output
must be preceded if the user wants to calibrate the current output. And the
procedure is the same the above.
Figure 2-5: Calibration tool
PISO-DA2/DA2U User Manual (Ver.2.7, Mar. 2012, PMH-020-27)
22


