ICStation RGB LED Bluetooth Amplifier Christmas Tree DIY Kit
orders@icstation.com
4
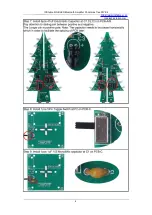
Step 9: Install 1pcs 1uF 105 Monolithic capacitor at C1 on PCB-C.
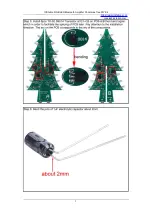
Step 10: Install 1pcs 220uF Electrolytic Capacitor at C10. Pay attention to distinguish between
positive and negative.The Longer pin is positive pole.
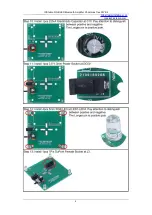
Step 11: Install 1pcs 3.5*1.3mm Power Socket at DC5V.
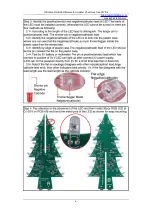
Step 12: Install 4pcs 5mm RGB LED at LED1-LED4. Pay attention to distinguish between positive
and negative.The Longer pin is positive pole.
Step 13: Install 1pcs 7Pin DuPont Female Socket at J3.
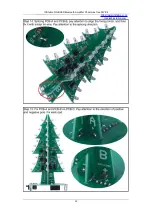
Step 14: Splicing PCB-A and PCB-B, pay attention to align the fixing points, and then fix it with
solder tin wire. Pay attention to the splicing direction.
Step 15: Fix PCB-A and PCB-B on PCB-C. Pay attention to the direction of positive and negative
pole. Fix each pad.
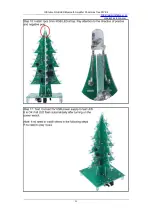
Step 16: Install 1pcs 3mm RGB LED at top. Pay attention to the direction of positive and
negative pole.
Step 17: Test. Connect 5V USB power supply to test LED. It is OK if all LED flash automatically
after turning on the power switch.Note: Its no need to install others in the following steps if no
need to play music.
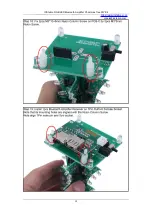
Step 18: Fix 2pcs M3*10+6mm Nylon Column Screw on PCB-C by 2pcs M3*6mm Nylon Screw.
Step 19: Install 1pcs Bluetooth Amplifier Receiver on 7Pin DuPont Female Socket. Note that its
mounting holes are aligned with the Nylon Column Screw. Note align 7Pin male pin and 7pin
socket.
Step 20: Fix 2pcs M3*8mm Nylon Column on M3*10+6mm Nylon Column Screw.Be careful not
to be too tight.
Step 21: Fix 2pcs M3*20mm Nylon Column on PCB-C by 2pcs M3*6mm Nylon Screw.
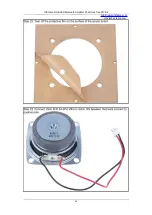
Step 22: Tear off the protective film on the surface of the acrylic board.
Step 23: Connect 10cm XH2.54-2Pin Wire to 4ohm 3W Speaker. Red wire connect to positive
pole.
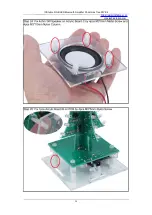
Step 24: Fix 4ohm 3W Speaker on Acrylic Board C by 4pcs M3*6mm Metal Screw and 4pcs
M3*10mm Nylon Column.
Step 25: Fix 1pcs Acrylic Board B on PCB by 4pcs M3*6mm Nylon Screw.
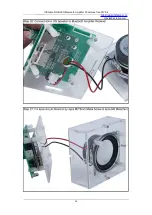
Step 26: Connect 4ohm 3W Speaker to Bluetooth Amplifier Receiver.
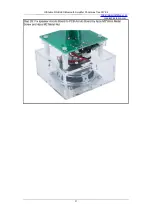
Step 27: Fix 4pcs Acrylic Board A by 4pcs M2*8mm Metal Screw and 4pcs M2 Metal Nut.
Step 28: Fix speaker Acrylic Board to PCB Acrylic Board by 4pcs M2*8mm Metal Screw and
4pcs M2 Metal Nut.
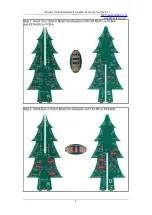
9.Install shown steps:


