background image

Logging in to the Keypad

When logging in to a keypad, the exact process, messages displayed and menus accessible will depend upon your
site and user configuration. Discuss with your installer which options have been configured for your site.

User Options

Individual user settings can be customized by navigating to

Users | Users

and selecting the

Options

tab.

A welcome greeting can be displayed to a user by enabling the

Show a greeting message to user

option.

A user can be taken directly to the main menu by enabling the

Go directly to the Menu on login

option.

Enabling the

User Can Edit User Settings From Keypad

option will give the user the ability to add new users,

edit user settings and delete users, all from the keypad.

When this option is enabled the user is

not

able to edit their own PIN code on the keypad, except when

prompted due to an expired PIN. This should generally be enabled for system administration users only.

Other display settings are configured in the

Expanders | Keypads

programming.

Menu Group Settings

A menu group's

Settings

determine which keypad menus will be available to users. If a menu setting is not enabled

in the menu group configuration, users will not be able to access that menu from a keypad.

Site Security Enhancement

The

Require Dual Credential for Keypad Access

option increases site security by requiring users to enter two

forms of credential identification (User ID and PIN) when logging in to a keypad.

Single Credential Login

1.

To log in, enter your

PIN

code and press

[ENTER]

.

Once a valid PIN is entered you will be presented with a welcome screen, area status or available menu.

Dual Credential Login

1.

To log in using dual credential authentication, enter your

User ID

credential code and press

[ENTER]

.

2.

When prompted, enter your

PIN

code and press

[ENTER]

.

Once a valid PIN is entered you will be presented with a welcome screen, area status or available menu.

If the

Lock Keypad On Excess Attempts

option has been enabled on your system, entering an invalid login three

times will lock the keypad for a short period, preventing further login attempts by any user. The lockout time is
defined under the keypad programming.

Logging Out

You are automatically logged out after a short period of inactivity, or if the

[CLEAR]

key is pressed while you are

logged in.

The period of inactivity is defined by the

Time User is Logged In

setting under the keypad programming. If no

key presses are detected during this time, you will be logged out automatically and will need to log in again
before you can proceed.

PRT-KLCS | Protege Touch Sense LCD Keypad | User Manual

8

Summary of Contents for PRT-KLCS

Page 1: ...PRT KLCS Protege Touch Sense LCD Keypad User Manual...

Page 2: ...ronic or mechanical for any purpose without the express written permission of Integrated Control Technology Limited Designed and manufactured by Integrated Control Technology Limited Protege and the P...

Page 3: ...Silencing and Canceling Alarms 12 Bypassing Inputs in an Area 12 Stay Arming an Area 13 Instant Stay Arming an Area 14 Force Arming an Area 14 Instant Force Arming an Area 15 Defer Arming an Area 15 A...

Page 4: ...urity and access control system Before using your keypad we highly recommend you read this manual carefully and have your security professional or property manager explain basic system operation to yo...

Page 5: ...med alarm indicator is flashing the system is in alarm and you need to enter your user code to silence the alarm When on the system is armed This indicator is programmable and may not function as desc...

Page 6: ...in functions are performed Confirmation Tone When an operation has been successfully completed the keypad generates a sequence of four audible tones Rejection Tone When the system times out or when an...

Page 7: ...ogrammed to unlock a door The STAY key is used to initiate the stay arming process for an area The FORCE key is used to force arm an area The MEMORY key will take a user directly to the memory view me...

Page 8: ...to access that menu from a keypad Site Security Enhancement The Require Dual Credential for Keypad Access option increases site security by requiring users to enter two forms of credential identificat...

Page 9: ...l advise that your PIN has expired PIN has expired Please change Enter new PIN code 2 Enter your new PIN code remembering that it must adhere to the PIN requirements configured for your site If your n...

Page 10: ...led 3 Press 1 or ENTER to begin the process for changing your PIN Enter new PIN Code 4 Enter your new PIN code remembering that it must adhere to the PIN requirements configured for your site If your...

Page 11: ...ned by your installation Please verify the operation with your security professional or property manager Arming an Area 1 To arm an area navigate to MENU 1 on your keypad If you have access to more th...

Page 12: ...M 2 Press DISARM Warehouse is DISARMING 3 When the area is disarmed the alarm stops Warehouse is DISARMED Bypassing Inputs in an Area Bypassing allows you to program the alarm system to ignore certain...

Page 13: ...For example if you are working late and the stay option is enabled you can arm a portion of the building to protect the windows and doors without arming other inputs 1 From the Arm Disarm menu you wi...

Page 14: ...em to close Force arming is commonly used when a motion detector is protecting an area that is occupied by a keypad For example if the motion detector has been programmed as a force input the system w...

Page 15: ...enter the number of hours you would like to defer the area arming for The minimum time that arming can be deferred from the keypad is 1 hour and the maximum is 9 hours Arming can only be deferred in w...

Page 16: ...pad at the same time 1 Select MENU 1 to view the Arm Disarm menu 2 Press the RIGHT key to view the area group controls Press Arm or Disarm to control group All Areas 3 Press ARM DISARM STAY or FORCE t...

Page 17: ...ss the ENTER key to view any trouble conditions that have occurred Battery The system or a 3 Use the RIGHT and LEFT keys to view the full details of the trouble condition and the action that should be...

Page 18: ...ad alarm on Roller Door 3 The area that the alarm occurred in is then shown If a tamper alarm has occurred the first line states that it was a 24HR alarm in AREA Warehouse 4 If the Acknowledge Alarm M...

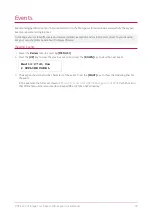
Page 19: ...nts 1 Select the Review menu by pressing MENU 3 1 2 Press the UP key to view the previous event and press the DOWN key to view the next event Wed 13 27 41 Use r OFFLINE USER L 3 The keypad shows the f...

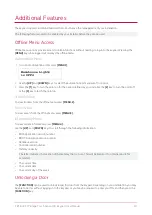
Page 20: ...ch the point on Trouble View To view troubles from the offline menu press MENU 2 Event View To view events from the offline menu press MENU 3 Information Menu To view system information press MENU 4 U...

Page 21: ...d for three seconds Based on your needs the panic alarm may generate audible alarms sirens or bells or silent alarms and communicate specific messages to your monitoring station or property manager Pr...

Page 22: ...oyees shall be liable under any circumstances to any party in respect of decisions or actions they may make as a result of using this information In accordance with the ICT policy of enhanced developm...

Page 23: ...aimer Whilst every effort has been made to ensure accuracy in the representation of this product neither Integrated Control Technology Ltd nor its employees shall be liable under any circumstances to...

Reviews: