ELITE 5220 BEARING REPLACEMENT - 05/02/16 pjm
ELITE 5220 REAR BEARING REPLACEMENT
Page 2 of 2
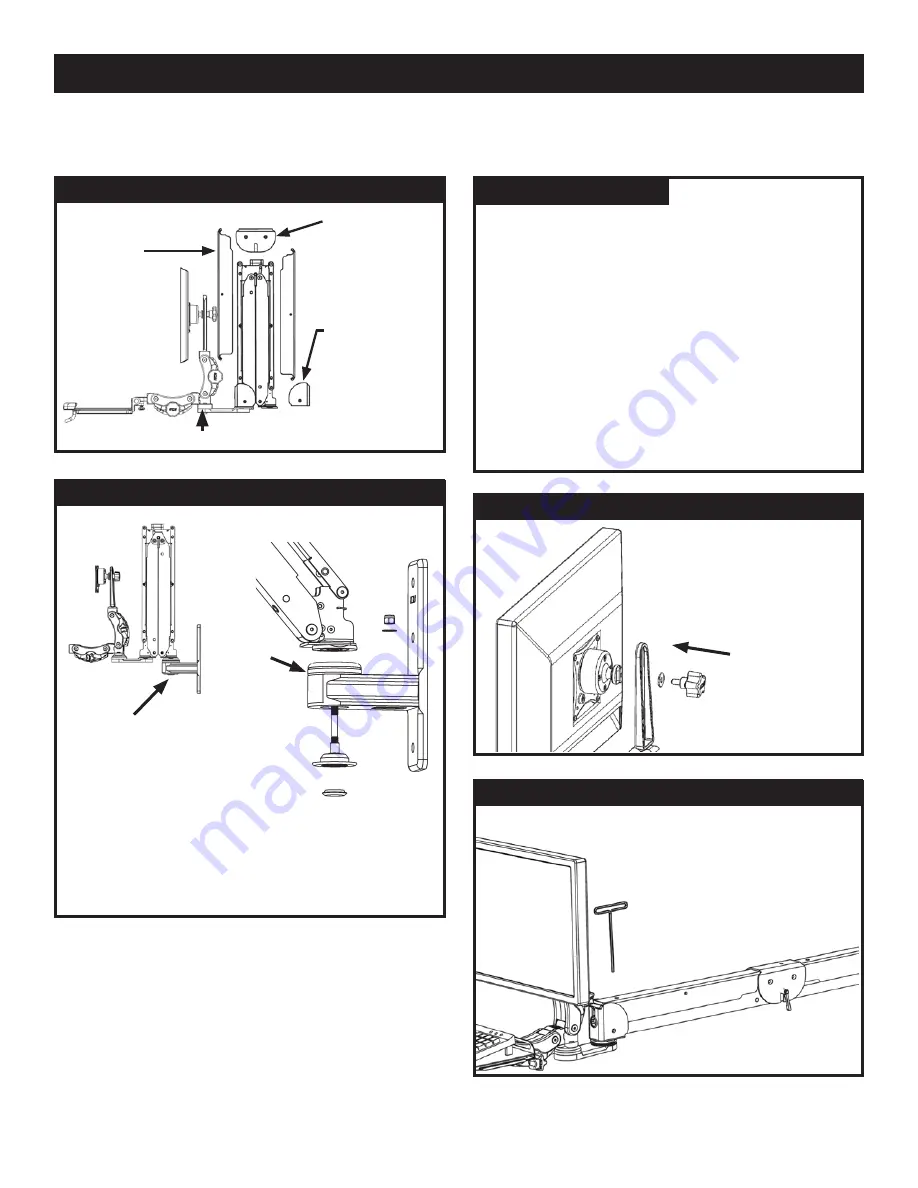
REATTACH ARM COVERS
TOP COVERS:
Reattach the long arm covers by replacing the two
1/4” long 6-32 flathead screws in the center of the
cover using a Phillips head screwdriver.
CENTER COVER:
Reattach the center cover by replacing the four 3/4”
long 10-24 flathead screws using a Phillips head
screwdriver.
END COVERS:
Reattach the end covers by replacing the two 3/4”
long 10-24 flathead screws using a Phillips head
screwdriver.
ADJUST ARM RESISTANCE
Extend the Elite straight out as
shown before increasing the
arm’s resistance. Be sure all
equipment is mounted on the
arm before adjusting.
Do not USe
power tooLS to ADjUSt
Replacing the rear bearing assemblies on the Elite 5220 may require two people.
END COVERS:
Remove the end
covers by unscrewing
the two 3/4” long
10-24 flathead screws
using a Phillips head
screwdriver.
CENTER COVER:
Remove the center
cover by unscrewing
the four 3/4” long
10-24 flathead screws
using a Phillips head
screwdriver.
TOP COVERS:
Remove the long
arm covers by
unscrewing the
two 1/4” long 6-32
flathead screws
in the center of
the cover using
a Phillips head
screwdriver.
torqUe 120 inch poUnDS. Do not LooSen.
REMOVE ARM COVERS
ATTACH MONITOR
Attach the monitor by
screwing the knob through
the rail into the VESA.
REPLACE BOLT & BEARING ASSEMBLIES
Fold arm. Remove
existing bolt and bearing
assemblies beneath the
wall ear. Replace with
new hardware provided.
This process may be easier if one person holds and
lifts the arm up while a second person installs the
replacement bolt and bearing assemblies.
3” Needle
bearing
If you have any questions, please call our
customer service representatives. They will be
able to answer your installation questions.
Toll free 1-800-558-4435


