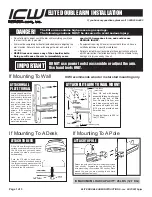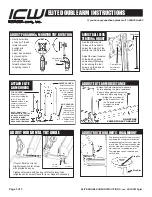
If you have any questions, please call 1-800-558-4435
iCWusA.com, inc.
ELITE DOUBLE ARM INSTRUCTIONS - rev 03/31/2015 pjm
ELITE DOUBLE ARM INSTRUCTIONS
Page 2 of 3
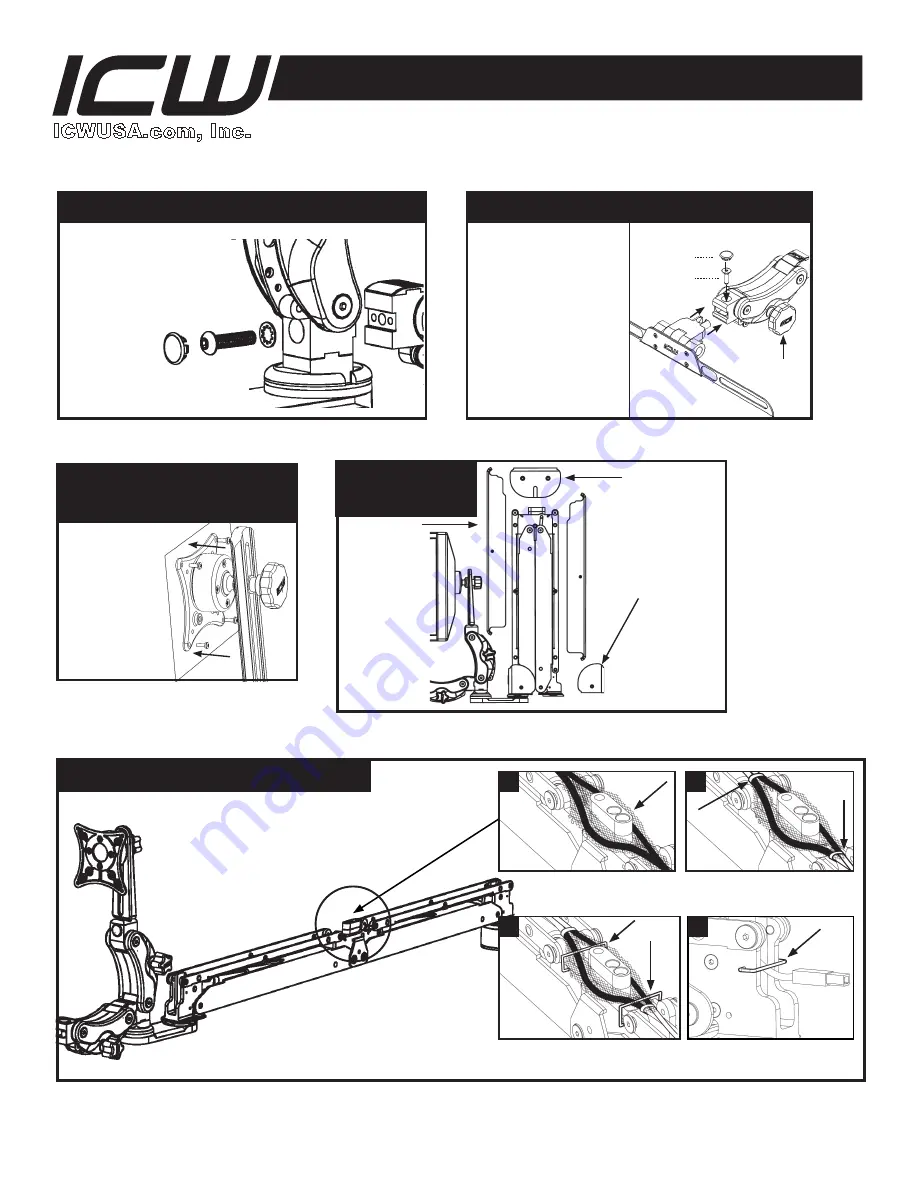
MANAGE CABLES THROUGH ARM
Extend the arm straight out and
lay all the cables for your monitor,
keyboard and mouse in the
channel on top of the arms.
Lay cables evenly around
adjuster with wire loom on
each side.
Wire tie cables around adjuster,
securing the cords and the wire
loom. Leave some slack.
Add provided wire clips, weaving
through wire loom to secure cables.
NOTE: YOU MUST LEAVE SOME
SLACK IN THE CABLES TO
ALLOW FOR ARM MOVEMENT.
Add wire clips to end of arms
as well.
1
2
3
4
REMOVE ELITE
ARM COVERS
TOP COVERS:
Remove the
long arm cover
by unscrewing
the two 1/4”
long 6-32
fl athead screws
in the center of
the cover using
a philips head
screwdriver.
END COVERS:
Remove the
end covers by
unscrewing the two
3/4” long 10-24
fl athead screws
using a philips
head screwdriver.
CENTER COVER:
Remove the
center cover by
unscrewing the
four 3/4” long
10-24 fl athead
screws using
a philips head
screwdriver.
ATTACH PARALINK KEYBOARD TO MONITOR
Attach the Paralink
keyboard mount to the
monitor mount by using
the 3/8-16 screw and
lock washer provided.
ATTACH PARALINK KEYBOARD TRAY
•
Remove beauty cap on
Paralink.
•
Remove screw using
3/16” hex key.
•
Slide keyboard tray into
Paralink.
•
Replace screw and
tighten.
•
Replace beauty cap.
•
Loosen knob, adjust
Paralink to desired
position, then tighten knob.
Beauty cap
Screw
Adjustment
Knob
ATTACH VESA TO MONITOR
(PARALINK)
Attach VESA
to monitor
using four 4mm
screws in the
hardware bag.


