Page 3 of 4
PRO SLIDE OVERCABINET MONITOR MOUNT WITH DROP POLE INSTALLATION - 11/24/20
PRO SLIDE OVERCABINET MONITOR MOUNT WITH DROP POLE INSTALLATION
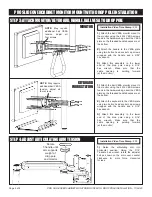
NOTE:
Minimum 10-foot
monitor cables are
required for proper
cabling through track, arm
and drop pole.
NOTE:
Minimum 10-foot
monitor cables are
required for proper
cabling through track, arm
and drop pole.
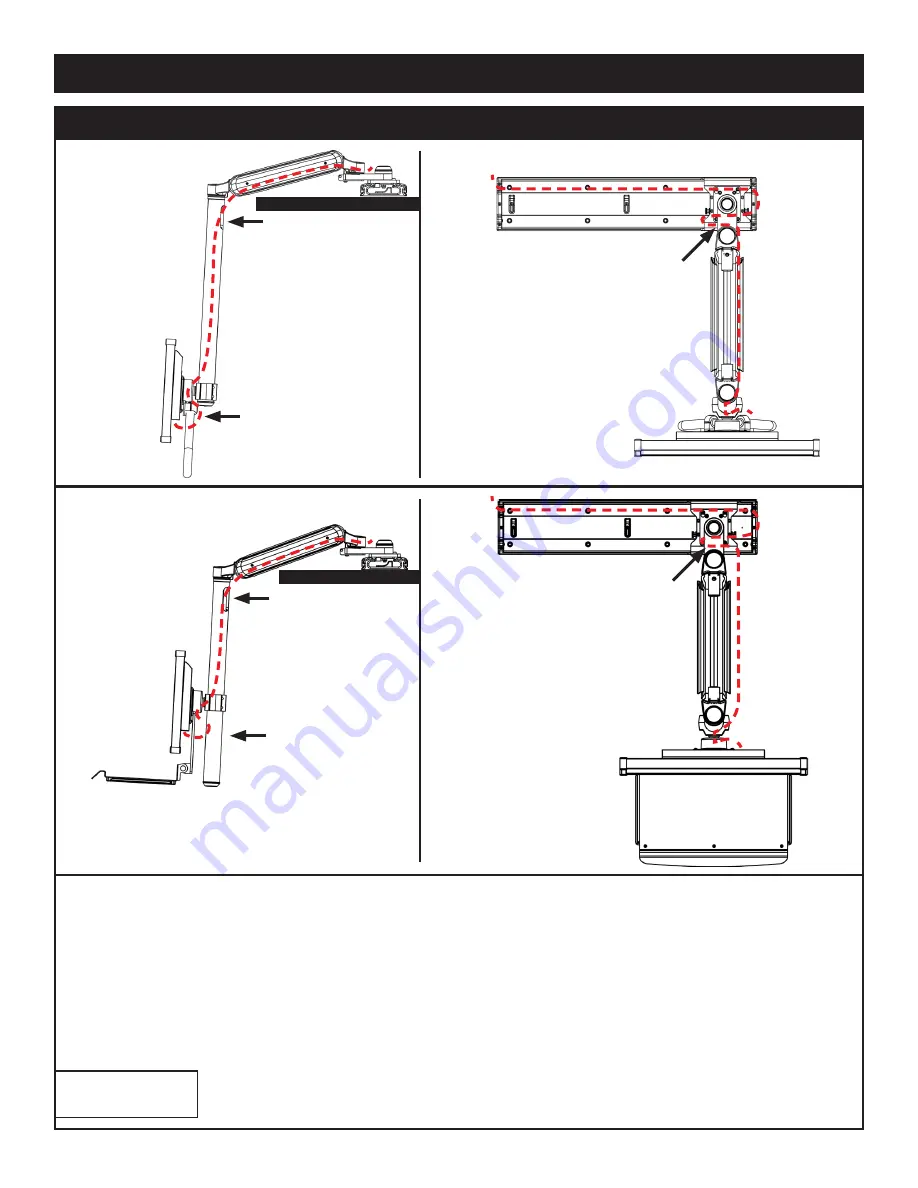
Leave cables with
enough slack to
allow movement
at the ball VESA
and monitor.
Leave cables with
enough slack to
allow movement
at the ball VESA
and monitor.
Feed cables in drop
pole here through
top slot and route
through drop pole’s
base slot.
Feed cables in drop
pole here through
top slot and route
through drop pole’s
base slot.
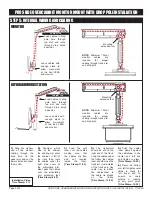
Mounting
extension foot
CABINET TOP
CABINET TOP
STEP 5: INTERNAL WIRING AND CABLING
Installation Video
Time Stamp:
8:35
4)
The trolley/arm
should be slid to the
right end of the track.
Loop the cables under
the trolley, the cables/
loom should cross the
track at or just outside
of the track end. Use
cable ties to attach
the cables/loom to
the cable tie blocks
on the trolley.
[Time Stamp: 12:00]
5)
Push the cable/
loom clamps against
the cable/loom in the
center and left end
and tighten in place.
[Time Stamp: 14:05]
6)
Travel the trolley/
arm left to right several
times to check for
full travel and to
ensure no cable
binding or rubbing
at any pivot point.
[Time Stamp: 14:50]
3)
Feed the split
loom over the cables
making sure that
the cables are free
and not tangled
inside the loom.
[Time Stamp: 11:00]
2)
Consider which
side of the cabinet
the cabling will enter
the cabinet, if left of
the track then route
the cables under the
right side cover of
the articulating arm.
Next, pass the cables
over the articulating
arm extension foot.
[Time Stamp: 8:40]
1)
Drop the monitor
end of the monitor
cabling through the
drop pole (in the
upper slot and out the
lower slot) and connect
the monitor.
Mounting
extension foot
KEYBOARD WORKSTATION
MONITOR

