TITAN ELITE WALL MOUNT INsTALLATION
TITAN ELITE EASY-TO-WIRE WALL MOUNT INSTALLATION - 09/01/16 pjm
Page 3 of 4
Cord Management - Wall Mount
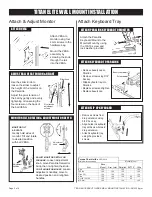
PREss WIREs INTO CHANNEL OF ELITE ARM sECTION
After feeding the wires through
the Titan (upper) section of
the arm, press them into the
channels of the Elite (lower)
section.
Use wire clips to secure them.
Be sure wires don’t bind
and the arm moves freely.
Wire clip
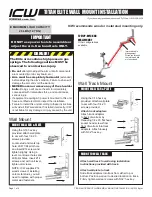
FEED WIRE THROUGH TITAN ARM
Pull wires one at a time through the arm. Feed the
largest wire first, allowing enough slack so the arm
turns freely.
Feed the first wire through the wall ear and out
of the first wire port. Feed the wire back down
through the first wire port and through the Titan
arm segment. Feed the wire up and out of the
second wire port, back down and into the
Elite section of the arm.
Repeat these steps with the second wire.
Wires run through
the joints.
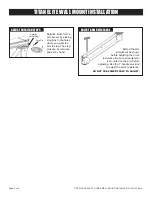
REPLACE ARM COVERs
Before reattaching arm
covers, slip wires through
end cover port.
Reattach black plastic
bushing around exiting
wires.
Replace covers on the Elite
section of the arm. DO NOT
use a power tool to replace
screws.
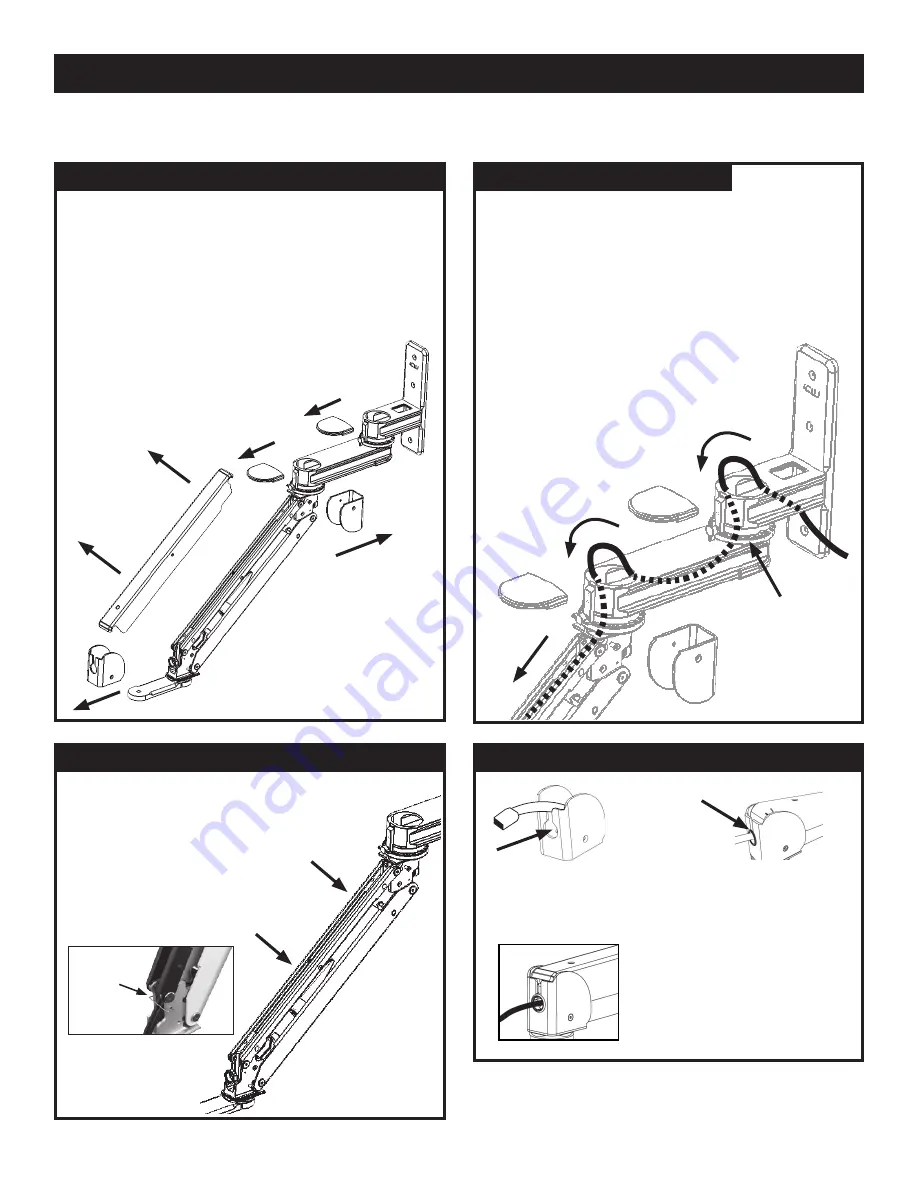
REMOVE ELITE ARM COVERs & TITAN ARM CAPs
END COVERs
Remove the end covers by unscrewing the two 3/4”
long 10-24 flathead screws using a Phillips head
screwdriver.
TOP COVER
Remove the long arm cover by unscrewing the two
1/4” long 6-32 flathead screws in the center of the
cover using a Phillips head screwdriver. If you
use a power tool, be very careful not to strip the
screws. The arm needs to be in a
vertical position to remove
the long top cover.
TITAN ARM CAPs
Slide off the plastic caps
that cover the wire ports
on the Titan section of
the arm.


