5
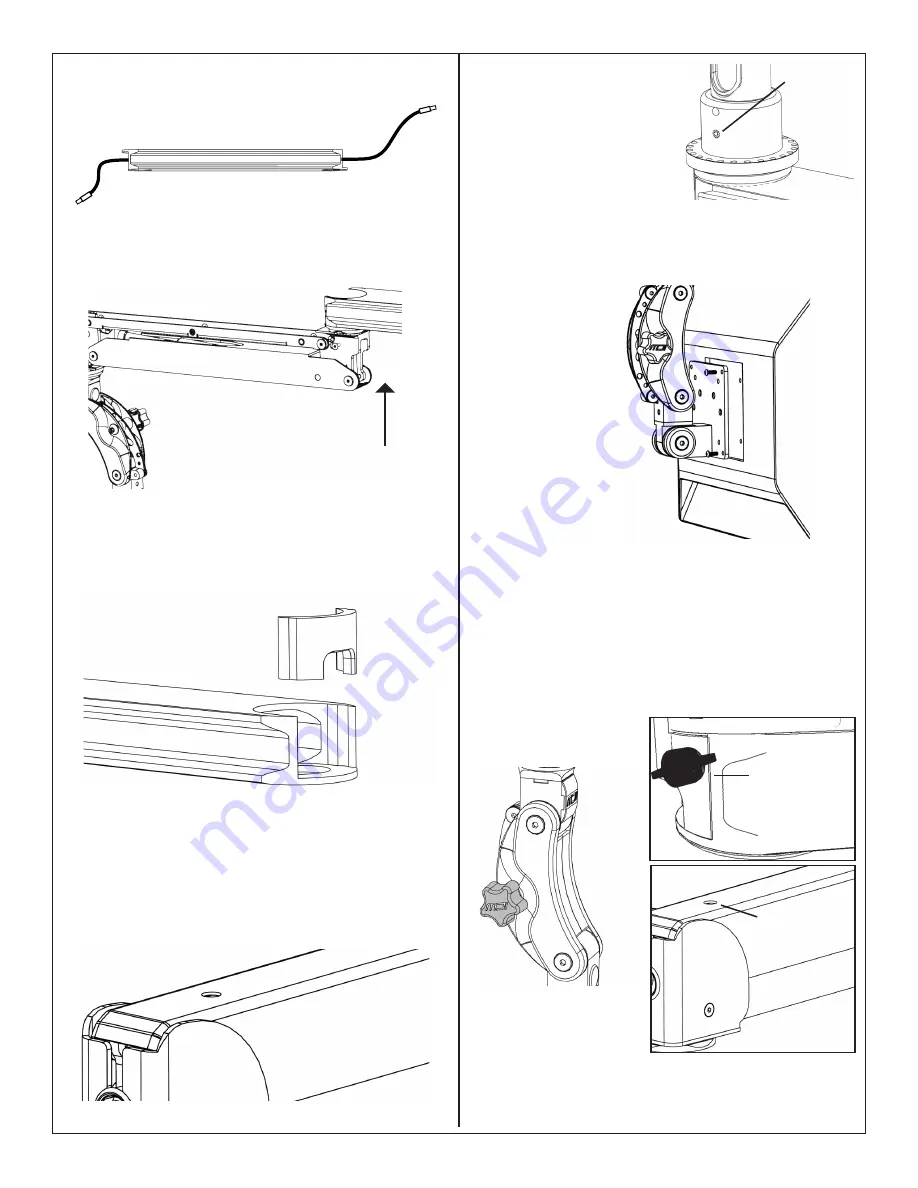
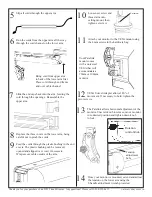
Slip all cords through the upper arm.
6
Run the cords from the upper arm all the way
through the cord channel on the lower arm.
10
Loosen set screw and
thread arm onto
ceiling mount, then
tighten set screw.
Set screw
Your Paralink
mount comes
with a universal
VESA that will
accommodate a
75mm or 100mm
monitor.
11
Attach your monitor to the VESA mount using
the 4mm screws in the hardware bag.
13
The Paralink allows horizontal adjustment of the
monitor. Unscrew knob to release, move monitor
in to desired position and tighten down knob
to lock.
14
Once your monitor is mounted, extend and adjust
the tension on the lower arm using the
T-handle adjustment wrench provided.
Thank you for your purchase of an ICW Titan Elite arm. Any questions? Please call 1-800-558-4435.
Titan Elite PL Ceiling 5/26/10 JM
Adjustment port
Rotation
control
knob
Bring cord from upper arm
to back of the lower arm first.
Place cord through end frame
and over cable channel
7
Slide the end caps back into the arm, feeding the
cord through the openings. Reassemble the
upper arm.
8
Replace the three covers on the lower arm, being
careful not to pinch the cords.
9
Feed the cords through the plastic bushing in the end
covers. The plastic bushing can be removed,
opened and slipped over cord, if necessary.
Wrap excess cable outside of the arm.
Tension
adjustment
hole
12
VESA Swivel Adapter allows 180° of
movement. If necessary to hold, tighten the
pivot screws.


