OVERHEAD ARM INSTALLATION 01/20/16 pjm
overhead arm installation
Page 2 of 4
overhead arm installation
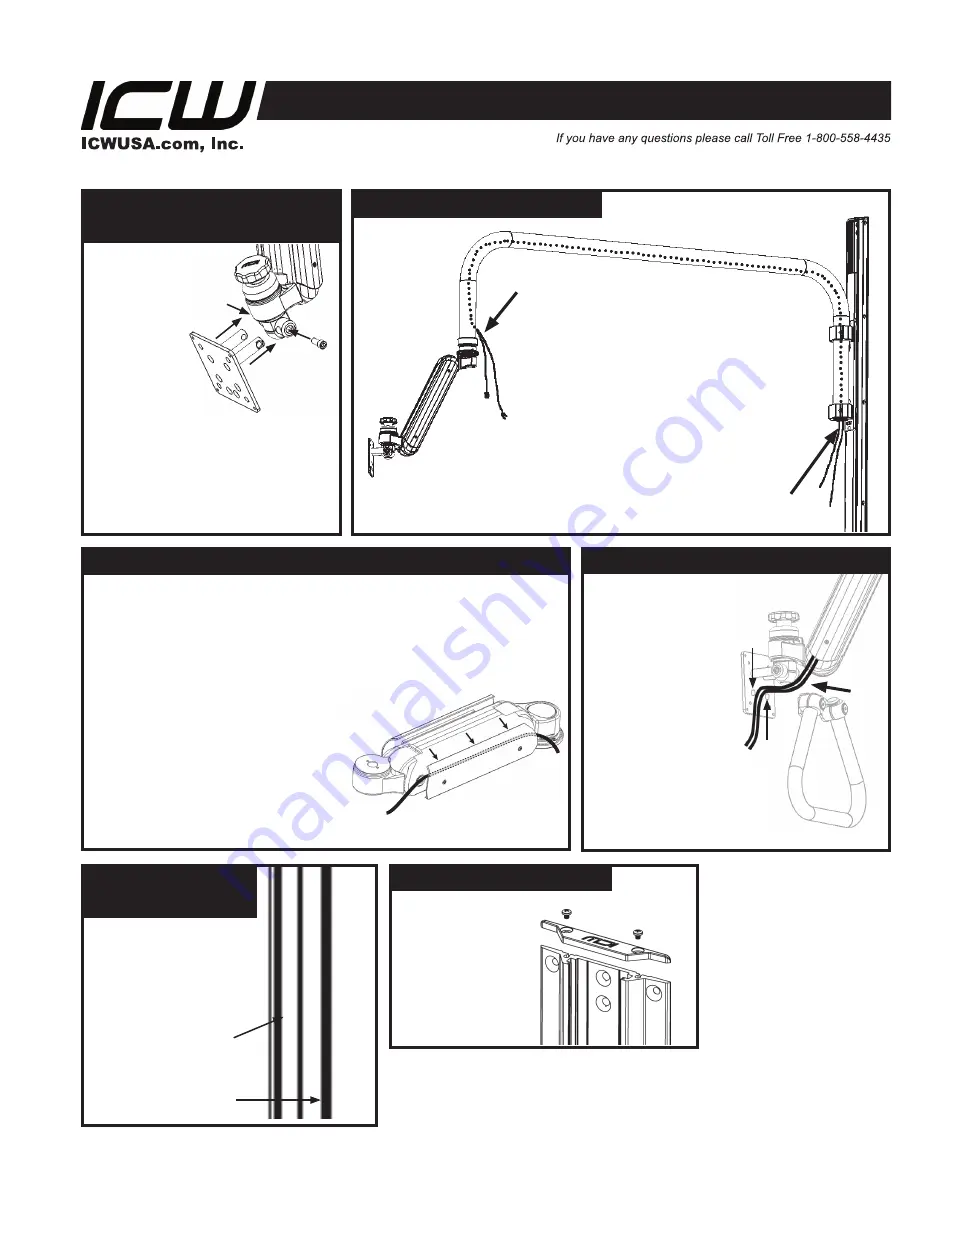
attaCh vesa With monitor
to arm
•
Slide posts
of VESA plate
into the EV65 joint assembly.
•
Insert provided socket head cap
screws into both sides of EV65
and tighten.
•
Use knob to adjust tilt friction.
NOTE: Monitor is
not shown in order
to illustrate mounting
detail.
Use cord provided inside overhead arm
to pull wires through to the monitor.
•
At track end of overhead arm, grasp cord
and pull down.
•
Loop cord around wires.
•
At monitor end of overhead arm, grasp
cord and pull wires through.
PUll Wires throUGh arm
Loop cord around
wires at this end
Pull wires through
arm at this end
rUn Wires throUGh Ultra 182 to monitor
•
The Ultra 182 cover plate is spring loaded. Loosen cover
plate screws on side of arm just enough to fit wires through
gap. Run wires loosely between cover plate and arm.
Wires can be run on either or both sides of the arm.
•
Connect wires from Ultra 182 to monitor.
•
Move monitor through full range of motion to
allow for correct amount of slack in wire.
Pull excess wire back through
Ultra 182 and overhead arm.
•
Push cover plate against Ultra 182
arm and tighten screws, being
careful not to pinch wires.
reattaCh BeaUtY CaPs
Reattach plastic
caps to top and
bottom of track.
rUn Wires
throUGh traCK
•
Pull slack wire down
from overhead arm.
•
Run wires through
center of track.
•
Reattach track cover.
Track cover
Wires run through
center of track and
out the bottom
attaCh handle to vesa Plate
Center wires
between screw
holes on VESA
plate where handle
attaches. Using
socket head
screws provided,
attach handle to
VESA plate,
securing wires
between handle
and back of VESA
plate.


