ULTRA 180 ARM INSTALLATION - rev 04/09/14 pjm
ULTRA 180 ARM INSTALLATION
Page 4 of 4
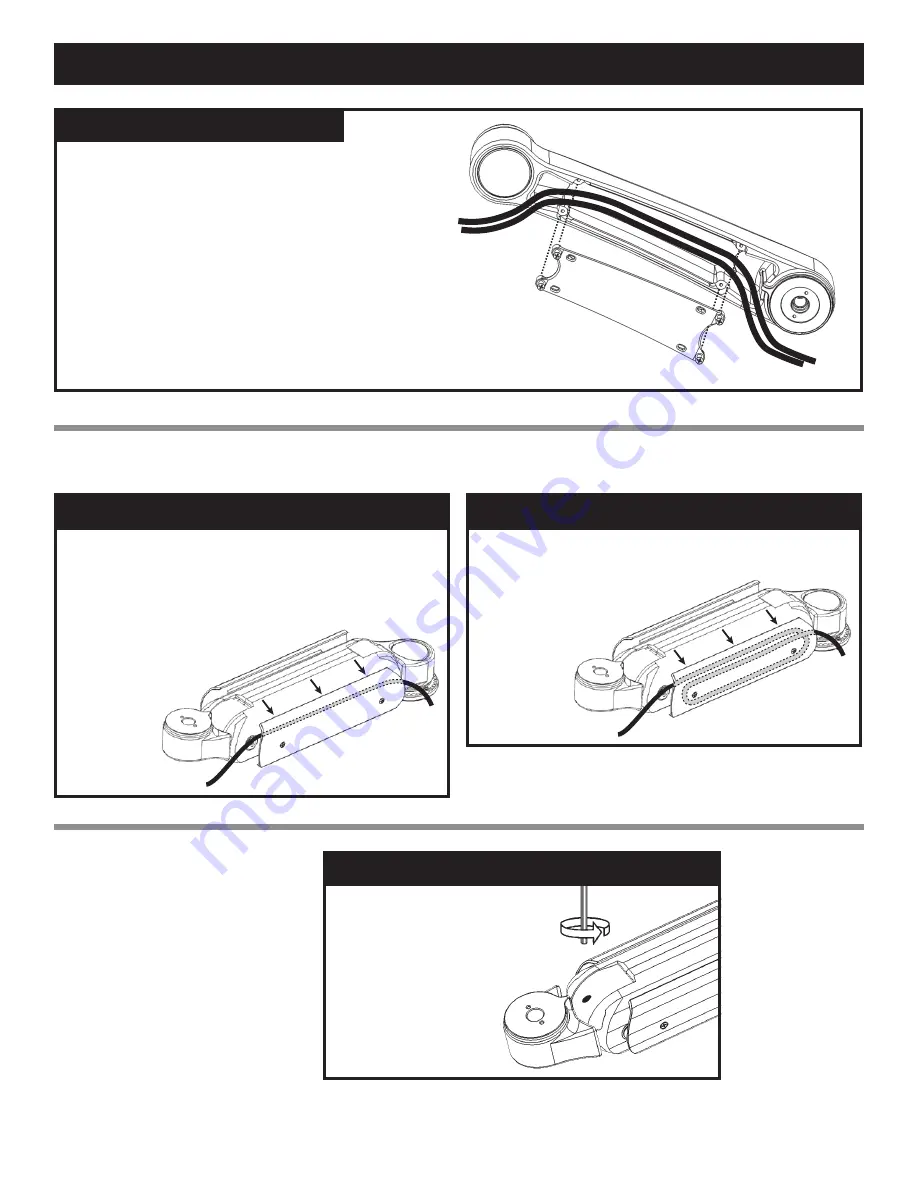
ULTRA 180 ARM CABLE MANAGEMENT
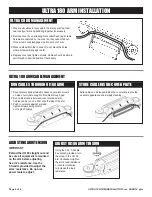
RUN CABLES THROUGH UL180 ARM
1. Cover plate is spring loaded. Loosen cover plate screws
on side of arm just enough to fit cables through gap.
2. Run cables loosely between cover plate and arm.
Cables can be run on either or both sides of the arm.
3. Push cover plate against arm and
tighten screws, being careful
not to pinch cables.
STORE CABLE INSIDE COVER PLATE
Extra cable can be looped inside the cover plate to provide
a neater appearance and simplify cleaning.
ULTRA CORD MANAGEMENT
1. Prepare all cables to route within the arm by placing them
near cavity of arm and bundling together if necessary.
2. Remove cover by unscrewing four socket head cap screws.
Screws are captured by the cover so they cannot fall out.
Once screws are disengaged, pull cover out of arm.
3. Place cables within the channel. Do not block the holes
where screws will engage in arm.
4. Replace cover and tighten screws. Cables should be able to
pull through to desired position if necessary.
ADJUSTING ARM TENSION
ADJUST UL180 ARM TENSION
Using the 3/16” T-handle
hex wrench provided, turn
the screw in the UL180
arm clockwise to lighten
the arm’s load resistance,
or counter-clockwise
to increase the load
resistance.
IMPORTANT
Extend the UL180 straight out and
be sure all equipment is mounted
on the arm before adjusting
he arm’s resistance. Use the
T-handle provided to adjust the
arms’ resistance. Do not use
power tools to adjust.


