If you have any questions please call Toll Free 1-800-558-4435
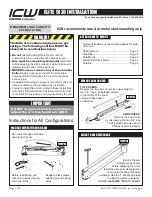
ELITE 5120 InsTaLLaTIon
ELITE 5120 INSTALLATION - rev 12/22/15 pjm
Page 4
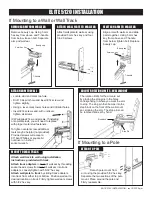
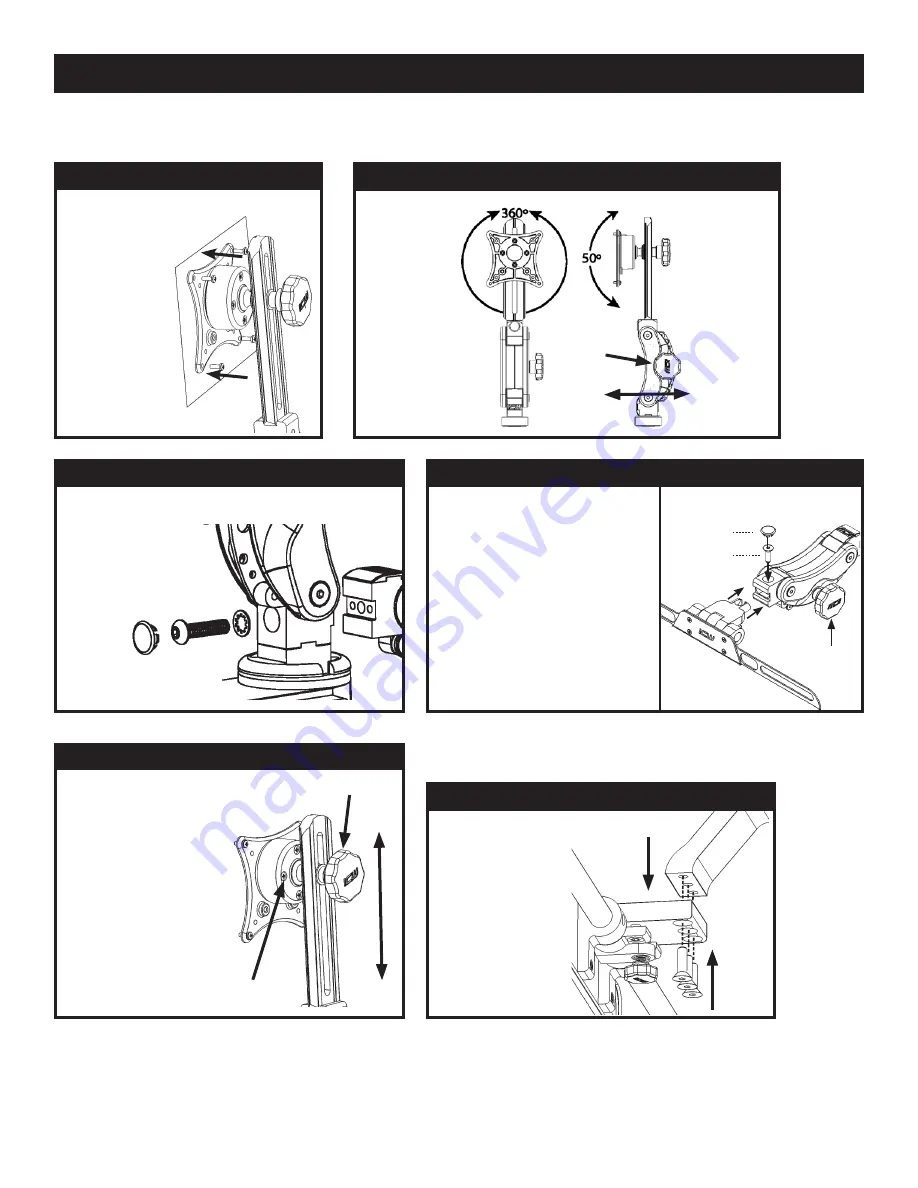
aTTaCH PaRaLInK KEYBoaRD To MonIToR
Attach the Paralink
keyboard mount to
the monitor mount
by using the 3/8-
16 screw and lock
washer provided.
aTTaCH PaRaLInK KEYBoaRD TRaY
•
Remove beauty cap on
Paralink.
•
Remove screw using 3/16”
hex key.
•
Slide keyboard tray into
Paralink.
•
Replace screw and tighten.
•
Replace beauty cap.
•
Loosen knob, adjust Paralink
to desired position, then
tighten knob.
Beauty cap
Screw
Adjustment
Knob
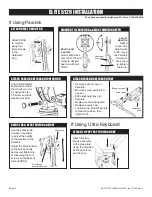
Attach VESA
to monitor
using four
4mm screws
in the
hardware
bag.
aTTaCH VEsa To MonIToR
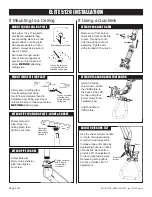
MonIToR TILT, RoTaTIon & aDJUsT MonIToR DEPTH
MONITOR TILT
& ROTATE
Gently hold sides
of monitor. Tilt and
rotate to desired
position with ball
VESA.
ADjUsT
MONITOR
DEPTh
Loosen the
adjustment
knob, move
the Paralink
forward or
back, then
re-tighten
the knob.
Adjustment
Knob
If Using Ultra Keyboard
If Using Paralink
Attach the tray
flip-up assembly
to the drop plate
using the provided
flat head screws
and hex key.
aTTaCH FLIP UP TRaY To ULTRa DRoP
aDJUsT BaLL VEsa TEnsIon & HEIGHT
Pivot tension
adjustment screws
Use the slider knob
to loosen the slider
to adjust the height
of the monitor on the
Paralink.
Adjust the pivot tension
of the ball by gently
and evenly tightening
or loosening the four
screws on the back of
the ball VESA.
Slider knob


