background image

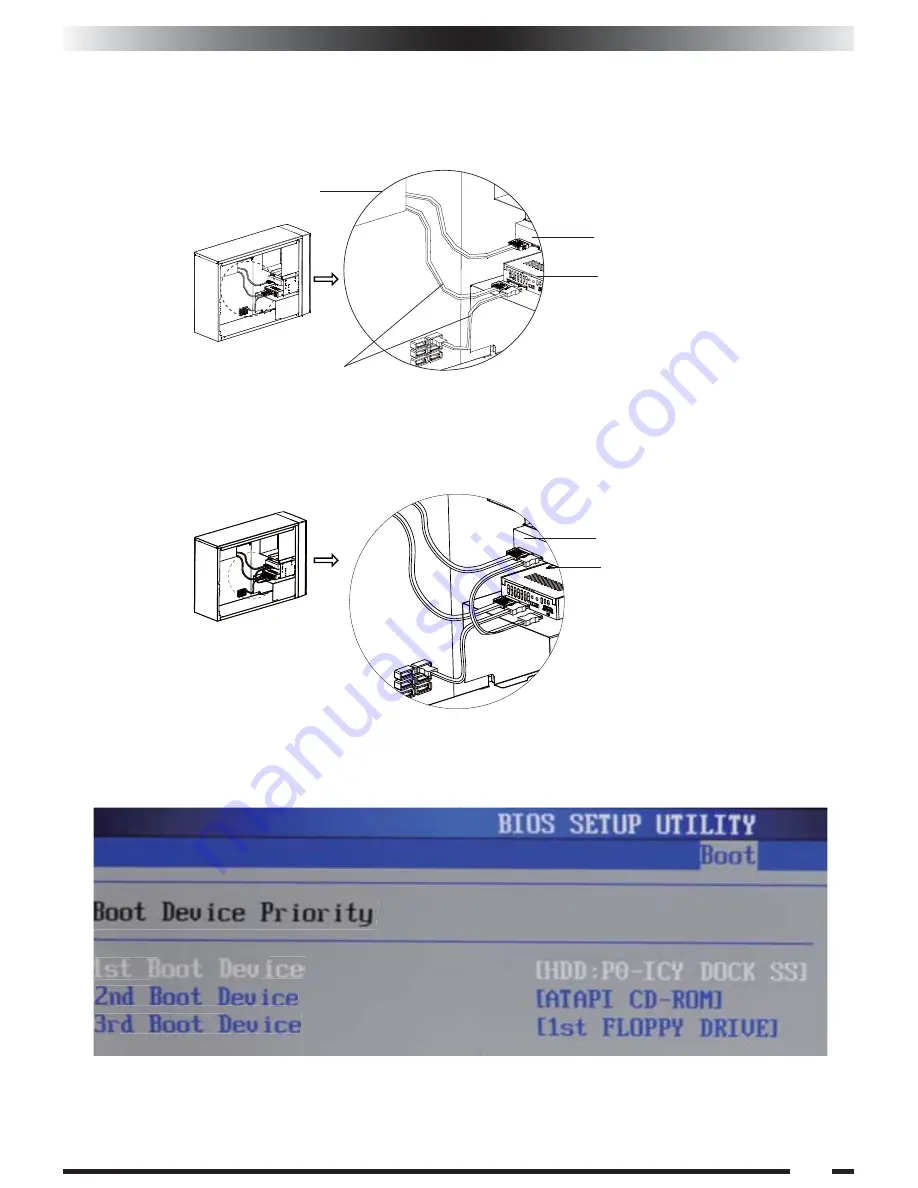
HDD

SSD Xpander

HDD

SSD Xpander

4.On the rear of the SSD Xpander, the leftmost connections will be addressed first. The 15-pin 
   power connection is to be hooked up to a 15-pin power cable from the power supply. The 7-pin 
   SATA connection is to be hooked up to a 7-pin SATA cable from a SATA port on the 
   motherboard or controller card being used.

5.Next, the rightmost 7-pin SATA connection is to be hooked up to a 7-pin SATA cable coming 
   from the 3.5" SATA HDD being used. This connection is the input to the SSD Xpander.

6.Verify all connections are secure and in the correct locations, and then turn the system on. 
   Once on, enter the BIOS boot device menu in order to confirm the SSD Xpander is recognized 
   as shown in the image below.

7.Finally, install the operating system of choice on the drive. Please refer to the operating 
   system documentation for proper steps. If an existing system is to be used, please refer to drive 
   cloning software documentation if the destination volume is smaller than the source volume.

Power Supply

Connect the SATA power connector 
from power supply to SSD Xpander, 
then connect the SATA data connector 
from motherboard to SSD Xpander

English

Summary of Contents for MB882HX-1SB

Page 1: ...MB882HX 1SB 2 5 SSD Xpander HDD...

Page 2: ...D Xpander for convenience 2 Connect a SATA 15 pin power cable from the power supply to the rear of the 3 5 SATA HDD 3 Connect a SATA 15 pin power cable from the power supply and a SATA 7 pin data cabl...

Page 3: ...a Input Connector from HDD OR HDD HDD 4 1 If the products shown above are different than the products included in the packaging please contact the seller or retailer for replacement A B C HDD E G D F...

Page 4: ...astening system 3 Secure the 3 5 SATA HDDof your choice into another 3 5 drive bay For convenience use a drive bay that is in close proximity to the SSD Xpander so that cabling will be more manageable...

Page 5: ...is the input to the SSD Xpander 6 Verify all connections are secure and in the correct locations and then turn the system on Once on enter the BIOS boot device menu in order to confirm the SSD Xpande...

Page 6: ...as operating system files games and audio video software All other files can be placed on the second partition such as documents music and other software Image 2 Below shows the 2 partitions that are...

Page 7: ...st due to the nature of the chipset To be safe we recommend regularly backing up all important data Q A Note 3 It is required to manually assign a drive letter and format in Windows Disk Management fo...

Page 8: ...cifications Our company has the right to modify product specifications without further notice ICY DOCK will not be liabl for any software hardware and any data stored with in or interfacing with our p...

Page 9: ...9 5...

Reviews: