background image

EN3

General operations

Power Connection

Before using your Bluetooth wireless sound system, make sure the battery level is sufficient at 60% or above for best performance, otherwise, please connect 

the adapter to AC main power to re-charge.

1.  Firmly and securely insert the DC plug of the adaptor to the DC IN jack on the rear of the unit.

2.  Plug the adaptor’s AC plugs into an AC outlet.

3.  Power on the unit by switching the POWER switch on the rear of the unit. 

Note: When the unit is not operated by the AC power or unused for long periods of the time, please remove the power adapter from the wall outlet and unplug 
from the main unit.

Charging instructions   


This unit operates on a built-in Li-ion battery that can be recharged from a power adaptor (included) 

CHARGING THE BATTERY FOR FIRST TIME 

1. 

Charge the built-in Li-ion battery a minimum of 3 hours prior to first use.  

Connect a power adaptor (see “Power connection”) into the main unit and auto to charging the internal Li-ion battery. 

2. 

Observe the internal battery charging level by the BATTERY INDICATOR on LCD display when the unit will power on.

RECHARGING THE INTERNAL BATTERY

After prolonged use, the internal battery will become weak and the operation may become intermittent. When the internal battery charge is low, the BATTERY 

INDICATOR will show low level alerting you to recharge the internal battery as soon as possible. 

Note: 

1. 

Charging time will vary if you are listening to music while charging the internal battery. We recommend you switch off the unit power during the charging 

process.

2. 

To prolong the life of a rechargeable battery, it is recommended to completely discharge it before fully charging it again. 

3. 

Rechargeable batteries need to be cycled for maximum performance and longer battery life. If you don’t use the player that often, be sure to recharge 

the battery at least once a month in order to keep the internal battery working properly.

Battery Note and Care

•  Do not burn or bury batteries. 

•  Do not puncture or crush. 

•  Do not disassemble.

•  Do not dispose of batteries in fire, batteries may explode or leak

•  Li-ion batteries must be recycled. Do not dispose of in the trash.

•  Use only chargers rated for Li-ion cells. Be sure the charger’s voltage and current settings are correct for the battery pack being charged.

•  Charge batteries on a fireproof surface and away from flammable items or liquids.

•  Batteries should NEVER be left unattended while charging. Only adults should charge the batteries.

Follow the manufacturer’s instructions for charging the product and do not charge longer than recommended. Unplug the charger when the battery is charged 

or not in use.

Mic Connection

1.  Plug the Dynamic microphone to the MIC jack on the rear side of your unit. Their output is mixed with playback from BLUETOOTH or AUX IN.    

2.  The volume of microphone can be adjusted by the MIC VOLUME knob on the left side of the front unit together with the speaker volume at the same time. 

(There is no independent microphone volume control)

3.  You can start to sing-along with the music playback.            

Party lighting

Press #7 and #8 LED ON/OFF button to switch on the party light show on the disco ball or the front LED.  
Press and hold again to turn off LED.

Bluetooth operation  


Pairing a Bluetooth Device for the First Time 

1.  Power on the unit by press the STANDBY button, LCD display will appear “PAIRING” and Pairing indicator will light BLUE and flash, press and hold the PAIRING 

button for about 5 seconds. When pairing, remain within 3 feet of the unit.

2.  Using the native controls on your Bluetooth device, select the BC100L in your Bluetooth settings to pair. If your device requests a password, enter the default 

password “0000”. 

Refer to the user’s manual for your specific device for instructions on pairing and connecting Bluetooth devices.

3.  When successfully paired and connected, a sound “ Connected ” will issue from the unit, After initial pairing, the unit will stay paired unless unpaired 

manually by the user or erased due to a reset of the device. If your device should become unpaired or you find it is unable to connect, repeat the above 

steps.

Playing Audio Wirelessly

1. 

After pairing to a Bluetooth device, use the native controls on the connected Bluetooth Device to select a track.

2. 

Play, pause or skip a selected track using the native controls on the connected Bluetooth Device.

3. 

Audio played through the connected Bluetooth Device will now be heard through the speakers.

4. 

Adjust the VOLUME control to obtain the desired volume level.

5. 

Press STANDBY button again to turn off the unit.

Summary of Contents for DISCO CUBE BC-100L

Page 1: ... declarationofconformity ASIA OFFICE iDance H K Unit i 6 F MG Tower 133 Hoi Bun Road Kwun Tong Kowloon Hong Kong UK OFFICE iDance Audio U K Graham Lloyd Building Midland Structures Industrial Estate Ampthill Road Bedford MK42 9JJ United Kingdom EUROPE OFFICE iDance Audio Europe Salland 9 1948RE Beverwijk The Netherlands DISCO CUBE BC 100L 50 Watts All in One SOUND and LIGHT Bluetooth PARTY SYSTEM ...

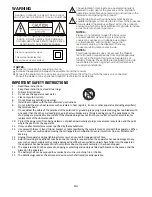
Page 2: ...Heed all warnings 3 Follow all instructions 4 Do not use this apparatus near water 5 Clean only with dry cloth 6 Do not block any ventilation openings 7 Install in accordance with the manufacturer s instructions 8 Do not install near any heat sources such as radiators heat registers stoves or other apparatus including amplifiers that produce heat 9 Do not defeat the safety of the polarized of the ...

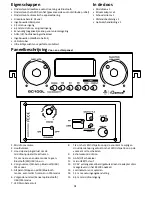
Page 3: ... Bluetooth FM USB Line in Previous track channel on Bluetooth USB FM mode 5 Play Stop on USB Bluetooth mode auto scan in FM mode 6 Next track channel on Bluetooth USB FM mode 7 Disco Ball LED On Off 8 Tap for changing front LED light show pattern Hold this button for turning off front LED light show 9 Microphone echo level 10 Power On Off switch 11 microUSB TF slot 12 DC 9V power input please only...

Page 4: ...ed for Li ion cells Be sure the charger s voltage and current settings are correct for the battery pack being charged Charge batteries on a fireproof surface and away from flammable items or liquids Batteries should NEVER be left unattended while charging Only adults should charge the batteries Follow the manufacturer s instructions for charging the product and do not charge longer than recommende...

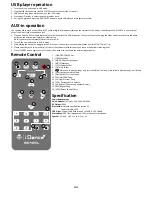
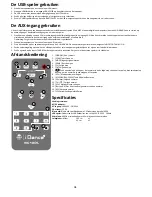
Page 5: ...you plugged into AUX IN input Their output is mixed with playback from BLUETOOTH or MIC IN 4 Slowly adjust both the volume controls of the unit and the external device until you reach a comfortable listening level 5 Press STANDBY button again to turn off the unit Remember to shut down the external player power Remote Control 1 STANDBY POWER Key 2 SCAN Scan Key 3 MODE Choose Signal Input 4 MUTE Mut...

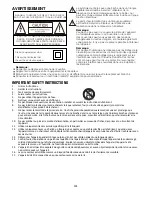
Page 6: ... compte des avertissements 4 Suivre toutes les instructions 5 Ne pas utiliser l appareil près de l eau 6 Nettoyer uniquement avec un chiffon sec 7 Ne pas bloquer les ouvertures de ventilation Installer en suivant les instructions du fabricant 8 Ne pas installer près des sources de chaleurs tels que radiateur four ou tout autre appareil y compris les amplificateurs qui produit de la chaleur 9 Ne pa...

Page 7: ...e haut niveau 4 Morceau Chaîne précédente en mode Bluetooth USB FM 5 Lecture Arrêt en mode USB Bluetooth recherche automatique en mode FM 6 Morceau Chaîne suivante en mode Bluetooth USB FM 7 Allumer Éteindre la boule disco LED 8 Appuyez pour changer le motif du jeu de lumière LED frontal Maintenez appuyée la touche pour éteindre le jeu de lumière LED frontal 9 Niveau d écho du micro 10 Commutateur...

Page 8: ...érifiez que la tension et l intensité utilisées sont adaptées à la batterie à recharger Chargez les batteries sur une surface résistante au feu et à distance d objets et liquides inflammables Ne JAMAIS laisser les batteries en charge sans surveillance Seul un adulte doit recharger les batteries Respectez les instructions du fabricant pour recharger le produit et ne chargez pas la batterie au delà ...

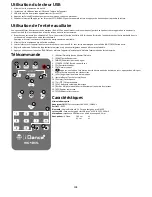
Page 9: ...ur sortie est mélangée avec celle de BLUETOOTH Entrée micro 4 Réglez le volume de l unité et de l appareil externe jusqu à ce que vous atteigniez un niveau d écoute confortable 5 Appuyez à nouveau sur le bouton STANDBY pour éteindre l appareil N oubliez pas d éteindre l alimentation du lecteur externe Télécommande 1 Allumer Éteindre Touche Allumer Éteindre 2 SCAN Touche Rechercher 3 MODE Choisisse...

Page 10: ... OR SHOCK DO NOT REMOVE COVER OR BACK NO USER SERVICEABLE PARTS INSIDE REFER SERVICING TO QUALIFIED PERSONNEL Class II equipment symbol This symbol indicates that the unit has a double system Belangrijke veiligheid instructies 1 Lees deze instructies 2 Bewaar deze instructies Let op alle waarschuwingen 3 Volg deze instructies 4 Gebruik dit apparaat niet dichtbij water 5 Maak alleen schoon met een ...

Page 11: ...FM USB Line in 4 Vorig nummer Kanaal op Bluetooth USB FM modus 5 Afspelen Stoppen op USB Bluetooth modus automatisch scannen in FM modus 6 Volgende nummer Kanaal op Bluetooth USB FM modus 7 LED Discobal aan uit 8 Tik om het LED lichtpatroon op de voorkant te wijzigen Houd deze knop ingedrukt om het LED lichtpatroon op de voorkant uit te schakelen 9 Echoniveau microfoon 10 AAN UIT schakelaar 11 mic...

Page 12: ...Verifieer dat de spanning en stroomspecificaties van de lader overeenkomen met die van het op te laden batterijblok Laad batterijen op een brandveilig oppervlak op uit de buurt van ontvlambare voorwerpen of vloeistoffen Batterijen dienen NOOIT onbeheerd achter te worden gelaten tijdens het laadproces Uitsluitend volwassenen dienen batterijen op te laden Volg de instructies van de fabrikant om het ...

Page 13: ...raat aangesloten op de AUX INGANG De uitvoer wordt gemixt met de weergave via BLUETOOTH of MIC IN 4 Pas de volumeregeling op zowel het hoofdapparaat als het externe apparaat geleidelijk aan tot op een comfortabel luisterniveau 5 Druk nogmaals op de toets STANDBY om het apparaat uit te schakelen Vergeet niet de externe speler uit te schakelen Afstandsbediening 1 STANDBY Aan uittoets 2 SCAN Toets Sc...

Page 14: ...sers 5 Putzen Sie es nur mit Trockene Stoffe 6 Blockieren Sie keine Ventilations Öffnungen 7 Bauen Sie das Gerät übereinstimmend mit den Aufbauanleitungen 8 Bauen Sie es nicht in der nähe Wärmquellen wie Heizungen Öfen oder andere Geräte die Hitze produzieren können 9 Verlieren Sie nicht die Sicherheit des polarisierten oder Boden Stecker Ein polarisierter Stecker hat zwei Stifte und einen dritten...

Page 15: ...tooth USB UKW Modus 5 Wiedergabe Pause im USB Bluetooth Modus automatischer Sendersuchlauf im UKW Modus 6 Nächster Titel Sender im Bluetooth USB UKW Modus 7 Discokugel LED ein aus 8 Drücken Sie diese Taste um das Lichtshow Muster der LEDs an der Vorderseite zu ändern Drücken und halten Sie diese Taste um die LED Lichtshow an der Vorderseite auszuschalten 9 Echopegel des Mikrofons ändern 10 Ein Aus...

Page 16: ...und und außerhalb der Reichweite von entflammbaren Gegenständen oder Flüssigkeiten auf Akkus sollten NIEMALS unbeaufsichtigt aufgeladen werden Akkus sollten nur von Erwachsenen aufgeladen werden Befolgen Sie zum Aufladen des Gerätes die Anweisungen des Herstellers Laden Sie es nicht länger als empfohlen auf Trennen Sie das Ladegerät bei Nichtbenutzung oder aufgeladenem Akku Mikrofon anschließen 1 ...

Page 17: ... Wiedergabe an dem mit dem AUX Eingang verbundenen Gerät Die Ausgabe wird mit der Wiedergabe der Bluetooth oder Mikrofoneingabe gemixt 4 Passen Sie langsam beide Lautstärkeregelungen von Produkt und externem Gerät an bis Sie eine angenehme Lautstärke erreicht haben 5 Drücken Sie die STANDBY Taste zum Ausschalten des Gerätes noch einmal Denken Sie daran auch das externe Wiedergabegerät auszuschalte...

Page 18: ...ciones 2 Guarde estas instrucciones Lea todas las precauciones 3 Siga todas las instrucciones 4 No use este aparato cerca del agua 5 Solo lo limpie con toallas secas 6 No bloquee ninguna apertura de ventilación 7 Instale acorde con las instrucciones del fabricante 8 No lo instale cerca de ninguna fuente de calor como radiadores registros de calor forno u otros aparatos incluyendo amplificadores qu...

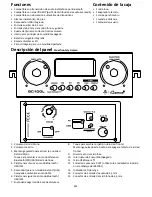
Page 19: ...ooth FM USB Entrada de línea 4 Pista canal anterior en modo Bluetooth USB FM 5 Reproducir parar en modo Bluetooth USB búsqueda automática en modo FM 6 Pista canal siguiente en modo Bluetooth USB FM 7 Encender apagar led de bola de discoteca 8 Toque para cambiar el patrón de luz led frontal Mantenga pulsado este botón para apagar el efecto de luz led frontal 9 Nivel de eco de micrófono 10 Interrupt...

Page 20: ... del cargador y los ajustes de corriente sean correctos para la batería que cargue Cargue las baterías sobre una superficie ignífuga y alejadas de objetos inflamables o líquidos NUNCA debe dejar las baterías sin supervisión durante la carga Solo adultos deben cargar las baterías Siga las instrucciones del fabricante para cargar el producto y no lo cargue durante más tiempo del recomendado Desenchu...

Page 21: ...AR La salida se mezcla con la reproducción del BLUETOOTH o de la entrada de micrófono 4 Ajuste lentamente ambos controles de volumen de la unidad y el dispositivo externo hasta que alcance un nivel de escucha cómodo 5 Pulse otra vez el botón de ESPERA para apagar la unidad Recuerde desconectar la alimentación del reproductor externo Mando a distancia 1 ESPERA Botón de encendido 2 SCAN Botón de bus...

Page 22: ...presente apparecchio in prossimità di acqua 5 Servirsi solo di panni asciutti per la pulizia 6 Non ostruire le aperture di ventilazione 7 Installare in base alle istruzioni del produttore 8 Non installare l apparecchio in prossimità di fonti di calore quali termosifoni bocchette di mandata stufe o altri dispositivi inclusi amplificatori che producono calore 9 Non rimuovere le sicure delle spine po...

Page 23: ...tà Bluetooth USB FM 5 Riproduci Arresta in modalità USB Bluetooth scansione automatica in modalità FM 6 Brano Canale successivo in modalità Bluetooth USB FM 7 Sfera disco LED On Off 8 Toccare per modificare il modello di visualizzazione dell illuminazione del LED anteriore Tenere premuto questo tasto per spegnere la visualizzazione dell illuminazione del LED anteriore 9 Livello di eco del microfon...

Page 24: ...a quella richiesta per le batterie da ricaricare Ricaricare le batterie su superfici non infiammabili e lontano da sostanze e liquidi infiammabili Non smettere MAI di controllare le batterie durante il caricamento Solo gli adulti devono occuparsi del caricamento delle batterie Seguire le istruzioni del produttore per la ricarica e non ricaricare più a lungo di quanto indicato Scollegare il caricab...

Page 25: ... ingresso AUX IN La loro uscita è mista con riproduzione da BLUETOOTH o MIC IN 4 Regolare lentamente entrambi i controlli del volume dell unità e il dispositivo esterno fino a quando non raggiunge un livello di ascolto comodo 5 Premere di nuovo il tasto STANDBY per spegnere l unità Spegnere anche il lettore esterno Telecomando 1 STANDBY Tasto Accensione 2 SCAN Tasto scansione 3 MODE Scegliere un i...

Reviews: