26
British Gas 440 - 480 RD2 -
Installation & Servicing
INSTALLATION
40 FROST PROTECTION
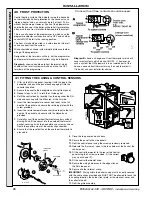
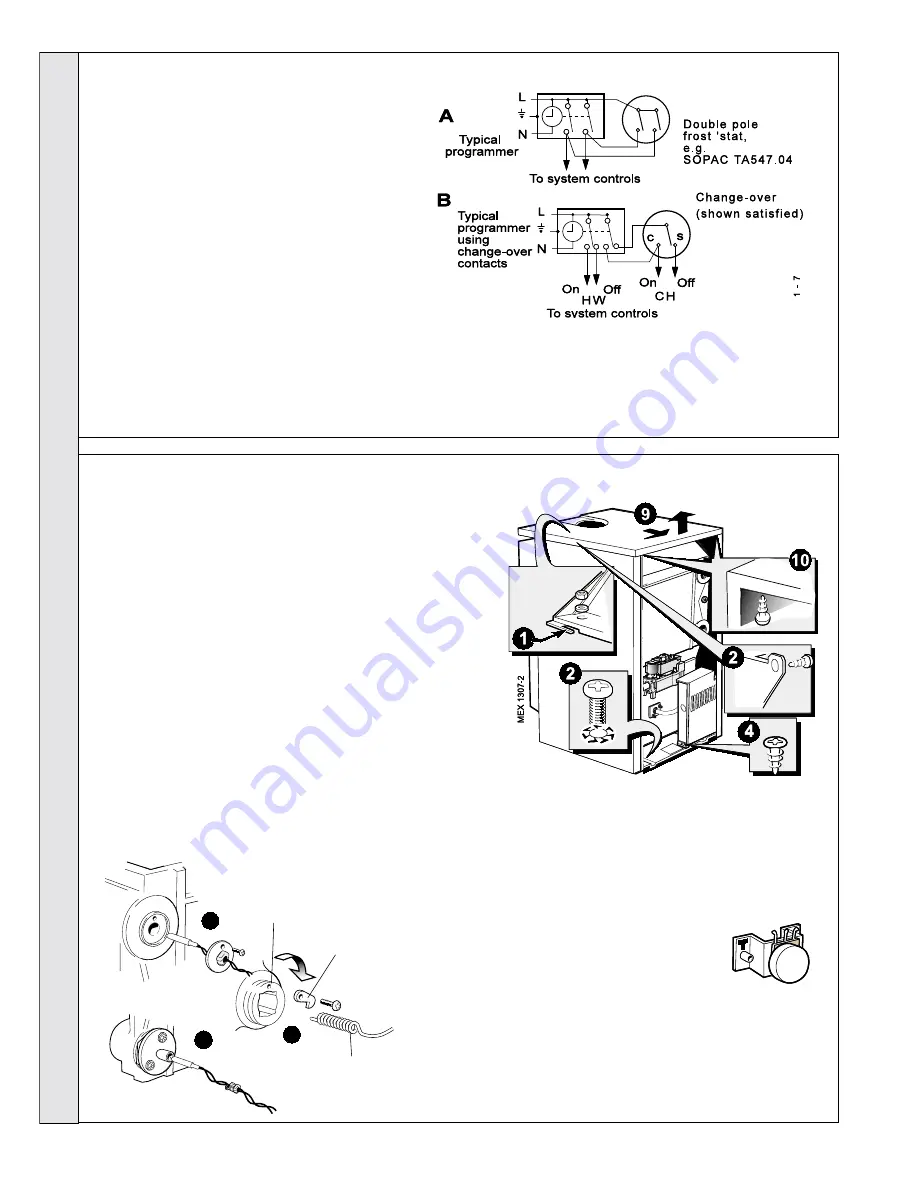
Diagram B shows a 'change-over' frost thermostat, which will
cover most systems which do use CH OFF. If, however, on
such a system the HW pipework is in an isolated part of the
house, a second frost thermostat may be used to protect it.
If in doubt, ask your installer for advice.
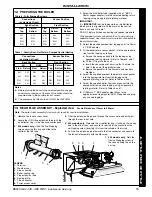
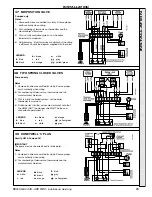
41 FITTING THE CASING & CONTROL SENSORS
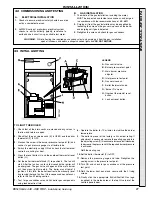
9. Place the top panel and push back.
10. Secure the panel to the side panels.
11. Refit the control panel using the screws previously removed.
12. Relocate the 'Burner on' neon in the lens holder at the back of the
control panel.
13. Fit the control thermostat to the rear of the control
panel using the 2 screws provided. Fit the correct
way up as shown (T).
14. Fit the control thermostat knob.
15. Secure the wiring harnesses in the edge clips on
the RH side panel..
16. Secure all other internal wiring.
IMPORTANT. Wiring within the boiler casing must be neatly secured
with the cable straps provided and MUST NOT be allowed to touch the
fan cooling impeller, the burner front plate, or the cleanout cover and
the collector hood.
17. Refit the grille assembly.
Central heating systems fitted wholly inside the house do
not normally require frost protection as the house acts as a
'storage heater' and can normally be left at least 24 hrs.
without frost damage. However, if parts of the pipework run
outside the house or if the boiler will be left off for more than
a day or so then a frost 'stat should be wired into the system.
This is usually done at the programmer, in which case the
programme selector switches are set to OFF and all other
controls MUST be left in the running position.
The frost 'stat should be sited in a cold place but where it
can sense heat from the system.
Wiring should be as shown, with minimal disturbance to other
wiring of the programmer.
Designation of the terminals will vary, but the programmer
and thermostat manufacturer's leaflets will give full details.
Diagram A shows a double pole frost thermostat, which
should suffice for all systems which do not use the OFF
terminals of the programmer.
1. Offer up the RH side panel, locating it with the peg in the
baseplate, and push the panel back engaging it into the
collector hood tab.
2. Secure the panel to the baseplate and turret front panel.
3. Repeat steps 1 and 2 to refit the LH side panel.
4. Refit the control box by locating it on the peg under the RH
side and securing with the M5 screw at the LH side.
5. Insert the flow temperature sensor (red lead) to the full
depth of the pocket and secure the retaining plate with the
screw provided.
6. Insert the return temperature sensor (blue lead) to the full
depth of the pocket and secure with the Heyco bush
provided.
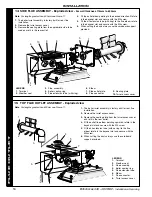
7. Carefully uncoil the overheat thermostat capillary without
kinking it and fit the sensor into the overheat thermostat
pocket, securing it with the hook plate and screw as shown.
Route the capillary clear of the combustion chamber.
8. Ensure that the reset button on the overheat thermostat is
pressed in.
Clock with volt free contacts should be used.
Mex 1850
Thermostat
Hook plate
Sensor end
7
5
6
INST
ALLA
TION

