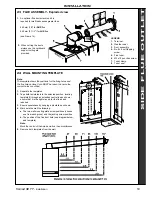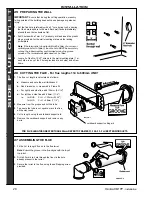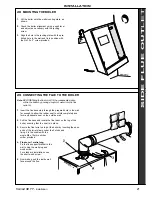
24
Henrad SE FF
- Installation
35 INTERNAL WIRING
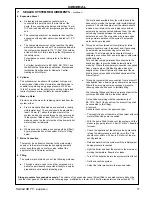
2. Controls that override an on/off control, e.g. a frost
thermostat, MUST be wired into the mains supply, in
parallel, with the controls to be overridden. Refer to Frame
42.
3. If a proprietary system is used, follow the instructions
supplied by the manufacturer.
4. The pump must always be wired in parallel with the boiler.
5. SYSTEM DESIGNS FEATURING CONTROLS OR
WIRING ARRANGEMENTS WHICH ALLOW THE BOILER
TO FIRE WHEN THERE IS NO PUMPED CIRCULATION
TAKING PLACE
MUST NOT BE FITTED.
Advice on required modifications to wiring may be obtained
from the component manufacturers.
36 EXTERNAL WIRING
INST
ALLA
TION
External wiring MUST be in accordance with the current I.E.E.
(BS.7671) Wiring Regulations.
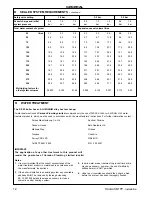
The wiring diagrams illustrated in Frames 38 to 41 cover the
systems most likely to be used with this appliance.
For wiring external controls to the SE FF boiler, reference
should be made to the systems wiring diagram supplied by
the relevant manufacturer in conjunction with the wiring
diagrams shown in Frames 38 to 41.
Difficulty in wiring should not arise, providing the following
directions are observed:
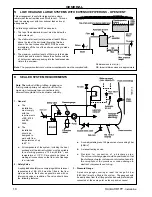
1. Controls that switch the system on and off, e.g. a time
switch, MUST be wired in series, in the live mains lead to
the boiler.
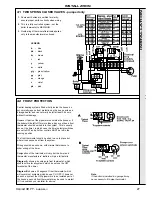
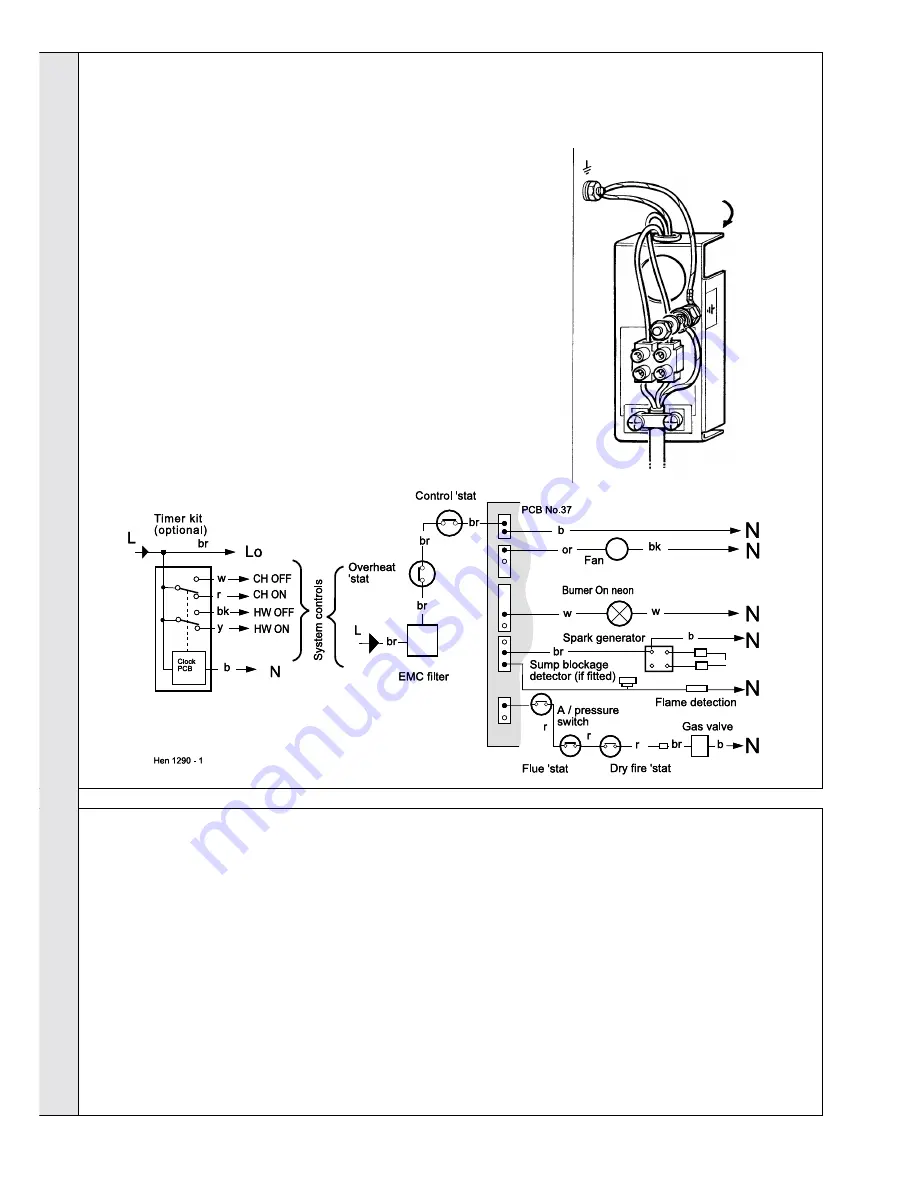
Flow wiring diagram
LEGEND
b
-
blue
bk -
black
br -
brown
r
-
red
o
-
orange
w
-
white
y
-
yellow
Note.
If a timer kit is to be fitted refer to the instructions provided with the kit, and Frame 36.
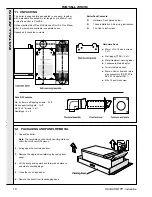
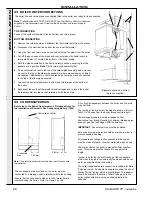
Incoming mains wiring detail
INSTALLATION
A pictorial wiring diagram is shown in Frame 37 .
1. Route the mains cable into the bottom RHS rear of the casing.
2. Swing the terminal strip bracket out.
3. Wire the live and neutral into the terminal strip.
4. Connect the earth wire to the earth post.
Note.
Ensure that the lengths of the current carrying conductors are
shorter than the earth conductor so that if the cable slips in its
anchorage the current carrying conductors become taut before the
earth conductor.
5. Secure the mains lead with the cable clamp.
6. Swing the terminal strip bracket back into its working position.
Summary of Contents for Henrad SE 30 FF
Page 1: ......

