33
Henrad SE FF
- Installation
SERVICING
SER
VICING
Note.
In order to assist fault finding, the control box printed circuit
board is fitted with three indicator lights which represent the
following boiler conditions. Refer to Frame 72.
LED 2
Lockout
LED 3
Fan on
LED 4
Mains electricity on
1. Isolate the electricity supply
2. Turn off the gas supply.
3. Remove the boiler front panel and sealing panel. Refer to
Frames 12 and 52.
IMPORTANT. When work is complete the sealing panel must
be correctly fitted, ensuring that a good seal is made.
WHEN REPLACING ANY
COMPONENT
REPLACEMENT OF COMPONENTS
and adjusted accordingly. Refer to Frame 47, 'Initial
Lighting' .
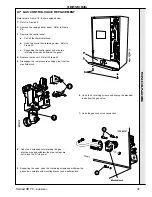
If the burner pressure is very low check the fan pressure.
Refer to Fault Finding Frame 82.
After any servicing, reference should be made to Table 2, page
3 (or the data badge), which quote details of the burner
pressures for the boiler models.
The burner pressure should be checked against these values
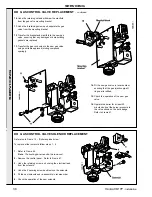
56 RE-ASSEMBLY
5. Reconnect the fan electrical leads.
6. Refit the boiler sealing panel.
IMPORTANT. Ensure the boiler sealing panel is correctly
fitted and that a good seal is made.
7. Refit the boiler front panel.
8. Turn on the gas supply at the gas service cock.
9. Reconnect the electrical supply.
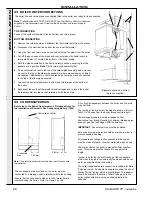
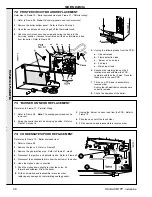
55 CLEANING THE HEAT EXCHANGER
1. Place a plastic sheet or similar beneath the boiler
and remove all visible loose deposits from the heat
exchanger fins, using a suitable brush.
2. Take care to clean debris from the ledge inside the
combustion chamber.
Note.
The pressure sensing pipes must be tested for gas soundness
THE BOILER MUST NOT BE OPERATED IF THE SEALING PANEL IS NOT FITTED.
57 BURNER PRESSURE CHECK
58 GENERAL
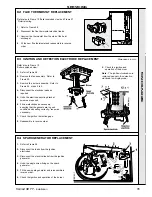
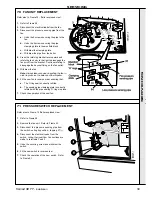
Reassemble the boiler in the following order:
1. Refit the burner, renewing any damaged or deteriorating
sealing gaskets.
2. Reconnect the 2 ignition leads and the detection lead.
3. Refit the fan, engaging it in the bayonet fixing and locating
it in the retaining bracket.
Ensure that the 'O' ring seal is in place.
4. Reconnect the pressure sensing pipe to the fan and secure
to the manifold block (together with the low pressure
sensing pipe), using the clamping plate.
Ensure that the 'O' ring seals are in place.
IMPORTANT.
Deposits are most effectively removed from the fins if they are
dry. Ensure this by running the pre-service checks with the
boiler thermostat set to maximum to avoid condensing
conditions.
Note.
Some aluminium oxide build-up on the heat exchanger fins is
quite usual with this type of condensing boiler. Though removal
is recommended annually, the heat exchanger MUST be
inspected and cleaned after a MAXIMUM of 2 years operation.
Summary of Contents for Henrad SE 30 FF
Page 1: ......

