INSTALLATION
12
Mexico Slimline CF440 -
Installation & Servicing
9
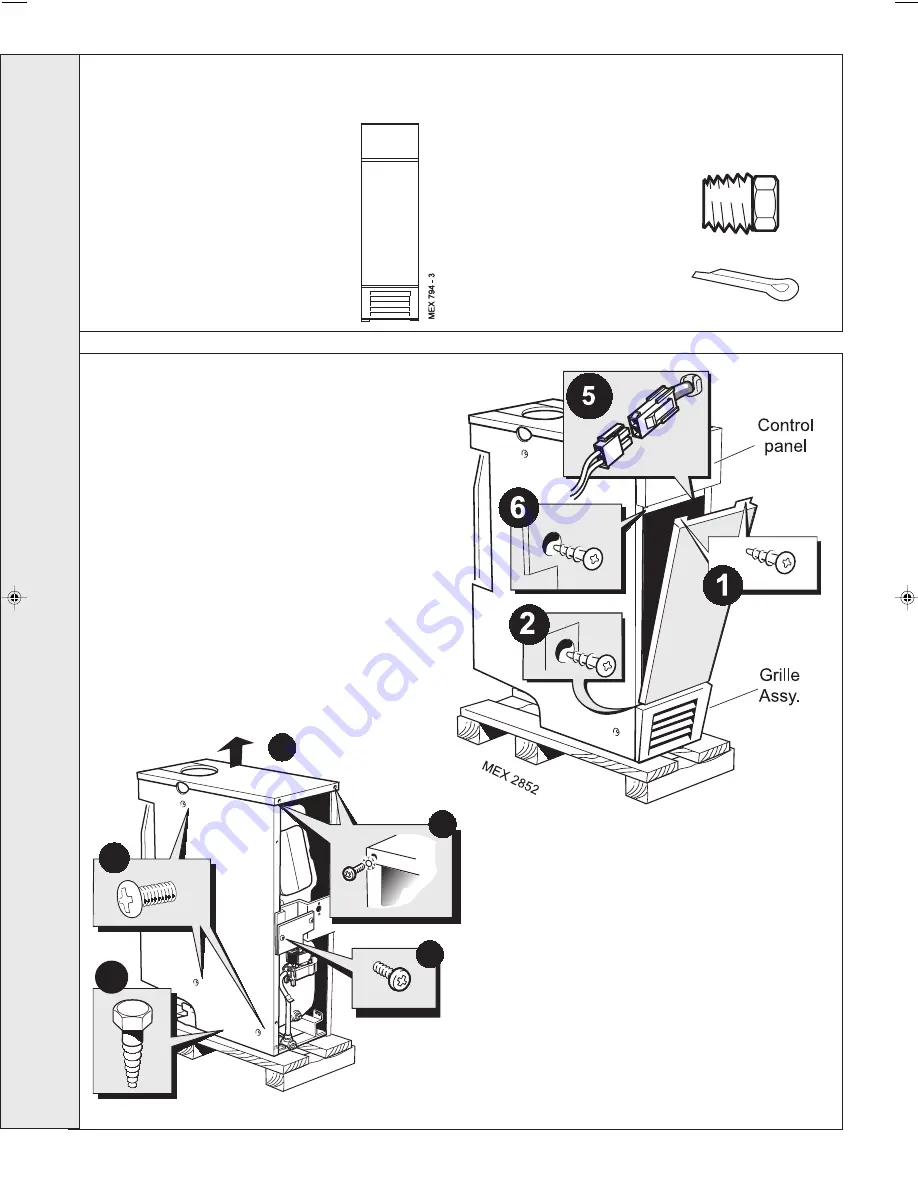
BOILER CASING REMOVAL
MEX 228
0
8
10
12
7
9
PACK CONTENTS
!
Complete boiler assembly
!
The Hardware Pack (listed separately)
!
These Installation and Servicing/Users
Instructions.
To avoid damage to the boiler casing it is recommended that the casing is removed BEFORE the boiler body is taken off the pallet.
8
UNPACKING
HARDWARE PACK
!
1" BSP plugs - 2 off
complete
boiler
assembly
!
Split pin - 1 off
It is preferable to remove the casing to install the boiler.
1.
Undo the 2 screws and lift off the lower front panel.
2.
Remove 2 screws and lift off the grille assembly.
3.
Disconnect the in-line connector on the PCB lead.
4.
Remove the Burner On neon cable from the back of the
control panel.
5.
Unplug the in-line connector to the TTB thermostat.
6.
Remove the 2 screws securing the control panel and
disengage the panel by lowering and pulling it forward.
In order to remove the control panel entirely the TTB
thermostat in-line connector has to be unplugged.
7.
Remove the 2 screws securing the top panel to the
side.
8.
Draw the top panel forward and lift it off the boiler.
9.
Undo the 2 screws securing the PCB box to the
side panels and carefully rest it on the top of the
gas valve.
10.
Remove the 3 screws securing each side panel
to the boiler.
11.
Remove each side panel.
12.
The boiler is held to the packaging base by 2 M6
hex head screws. Remove the screws and
remove the boiler from the packaging base.
INST
ALLA
TION
200946-1.p65
3/9/2004, 3:30 PM
12


