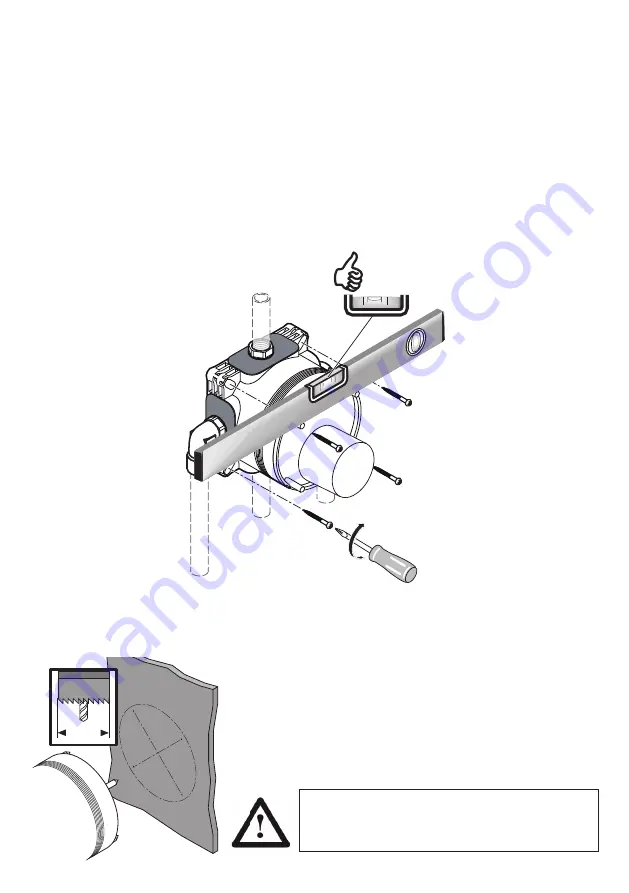
Before commencing, decide on which installation method to adopt from the two detailed below. Mark the
wall at the desired location for the valve-box. Decide on preferred mounting option (see 4.3). Note: before
mounting, it may be easier to fit pipe connectors to the valve-box (see 5.1).
CAVITY METHOD requires the installer to chase-out the brick-work to the required depth. Then mount the
valve-box & pipe-work into this cavity. The cavity can then be closed-off for example with plaster board. Cut
large hole in the covering plaster board to suit the valve-box diameter (see below).
FALSE-PARTITION METHOD requires the installer to mount the valve-box directly
onto the wall, then build a false partition or use a panelling system in front of the wall to conceal the valve-box
& pipe-work. The false wall can be just local to the valve area.
Cut large hole in the covering panel to suit the valve-box diameter (see below).
Ø133
Check level & valve-box orientation (see 4.5). Confirm valve-box is projecting correctly from the wall; such
that the finished wall will fall between the depth markers (see 4.2).
For both methods, drill at lease 4 fixing holes in the wall & fit suitable wall plugs for screw type being used.
Ensure valve-box is securely attached to the wall.
Use suitable sup
-
porting washers
under the screw
heads
The large hole to be cut in the panel or plaster board
should be Ø133mm (5.1/4”), which permits some clearance
around the valve-box diameter (Ø129mm)
ENSURE THIS HOLE IS ADEQUTELY SEALED. USE THE
FLEECE MAT SUPPLIED WHEN TILING OR USE A SUIT
-
ABLE SEALANT FOR PANEL INSTALLATIONS.
WARNING:
Cavity should only be closed off when all
pipe-work has been checked for leaks.
Remember
isolating valves must be installed in an
easily accessible location
5.4 Mounting valve-box into a solid wall
17


