22
Classic LX, RS -
Installation
SERVICING
SER
VICING
1.
Refer to Frame 36.
2.
Remove burner and
air box assembly.
Refer to Frame 31.
3.
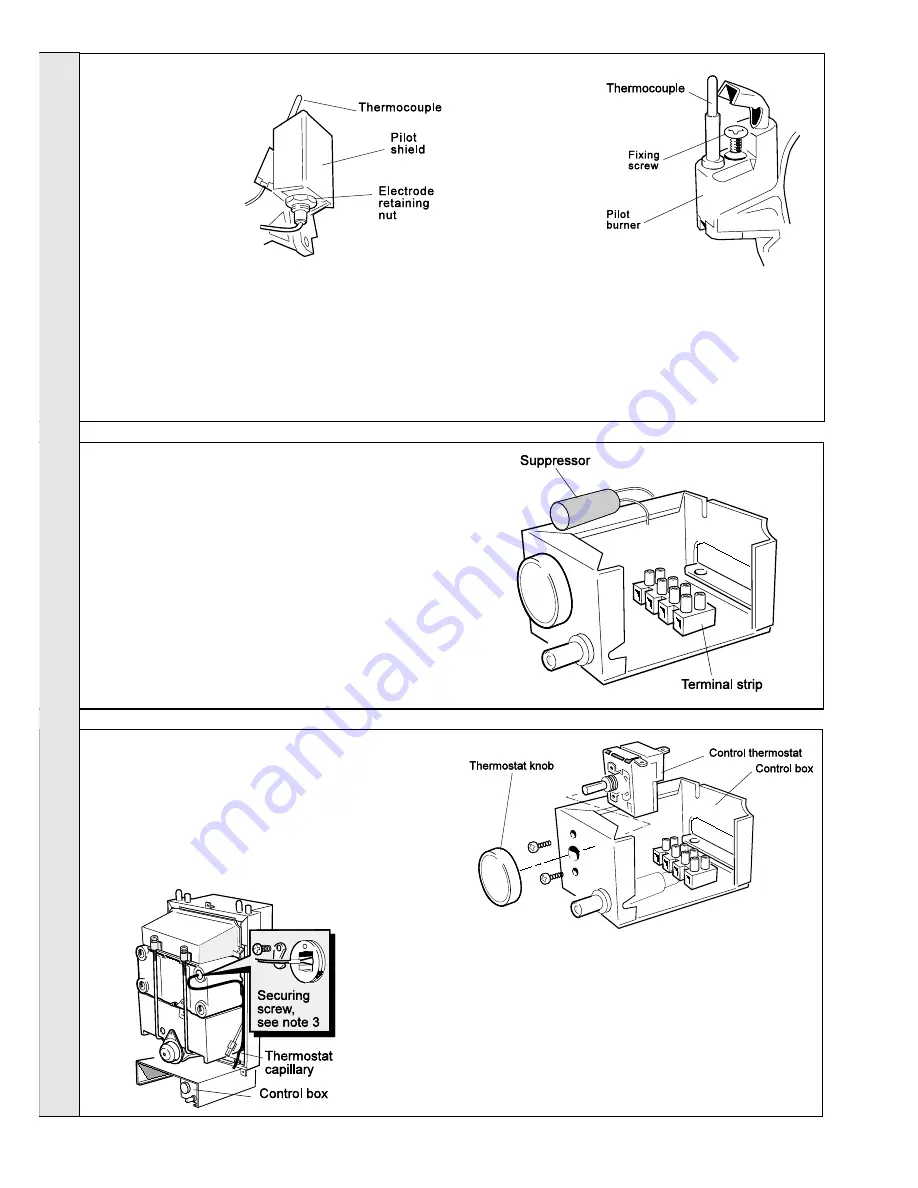
Remove the
electrode retaining
nut. Remove the pilot
shield and electrode.
4.
Unscrew the central pilot fixing screw and lift the pilot
burner clear of the thermocouple and pilot injector.
If required, the pilot injector may now be unscrewed and
the injector checked or replaced as necessary.
Ensure that the copper sealing washer is fitted when
replacing the injector.
40 SUPPRESSOR REPLACEMENT (IF FITTED)
1.
Refer to Frame 36.
2.
Remove the control box fixing screw. Pull the box forward
and downward to disengage.
3.
Remove the suppressor by unscrewing the suppressor
lead connections from the terminal block.
4.
Fit the new suppressor and re-assemble in reverse order.
Ensure that all of the electrical connections are correctly
remade - refer to 'Wiring Diagrams', Frames 19 - 23.
5.
Refit the control box.
6.
Replace the boiler casing.
7.
Check the operation of the control thermostat.
41 CONTROL THERMOSTAT REPLACEMENT
1.
Refer to Frame 36.
2.
Unclip the thermostat
capillary from the clips
situated on the back panel.
3.
Remove the thermostat
phial from the pocket in
the heat exchanger.
4.
Pull off the thermostat
knob.
6.
Remove the 2 screws securing the thermostat.
7.
Pull off the 2 electrical connections from the
thermostat head and the thermostat earth lead.
8.
Fit the new thermostat and refit in reverse order.
Ensure that the phial is correctly replaced in the
pocket and the capillary routed as previously.
9.
Replace the boiler casing.
10.
Check the operation of the new thermostat.
Refer to Frame 27.
39 PILOT BURNER REPLACEMENT
5.
Replace the pilot
burner and retain
with the M4 screw
previously
removed.
6.
Replace the
electrode and pilot
shield - retaining
both with the
electrode nut.
7.
Replace the airbox assembly and ensure that the gasket is
in position.
8.
Replace the burner.
9.
Replace the boiler casing.
10.
Check the pilot length. Refer to Frame 35.
11.
Check the pilot operation, ignition and cross-lighting.
5.
Remove the
control box
fixing screw
and pull the
box forward
and downward
to disengage.
Detail of thermostat
pocket
Summary of Contents for Classic LX RS 230
Page 1: ......


