20
Concord CXC -
Installation
24 ADJUSTING THE MANIFOLD PRESSURES
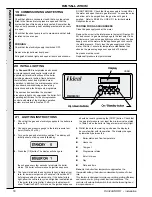
1. Press the [ENTER] button on the fascia panel, then press
either the up or down arrow button until the display shows:
then press [ENTER]. The microprocessor is now in
commissioning mode. Failure to enter the commissioning
mode will result in a fault condition being detected when
the following actions are carried out.
2. If desired, it is possible to use the onboard commissioning
instructions using the up/down arrow buttons. However the
following paragraphs provide more detailed instructions
and are recommended until the installer is familiar with the
Concord CXC.
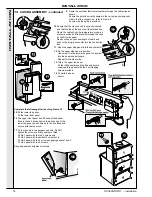
3. It is ESSENTIAL to adjust the LOW setting first.
4. Press the [0/1] button to turn the appliance OFF, then
disconnect the power leads from the right hand (HIGH)
gas valve.
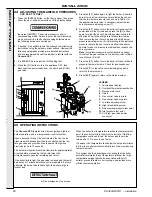
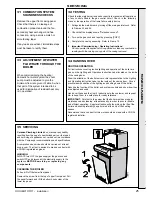
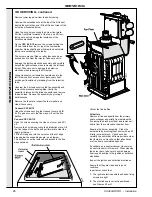
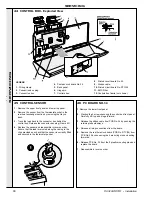
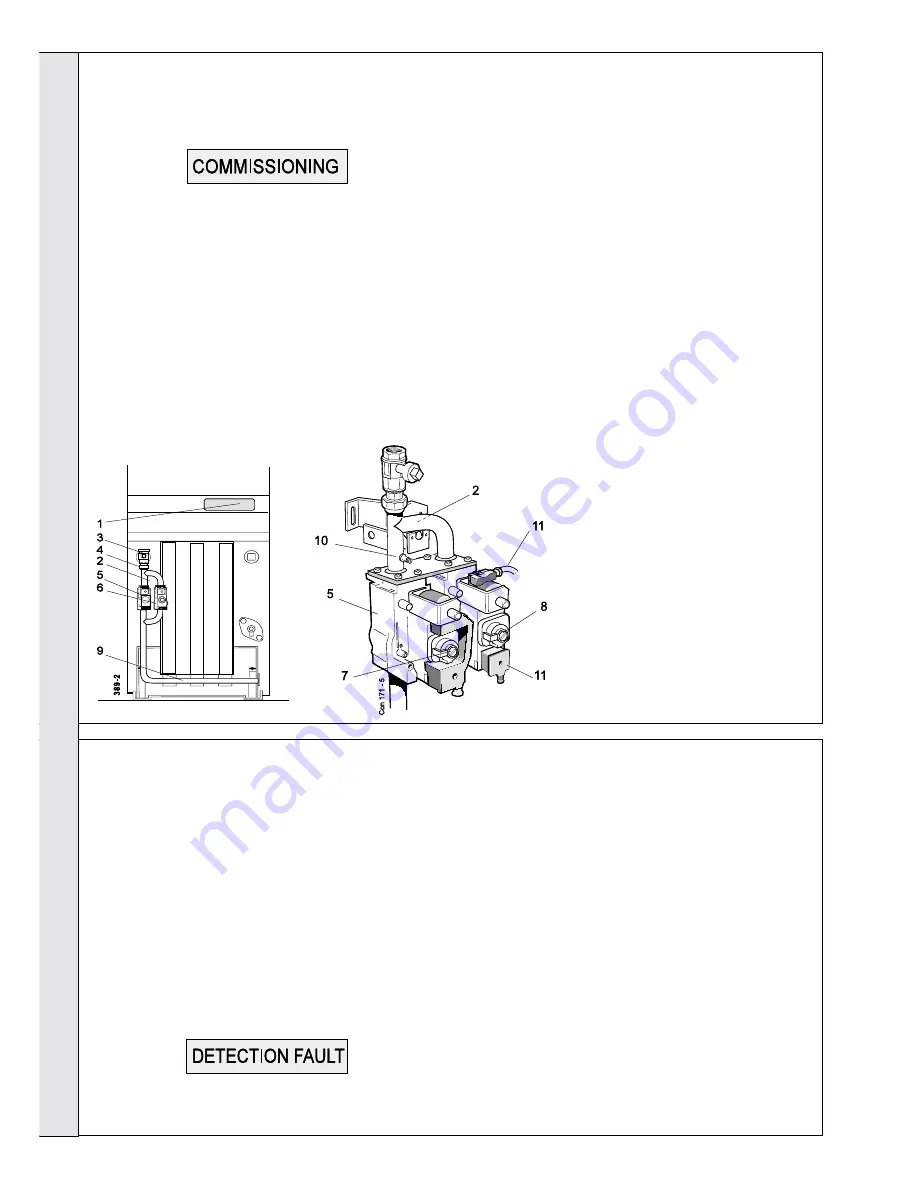
LEGEND
1. Fascia panel display.
2. Overheat thermostat reset button.
3. Main gas inlet cock.
4. Union.
5. Gas control valve low rate.
6. Gas control valve high rate.
7. Low rate adjusting screw.
8. High rate adjusting screw.
9. Burner setting pressure test point.
10. Inlet pressure test point.
11. RH (high) gas valve power
connector.
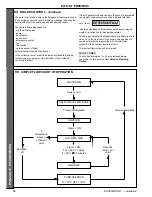
The Concord CXC features direct burner ignition, high/low
burner operation, and a microprocessor control system.
Upon a demand for heat, the controls start the fan, the air
pressure switch senses flow then the controls open the low
rate gas valve and provides a rapid spark at the ignition
electrode for up to 10 seconds.
The burner will light and remain at low rate for approximately 3
minutes before proceeding to high rate (when the
microprocessor opens the remaining gas valve).
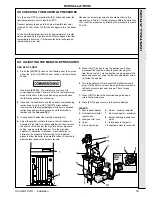
If the boiler fails to light, the gas valve is closed and there will
be a delay of 1 minute before the cycle is repeated. If, after 5
attempts, the burner has failed to light, the boiler will go to
lockout and
will be displayed on the screen.
When the boiler flow temperature reaches the thermostat set
point, the controls will turn the burner to low rate. If the flow
temperature continues to rise, the burner and fan will be
turned off at 3
o
C above the set point.
If, however, the temperature falls below the set point whilst on
low fire, the controls will automatically turn the burner back up
to maximum rate.
This system has the advantages of ensuring that the boiler
accurately maintains the set temperature (without the large
temperature swings that can be associated with on/off
boilers), prevents rapid or short cycling, and provides more
efficient system operation.
CXC 94 & 116 ONLY
5. Press the [0/1] button again to light the burner. Allow the
burner to run at low rate for several minutes then check
that the low burner pressure is as shown in Table 1 for
the appropriate boiler size. If necessary, adjust the low
burner pressure adjusting screw (7).
6. Press the [0/1] button to turn the boiler off, reconnect the
power leads to the RH valve and press the [0/1] button
again to relight the boiler. Adjust the system controls to
allow the boiler to fire at high rate for several minutes,
then remove the dust cover and adjust the high burner
pressure adjusting screw (8). After setting to the indicated
pressure replace the dust cover and allow the boiler to
operate for about 5 minutes to stabilise then recheck the
burner pressure.
Note.
If high rate pressure is not achievable as above
check that the gas restrictor in the low-rate valve is fitted
(see Frames 39 & 42).
7. Press the [0/1] button to turn the boiler off, then refit both
pressure test point screws. Check for gas soundness.
8. Press [EXIT] to leave the commissioning mode and
return to the main menu.
9. Press [EXIT] again to return to the status displays.
INSTALLATION
INST
ALLA
TION
25 OPERATING INSTRUCTIONS
Summary of Contents for Concord CXC 116
Page 1: ......
Page 38: ...38 Concord CXC Installation NOTES ...

