32
Concord CXC -
Installation
SER
VICING
SERVICING
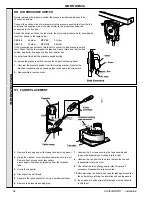
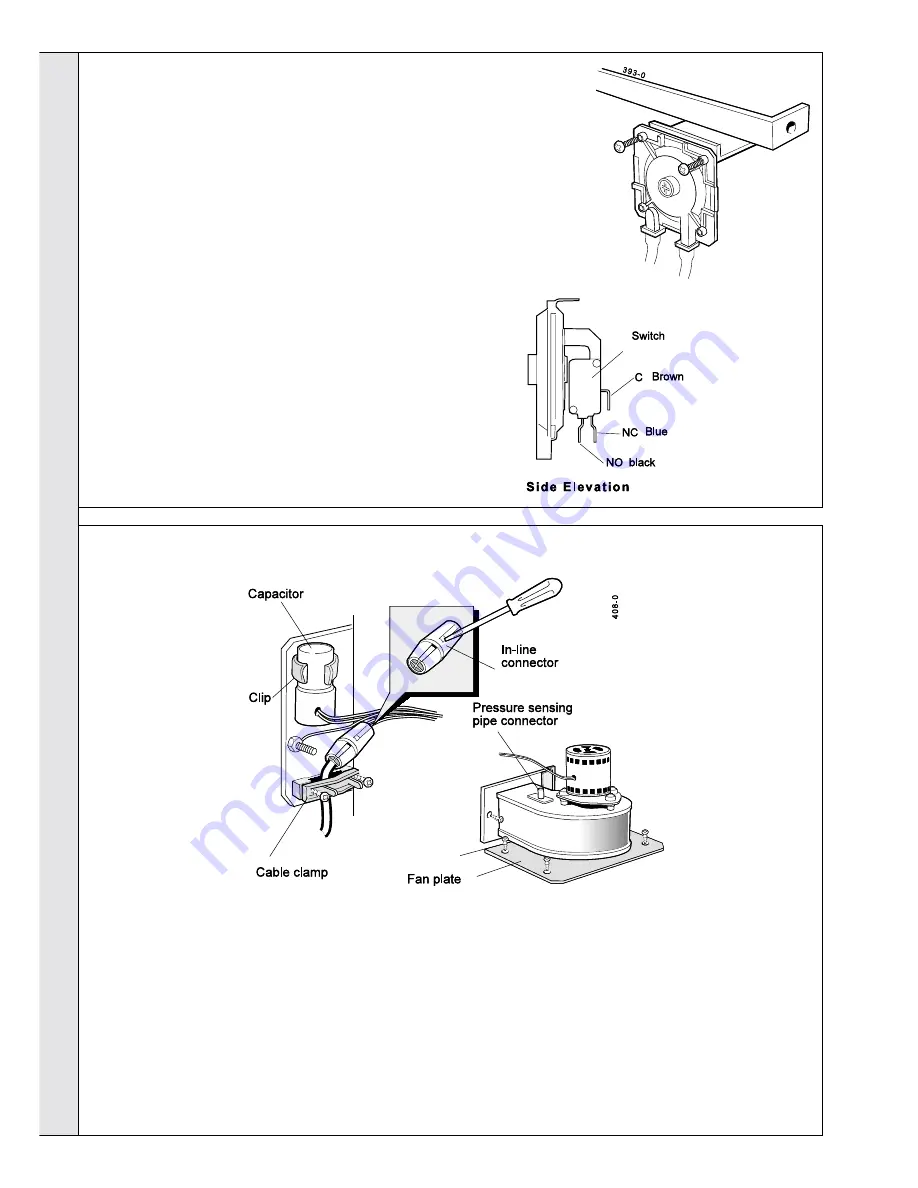
50 AIR PRESSURE SWITCH
Before replacing the pressure switch, the pressure switch reading should be
checked as follows:
Connect the positive side of a manometer to the pressure sensing line from the fan
scroll and the negative side of the manometer to the pressure sensing line
connected to the flue box.
Switch the boiler on. When the fan starts, the combined pressure (cold) should be at
least that shown in the table below:
CXC 48
3.4mbar
CXC 94
2.7mbar
CXC 70
3.2mbar
CXC 116
2.4mbar
If the pressure does not reach this level it is unlikely to be a pressure switch
fault. Check that the fan impeller is clean and free to rotate and that the flue
system and boiler flue ways are free from obstruction.
Do not attempt to adjust the pressure switch setting.
To replace the pressure switch, remove the upper front casing panel.
1. Unscrew the pressure switch from its mounting bracket. Transfer the
electrical connections and sensing pipes to the new pressure switch.
2. Reassemble in reverse order.
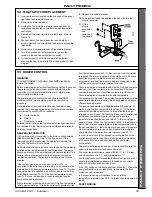
51 FAN REPLACEMENT
7. Unscrew the 5 screws securing the fan assembly and
remove the assembly by pivoting it to the right.
8. Unscrew the fan from the fan plate, replace the fan and
reassemble in reverse order.
9. Check that the fan outlet gasket is intact. Replace if
necessary. Reassemble in reverse order.
10. Recommission the boiler and check for leakage around the
fan outlet before refitting the insulation and casing panels.
11. If any leaks are evident immediate steps must be taken to
rectify them.
1. Remove the casing upper front panel and lower top panel.
2. Hinge the cleanout cover insulation upward and to the left.
Remove front access cover (secondary
h/exchanger) insulation by releasing from the retention
tabs.
3. Unclip the capacitor.
4. Disconnect the earth lead.
5. Separate the inline connector, using a small screwdriver.
6. Remove the pressure sensing pipe.
Summary of Contents for Concord CXC 116
Page 1: ......
Page 38: ...38 Concord CXC Installation NOTES ...

