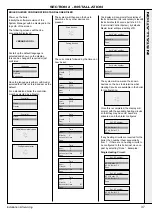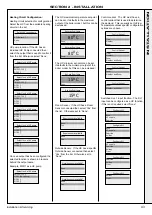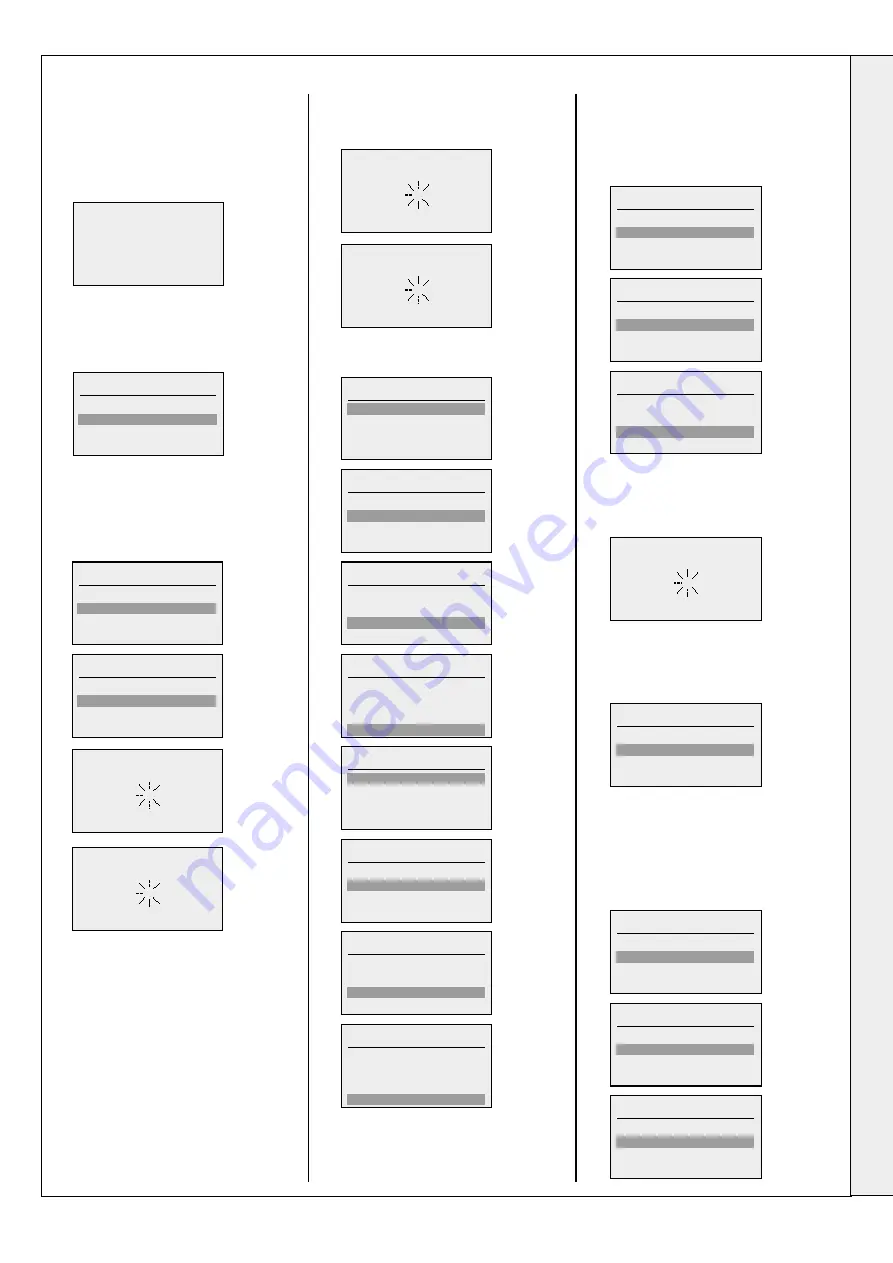
Power up the boiler
Initailly the software revision of the
System Manager with be displayed in the
top LHS of the screen.
The following screens will then be
sequentially displayed:
At start up the default language is
selected and shown on the display,
this can be changed if required or just
confirmed:
Once the language is either confirmed or
selected then this is stored and set as the
default.
For a standalone boiler the controller
must be selected as a Master:
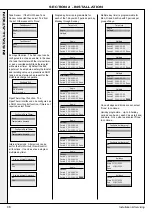
The system will then scan the bus to
determine if any other devices are
present:
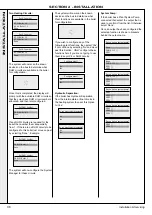
The current date followed by the time can
now be set:
The display will now prompt for selection of
the boiler number, this is necessary to identify
the boiler should it become part of a
i
CCS
(Commercial Control System), by default a
Master boiler will have a setting of 01:
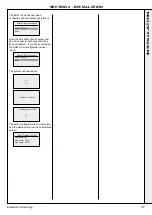
The system will now scan the known
devices on the bus to determine what
Heating Circuits are available in the boiler
for configuration:
Once this is completed, the display will
prompt with the available heating circuits
so that they may have HC numbers
allocated, and then later configured.
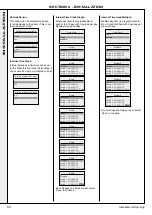
If any heating circuits are required for the
boiler, then number them sequentially
from 1. If there are no heating circuits to
be configured to this boiler just move on
past by selecting "Done". Examples:
Single Heating Circuit:
Controller
Slave
Master
Controller
Slave
Master
Language
English
Francais
Nederlands
BOILER GUIDED CONFIGURATION STAND ALONE BOILER
Date
Year: 2018
Month: 7
Day: 4
Done
Set boiler number
Boiler ##
Done
Set HC number
HC ## Boiler 1.1
HC ## Boiler 1.2
Done
Set HC number
HC 01 Boiler 1.1
HC ## Boiler 1.2
Done
Set HC number
HC 01 Boiler 1.1
HC ## Boiler 1.2
Done
Set HC number
HC ## Boiler 1.2
Done
Time
Hour: 0
Minute: 0
Auto su/wi time:
Done
Date
Year: 2018
Month: 7
Day: 4
Done
Set boiler number
Boiler 01
Done
Time
Hour: 0
Minute: 0
Auto su/wi time:
Done
Date
Year: 2018
Month: 7
Day: 4
Done
Set boiler number
Boiler 01
Done
Time
Hour: 0
Minute: 0
Auto su/wi time:
Done
Time
Hour: 0
Minute: 0
Auto su/wi time:
Done
Date
Year: 2018
Month: 7
Day: 4
Done
< BRAND LOGO >
Scan devices
Pairing devices
Initialize communication
Configure as master
37
Installation & Servicing
SECTION 2 - INSTALLATION
INST
ALLA
TION
Summary of Contents for EVOMAX 2 30
Page 4: ...4 Installation Servicing...
Page 75: ...75 Installation Servicing NOTES...
Page 76: ...76 Installation Servicing NOTES...
Page 77: ...77 Installation Servicing NOTES...
Page 78: ...78 Installation Servicing NOTES...

