37
Response FF80
- Installation
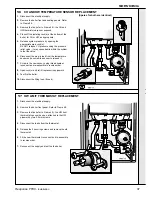
56 CH AND HW TEMPERATURE SENSOR REPLACEMENT
SERVICING
57 HW LIMIT THERMOSTAT REPLACEMENT
(Spares for both are identical)
1.
Disconnect the electrical supply.
2.
Remove the boiler front panel. Refer to Frame 48.
3.
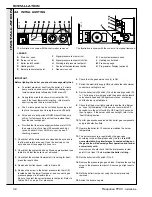
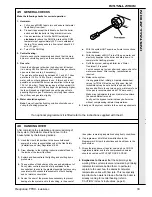
Remove the fan (refer to Frame 49) : the HW limit
thermostat can now be seen, attached to the HW
pipework by two 3.5mm screws.
4.
Disconnect the leads from the thermostat.
5.
Release the 2 securing screws and remove the old
thermostat.
6.
Fit the new thermostat, reconnect and re-assemble
in reverse order.
7.
Reconnect the supply and test fire the boiler.
1.
Disconnect the electrical supply.
2.
Remove the boiler front and sealing panels. Refer
to Frame 48.
3.
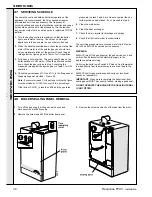
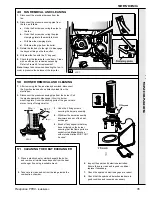
Remove the fan (refer to Frame 49) : the CH and
HW thermistors are now exposed.
4.
Close off the isolating cock(s) at the bottom of the
boiler, for CH or HW, as appropriate.
5.
Release system pressure by opening the
appropriate drain cock(s).
Do NOT release CH pressure using the pressure
relief valve - it may cause debris within the system
to foul the valve.
6.
Disconnect the plug-in lead from the temperature
sensor and unscrew the sensor to release it.
7.
Screw in the new sensor, using thread sealant,
reconnect and re-assemble in reverse order.
8.
Open cock(s) and refill / repressurise pipework.
9.
Test fire the boiler.
10.
Disconnect the filling loop (if used).

