27: F
LOW
C
ALCULATION
I
NSTRUCTIONS
27-24
FC6A S
ERIES
MICROS
MART
L
ADDER
P
ROGRAMMING
M
ANUAL
FC9Y-B1726
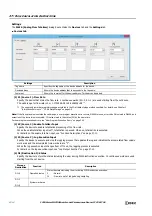
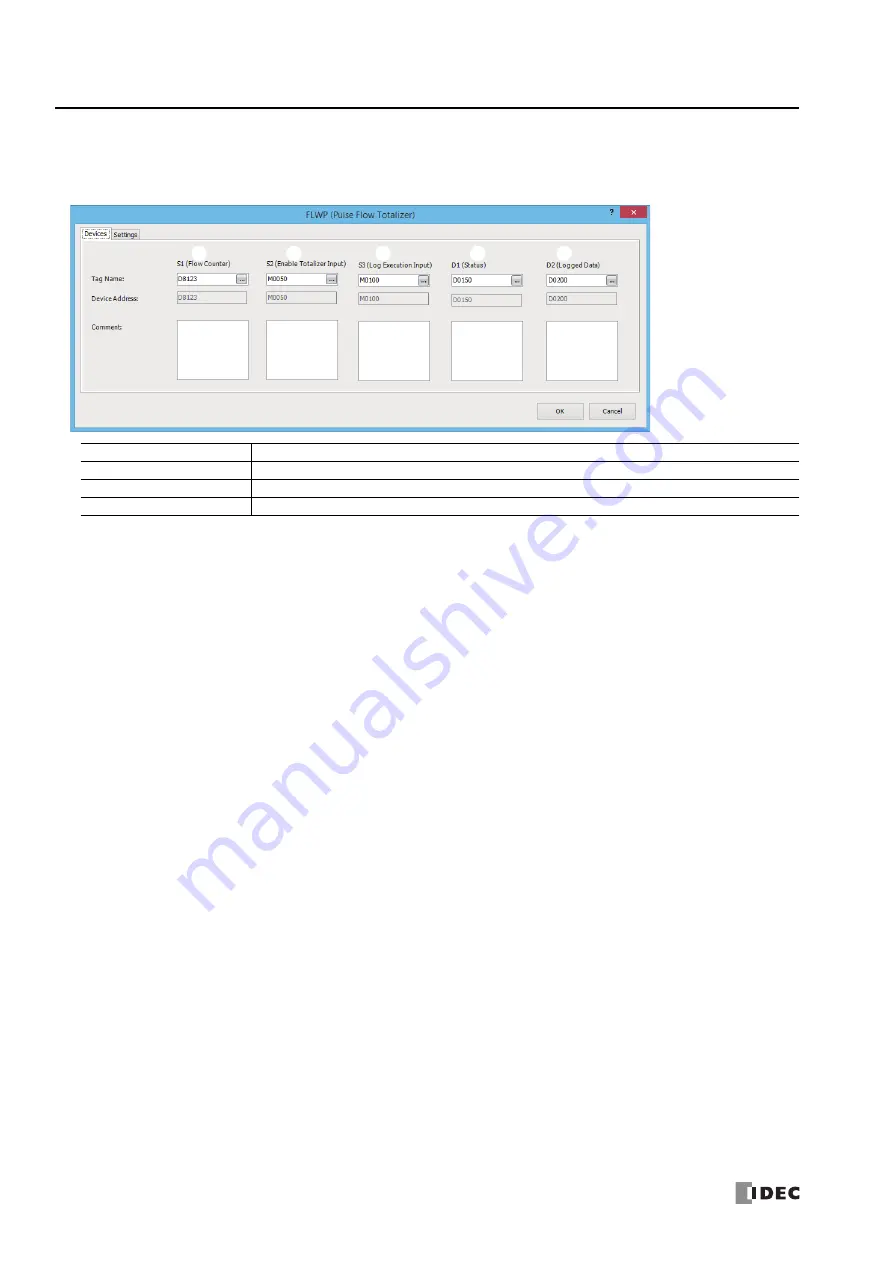
Settings
The
FLWP (Pulse Flow Totalizer)
dialog box contains the
Devices
tab and the
Settings
tab.
■
Devices tab
(1) S1 (Source 1): Flow Counter
The flow counter setting differs according to the "(2) Counter Type" on page 27-26 operation type. Starting from the set
device, a number of continuous devices are used according to the data type.
When Counter Type is "Free Run"
Specify the device that stores the counter value that is used to continuously add pulses. To find the number of pulse count
for each scan, calculate it from the difference between the flow counter of the previous scan and latest flow counter.
When Counter Type is "Difference"
Specify the device that stores the number of pulse count for each scan.
The setting range differs according to "(2) Counter Type" on page 27-26.
If
Data Type
is "Word (W)", the range is 0 to 65,535.
If
Data Type
is "Double (D)", the range is 0 to 4,294,967,295
.
(2) S2 (Source 2): Enable Totalizer Input
Set the device to enable flow volume totalization.
When the enable totalizer input is off, totalization is paused. When on, totalization is executed.
For details on the enable totalizer input, see "Function Descriptions" on page 27-20.
(3) S3 (Source 3): Log Execution Input
Specify the device to execute and stop the logging process that updates the log and initializes the accumulated flow volume
work area and the accumulated time work area to "0".
When the log execution input changes from off to on, the logging process is executed.
While the FLWP instruction is being executed, execute the next logging process within 119 hours of the previous logging
process.
For details on the log execution input, see "Log Output Function" on page 27-23.
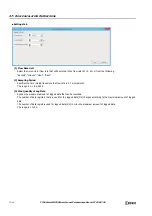
Settings
Description
Tag name
Specifies the tag name or the device address for the device.
Device address
Shows the device address that corresponds to the tag name.
Comment
Shows the comment for the device address. This item can be edited.
*1 The upper and lower data registers change according to the 32-bit data storage method specified. For details, see Chapter 3
"Instructions Reference" - "32-bit Data Storage" on page 3-9.
(1)
(2)
(3)
(4)
(5)
Summary of Contents for MICROSmart FC6A Series
Page 1: ...B 1726 7 FC6A SERIES Ladder Programming Manual ...
Page 8: ...Preface 7 FC6A SERIES MICROSMART LADDER PROGRAMMING MANUAL FC9Y B1726 ...
Page 32: ...1 OPERATION BASICS 1 20 FC6A SERIES MICROSMART LADDER PROGRAMMING MANUAL FC9Y B1726 ...
Page 96: ...3 INSTRUCTIONS REFERENCE 3 18 FC6A SERIES MICROSMART LADDER PROGRAMMING MANUAL FC9Y B1726 ...
Page 130: ...4 BASIC INSTRUCTIONS 4 34 FC6A SERIES MICROSMART LADDER PROGRAMMING MANUAL FC9Y B1726 ...
Page 192: ...9 SHIFT ROTATE INSTRUCTIONS 9 12 FC6A SERIES MICROSMART LADDER PROGRAMMING MANUAL FC9Y B1726 ...
Page 272: ...12 DISPLAY INSTRUCTIONS 12 24 FC6A SERIES MICROSMART LADDER PROGRAMMING MANUAL FC9Y B1726 ...
Page 284: ...14 REFRESH INSTRUCTIONS 14 6 FC6A SERIES MICROSMART LADDER PROGRAMMING MANUAL FC9Y B1726 ...
Page 502: ...25 DATA LOG INSTRUCTIONS 25 22 FC6A SERIES MICROSMART LADDER PROGRAMMING MANUAL FC9Y B1726 ...
Page 546: ...26 SCRIPT 26 44 FC6A SERIES MICROSMART LADDER PROGRAMMING MANUAL FC9Y B1726 ...
Page 598: ...APPENDIX A 14 FC6A SERIES MICROSMART LADDER PROGRAMMING MANUAL FC9Y B1726 ...


