4 Customizing WindO/I-NV4
2-62
WindO/I-NV4 User’s Manual
●
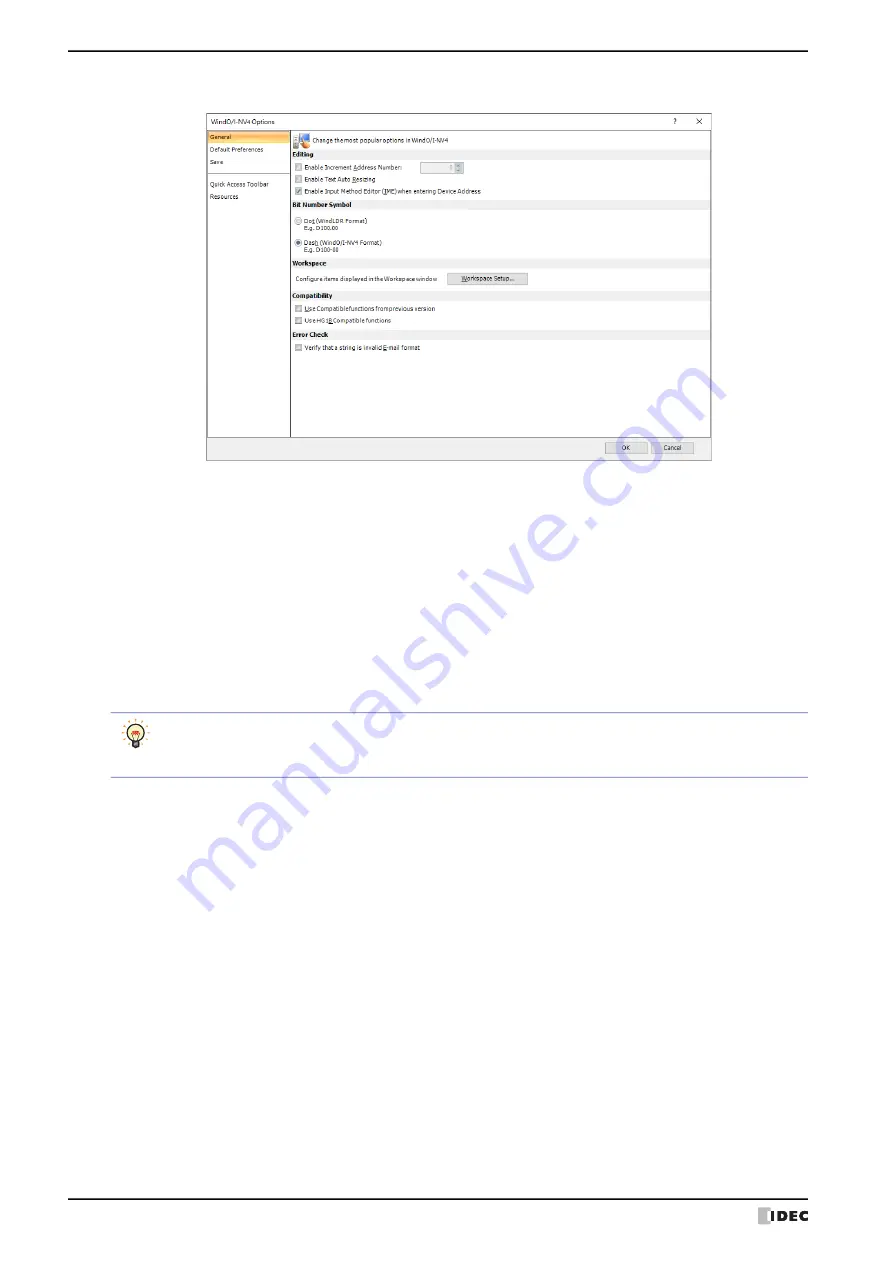
General Tab
■
Editing
■
Bit Number Symbol
Select the separator for address numbers and bit numbers. When manually entering device address, you can enter
either separator, but they will be displayed using the symbol selected here.
■
Workspace
*1 For the following external devices, this feature cannot be used because the device address format is different.
- The
Manufacturer
is
ABB
or
Emerson
- The
Manufacturer
is
Allen-Bradley
and the
Communication Driver
is
Logix Native Tag(Ethernet)
Enable Increment Address Number:
When copying or duplicating parts, select this
check box to add a specified value (-999 to 999)
to address number of the device address set for
the original part before pasting it to the screen.
Enable Text Auto Resizing:
Select this box to automatically change the text
size according to a change in part size.
Enable Input Method Editor (IME) when entering Device Address: Select this box to enter characters other than
alphanumeric characters using the input method
editor (IME) in text boxes for entering device
addresses.
You cannot enter full-width characters in text boxes that only accept alphanumeric input, even if the IME is
enabled.
Select this box to use full-width characters in tag names in the device address settings.
Dot (WindLDR Format):
Separates the address number and bit number with a dot.
Example: D100.00
Dash (WindO/I-NV4 Format): Separates the address number and bit number with a dash.
Example: D100-0
Workspace Setup:
Displays the Workspace Setup dialog box. You can configure items displayed in
the workspace window. For details, refer to “4.2 Customizing the Workspace”
Summary of Contents for WindO/I-NV4
Page 1: ...B 1701 16 User s Manual...
Page 108: ...5 WindO I NV4 Common Operations and Settings 2 76 WindO I NV4 User s Manual...
Page 256: ...7 BACnet Communication 3 148 WindO I NV4 User s Manual...
Page 372: ...6 Screen Restrictions 5 32 WindO I NV4 User s Manual...
Page 390: ...5 Part Library Function 6 18 WindO I NV4 User s Manual...
Page 420: ...3 Text 7 30 WindO I NV4 User s Manual...
Page 628: ...2 Multi State Lamp 9 34 WindO I NV4 User s Manual...
Page 924: ...4 Meter 11 76 WindO I NV4 User s Manual...
Page 990: ...7 Timer 12 66 WindO I NV4 User s Manual...
Page 1030: ...4 Using Data and Detected Alarms 13 40 WindO I NV4 User s Manual...
Page 1098: ...4 Using the Data 15 22 WindO I NV4 User s Manual...
Page 1248: ...5 Restrictions 22 18 WindO I NV4 User s Manual...
Page 1370: ...2 Monitoring on the MICRO I 25 28 WindO I NV4 User s Manual...
Page 1388: ...4 Restrictions 26 18 WindO I NV4 User s Manual...
Page 1546: ...5 Module Configuration Dialog Box 30 36 WindO I NV4 User s Manual...
Page 1614: ...3 Settings 34 14 WindO I NV4 User s Manual...
Page 1726: ...5 Text Alignment A 10 WindO I NV4 User s Manual...


