35
MorphoWave Compact - 2018_2000035853
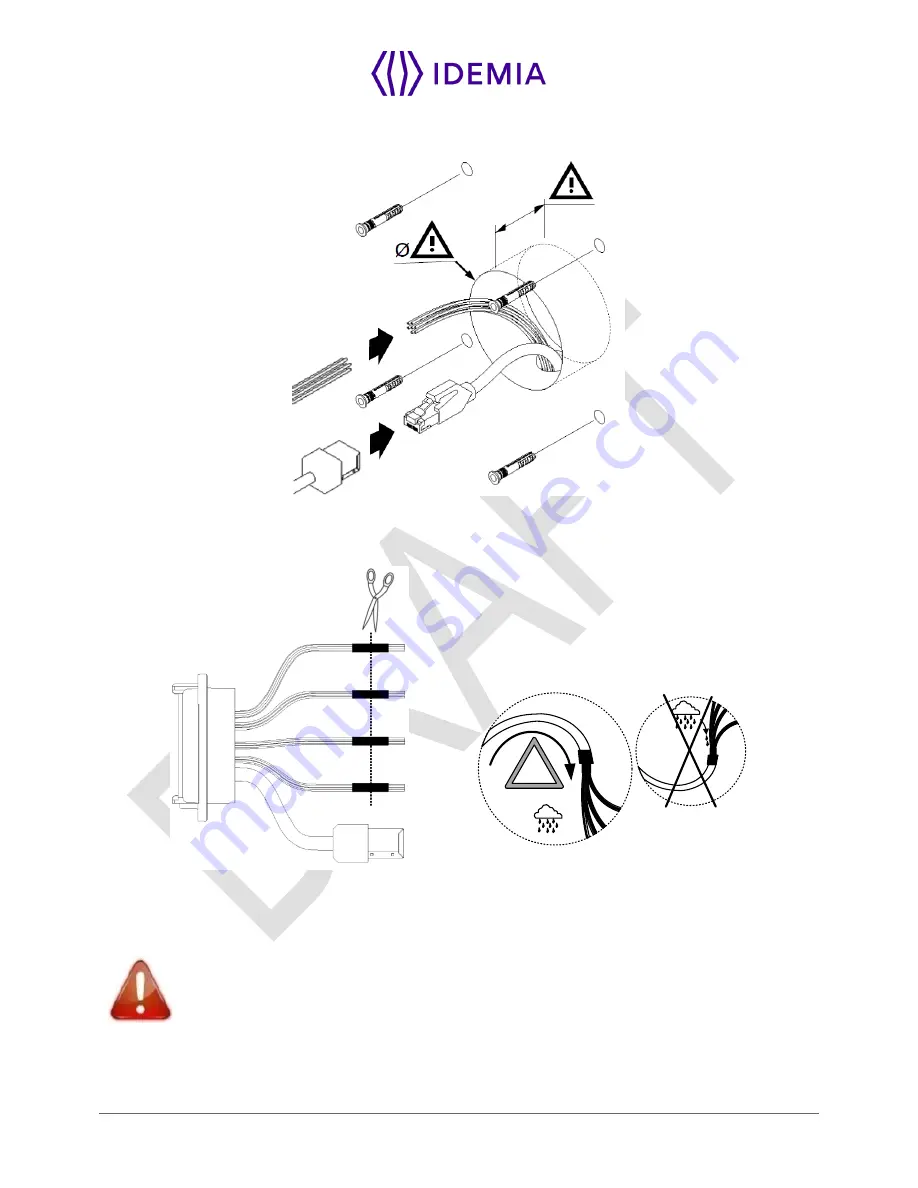
Then connect the cables:
Before cabling the product, remove the connector by cutting cables in the middle of heat shrink tube.
Please refer to section 4 / for explanations of how cables/wires should be connected, according to wire
color code.
IP65
!
Figure 8: Cable preparation : cable position for water tightness
Cable for wiring shall be AWG 20 to 24, length shall be adapted to the size of the hole in the wall, to
terminal connections, and to the distance between the electric source and the terminal itself.
To ensure water tightness, be sure to bend the cable downward.
Summary of Contents for MorphoWave Compact
Page 1: ...Copyright 2018 Idemia May 2018 2018_2000035853 MorphoWave Compact Installation guide ...
Page 2: ...Copyright 2018 Idemia May 2018 2018_2000035853 ...
Page 9: ...9 MorphoWave Compact 2018_2000035853 1 Introduction ...
Page 21: ...21 MorphoWave Compact 2018_2000035853 2 General description ...
Page 29: ...29 MorphoWave Compact 2018_2000035853 3 Installation procedure ...
Page 37: ...37 MorphoWave Compact 2018_2000035853 3 3 4 Attach the device on the base plate ...
Page 41: ...41 MorphoWave Compact 2018_2000035853 4 Electrical interface ...
Page 58: ...58 MorphoWave Compact 2018_2000035853 5 User interface ...
Page 64: ...64 MorphoWave Compact 2018_2000035853 6 Accessories Software Licenses and PC Applications ...
Page 67: ...67 MorphoWave Compact 2018_2000035853 7 Recommendations ...
Page 70: ...70 MorphoWave Compact 2018_2000035853 8 Annex 1 finger placement recommendations ...
Page 74: ...74 MorphoWave Compact 2018_2000035853 ...
Page 75: ...75 MorphoWave Compact 2018_2000035853 9 Annex 2 Bibliography ...
Page 78: ...78 MorphoWave Compact 2018_2000035853 10 Annex 3 Support ...
Page 80: ...Copyright 2017 Photo GettyImages 656164914 Copyright 2017 Photo GettyImages 656164914 ...


