18 FD151 Gas Compressor
5.1 VALVES
CAUTION: Always relieve pressure in the unit
before attempting any repairs.
Low capacity, overheating, noise and vibration are all
indications of possible valve failure. Because valve
problems can manifest themselves in so many
different forms, valve inspection is frequently the best
first step in troubleshooting poor performance.
To remove and inspect valves,
begin by
depressurizing and purging
(if necessary) the unit.
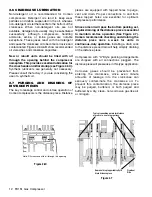
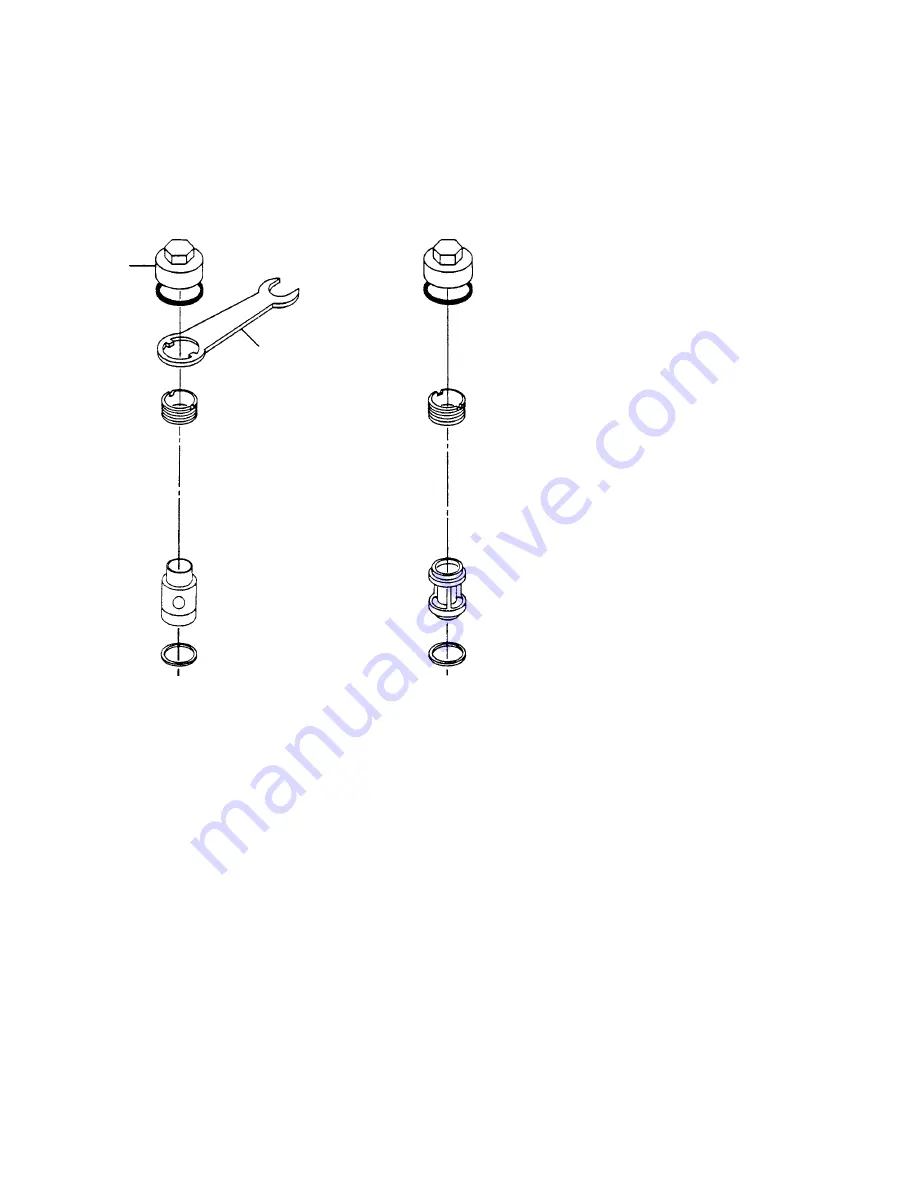
Next, remove the valve cap or unloader assembly and
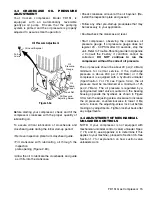
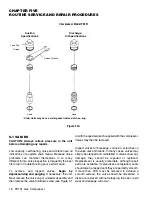
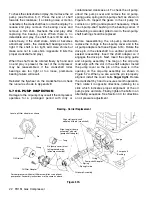
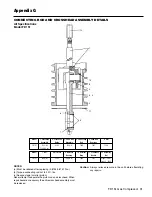
then remove the valve holddown screw (see Figure 5.1
A) with the special wrench supplied with the compressor.
Valves may then be removed.
Inspect valves for breakage, corrosion, scratches on
the valve disk and debris. In many cases, valves may
simply be cleaned and reinstalled. If valves show any
damage, they should be repaired or replaced.
Replacement is usually preferable, although repair
parts are available. If valve disks are replaced, seats
should also be lapped until they are perfectly smooth.
If more than .005” must be removed to achieve a
smooth surface, the valve should be discarded. If
disks are replaced without relapping the seat, rapid
wear and leakage will occur.
Figure 5.1A
Compressor Model FD151
CHAPTER FIVE
ROUTINE SERVICE AND REPAIR PROCEDURES
Suction:
Specification 4
Discharge:
All Specifications
* Older Units may have a metal gasket instead of the o-ring.
O-rings*
Corken Wrench
Valve Cap
Head
Head

