7
Camera Registration
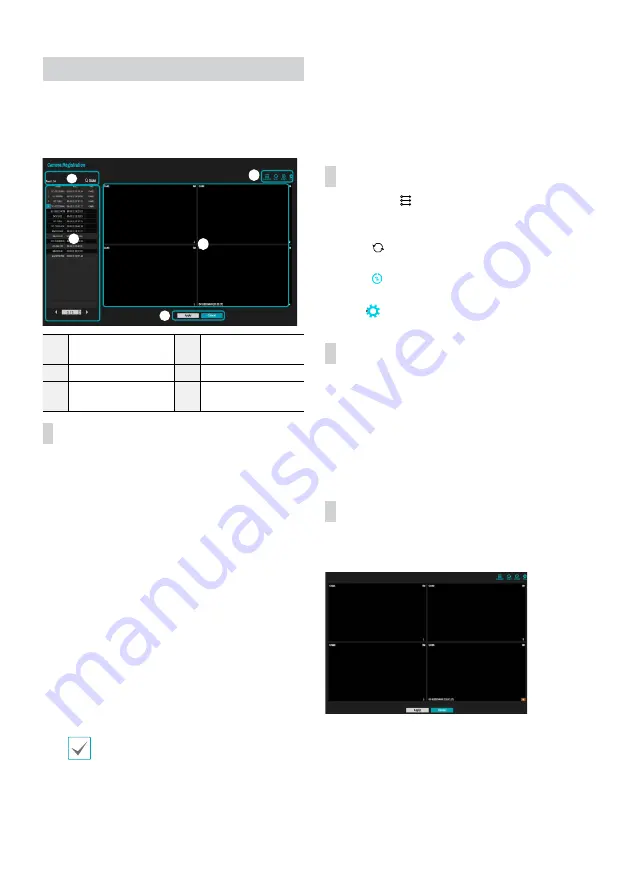
Once Network Setup Wizard is complete, live mode screen
appears. While in live mode, right-click on the mouse and
select Camera Registration to run the Camera Registration
mode. It allows you to scan for the cameras connected to
the NVR.
1
Camera Scan Button
2
Camera View
Buttons
3
Camera List Area
4
Video Display Area
5
Apply/Cancel
Buttons
Camera Scan Button
Use this button to scan for and register cameras.
Pressing the
Scan
button displays the following submenu:
●
Rescan
: Scan for DirectIP cameras that were not scanned
automatically.
●
Go To Camera
: Moves the focus automatically to the
camera using MAC address of camera in the camera list.
●
Search Scope
: Filters the cameras in the camera list
depending on the search scope such as specified IP
address range.
●
Screen Auto. Assign
: Assigns the detected cameras on
the video display area.
●
Camera list
: By using the camera information file, .csv,
the user can register the cameras easily.
●
Scan Refresh Interval
: Configures the refresh interval to
scan the camera.
●
Third Party Scan
: Used to Scans for IDIS Open cameras
that do not support automatic scan feature.
- Protocol: Select the protocol used by the camera (or
video encoder) you wish to search for.
Even if the network device uses a protocol
supported by the NVR, the device itself may not
be visible for scanning and registration by the
NVR. For more information about supported
network devices and models, contact your
retailer.
- Mode: Select the scan mode.
1
Select
Scan
to commence scanning.
2
Select a camera from the scan list and then select
Add
Camera
. The Device Login window will appear.
3
Enter a
User ID
and a
Password
for the selected
camera.
Camera View Buttons
●
ALIGNMENT
Button: Realigns camera screens
displayed on the video display area in the order of
Video
In
port connections.
●
RESET
Button: Refreshes the video display area and
the camera list.
●
Bitrate
Button: Changes the bitrate allocation for
each channel.
●
TOOL
Button: Displays network camera tool window
and changes the camera protocol.
Camera List Area
Following options can be accessed by right-clicking on a
camera list entry:
●
Add/Remove Camera
: Adds or removes the selected
camera. The Add Camera option is inactive if the camera
has already been added to the screen.
●
Authentication
: Enter the necessary camera login info.
This option is inactive for DirectIP cameras because they
do not require login.
Video Display Area
Left-click on the video display area to toggle between split
screen and single screen modes.
Drag the camera screens around to rearrange them.
1
3
4
2
5


