ID4/IE4 Series
•
Service Manual
Rev:1.0
34
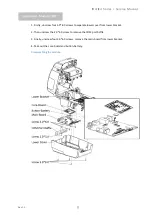
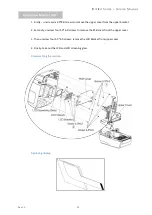
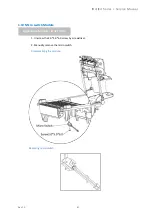
1. Firstly, unscrew six 3.0*8.0 screws and remove the upper cover from upper bracket.
2. Secondly, unscrew four 3.0*6.0 screws and remove PCB cover from upper cover.
3. Then unscrew two 2.5*6.0 screws, take out the cable fastener.
4. Finally, unscrew two 3.0*6.0 screws to remove PCB board from upper cover.
5. Manually remove the feed button and LED.
Disassembling the module:
Replacing keypad:
Applicable Module: iE4S
Summary of Contents for ID4 Series
Page 1: ...Label Printer Service Manual ID4 IE4 Series IE4P IE4S ID4S ID4P...
Page 39: ...ID4 IE4 Series Service Manual Rev 1 0 38 Replacing lower photoelectric module...
Page 41: ...ID4 IE4 Series Service Manual Rev 1 0 40 Replacing lower photoelectric module...
Page 50: ...ID4 IE4 Series Service Manual Rev 1 0 49 1 16 Power Cord 1 17 Power Adapter...
Page 52: ...ID4 IE4 Series Service Manual Rev 1 0 51 Module Purchase for Service...
Page 58: ...Rev 1 0 57 2 3 Service Process...
Page 59: ...Rev 1 0 58...
Page 61: ...ID4 IE4 Series Service Manual Rev 1 0 60 3 1 The Exploded View ID4P...
Page 62: ...ID4 IE4 Series Service Manual Rev 1 0 61...
Page 63: ...ID4 IE4 Series Service Manual Rev 1 0 62 ID4S...
Page 64: ...ID4 IE4 Series Service Manual Rev 1 0 63...
Page 65: ...ID4 IE4 Series Service Manual Rev 1 0 64 IE4P...
Page 66: ...Rev 1 0 65...
Page 67: ...ID4 IE4 Series Service Manual Rev 1 0 66 IE4S...


