background image


ViVOpay Kiosk III User Manual 


Page 14 of 

24


2.


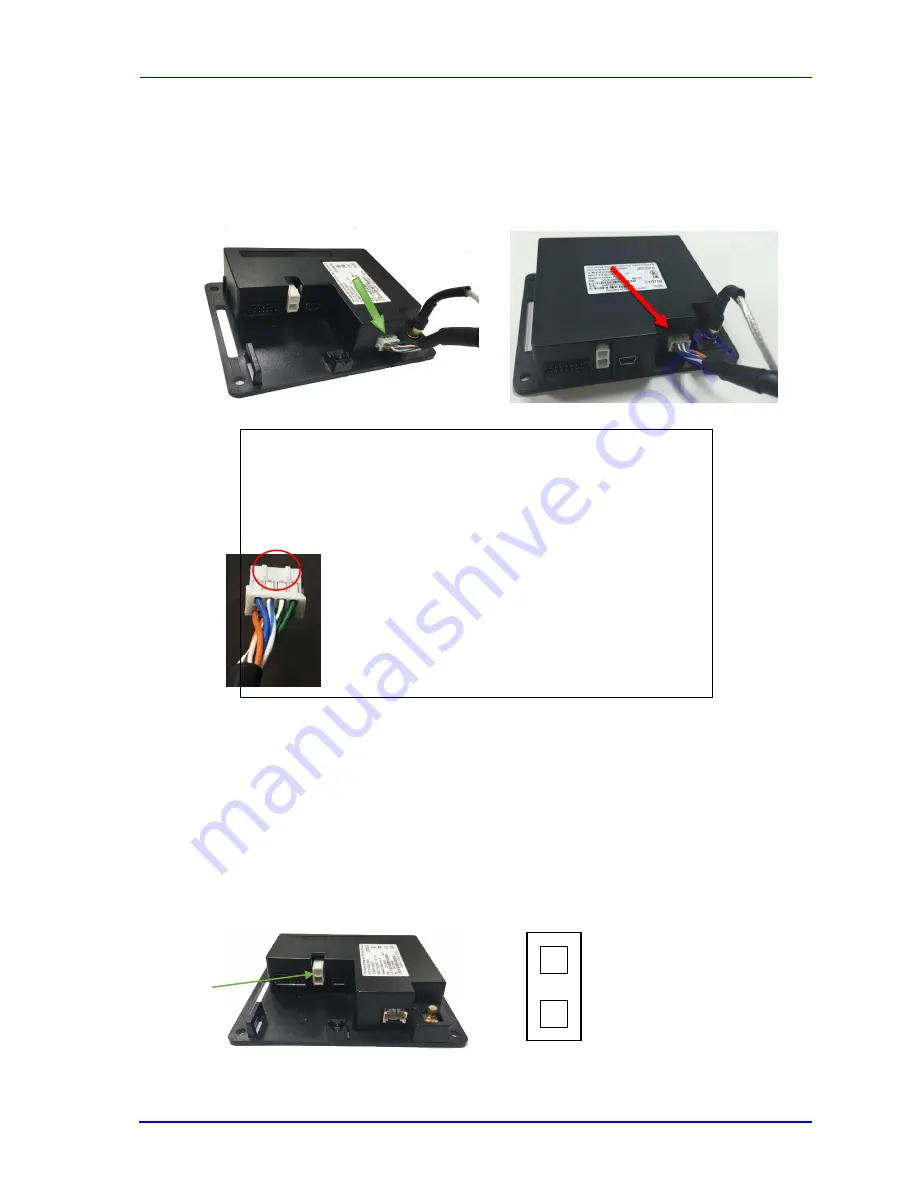
Attach the other end of the cable (80136204-001) from the antenna to the ViVOpay Kiosk 
III Controller. 
 
 
Non-SRED Controller 


SRED Controller 


Note: Verify that the polarizing lug on the end of the data cable is 
facing towards the top of the ViVOpay Kiosk III Controller (away 
from the mounting plate) before inserting the cable. If the cable is 
installed incorrectly (upside-down), it will apply the wrong polarity 
to the LEDs and damage them. 


2.5


Connecting to USB Power 

The KIOSK III can be powered through the serial communications port or the two-socket power 
connector. If you are using USB data communications, you must power the KIOSK III though the 
two-socket power connector. 
 
C7.5 to 45VDC to the white two-socket Molex connector (mating connector Molex P/N 
0039012020 with 5556-series crimps) or to pins 1 and 2 of the RS-232 connector (see next section). 


Non-SRED 


Pin 1 - +7.5v to 45VDC 

Pin 2 - Ground 

Summary of Contents for vivopay kiosk iii

Page 1: ...ViVOpay Kiosk III User Manual 80136500 001 Rev D ...

Page 2: ...hanical recorded or any other method or translated into another language or language form without the express written consent of ID TECH ID TECH is a registered trademark of International Technologies and Systems Corporation ViVOpay and Value through Innovation are trademarks of International Technologies and Systems Corporation Other trademarks are the property of the respective owner Warranty Di...

Page 3: ...t off and on the user is encouraged to try and correct the interference by one or more of the following measures Reorient or relocate the receiving antenna Increase the separation between the equipment and the receiver Connect the equipment into an outlet on a circuit different from that to which the receiver is connected Consult the dealer or an experienced radio TV technician for help Changes or...

Page 4: ...g the ViVOpay Kiosk III Controller 12 2 3 1 Mounting the ViVOpay Kiosk III Controller Using Screws 12 2 3 2 Mounting the ViVOpay Kiosk III Controller Using Mounting Tape 13 2 4 Attaching the Cables from the Antenna to the Controller 13 2 5 Connecting to USB Power 14 2 6 Connecting to the Data Port 15 2 7 Using the ViVOpay Kiosk III to Make a Purchase 17 Presenting Cards or NFC Phones 17 2 8 Making...

Page 5: ...also available to aid rapid development of applications that talk to Kiosk III Be sure to check the Downloads link on the ID TECH public Knowledge Base at https atlassian idtechproducts com confluence display KB Knowledge Base Home for the latest product downloads The ViVOpay Kiosk III is designed to support a wide input power range Both data and power can be supplied via a single cable to reduce ...

Page 6: ...crypt transaction sensitive data to meet PCI requirements SAM Not supported Supported Pass Through Mode Output Always Plaintext 1 Output plaintext if no sensitive data 2 According to white list a If the AID is in white list output plaintext message b If the AID is not in the white list no output USB VID 0x0ACD PID 0x3710 VID 0x0ACD PID 0x2830 Burst Mode setting If MSD EMV encryption is ON and Data...

Page 7: ...O 18092 ISO 21481 PCD NFC Receiver Subcarrier Frequency 847 5 KHz Receiver Subcarrier Data ISO 14443 2 Type A Modified Manchester ISO 14443 2 Type B NRZ L BPSK ISO 18092 ISO 21481 PCD NFC Typical Read Range 4 6 cm 1 5 to 2 3 inches Physical Controller Height 105 mm 4 13 inches Width 76 2 mm 3 00 inches Depth 22 5 mm 0 88 inches Square Bezel Antenna Height 75 mm 2 95 inches Width 60 mm 2 36 inches ...

Page 8: ...e Temperature 40 C to 85 C 40 F to 185 F Operating Humidity 10 to 90 non condensing Storage Humidity 10 to 90 non condensing duration 3 months Transit Humidity 5 to 95 non condensing duration 1 week Operating Environment Water resistant for indoor and outdoor use Electrical Reader Input Voltage 7 5V to 45VDC PLEASE NOTE For UL compliance Input voltage needs to be below 30 VDC 1 3 Certifications an...

Page 9: ...be USB or serial cable based on the host machine Drill Template for the antenna PN 80136500 001 2 2 Mounting the ViVOpay Kiosk III External Antenna Use the following instructions to mount the antenna on the exterior of a kiosk Note Verify the orientation of the ViVOpay Kiosk III Antenna before marking and drilling the holes The two larger holes should be located towards the top of the mounting loc...

Page 10: ...4 4 mm 0 173 mounting holes using a number 17 drill bit 4 Drill the two 14 0 mm 0 551 inch holes using a 35 64 drill bit 5 Remove the nuts from the four mounting screws 6 Route the end of the cable 80136204 001 with the RJ45 connector through the left 14 0 mm 0 551 inch hole in to the kiosk Make sure that the front of the antenna will be properly oriented not upside down on the kiosk before insert...

Page 11: ...Make sure to tighten the nuts securely so that the ViVOpay Kiosk III does not move on the outside surface of the kiosk If you are installing the Angled Bezel Antenna tighten the nuts to 5 7 in lbs for a good weather seal 9 Attach the end of the cable with the SMB connector through the right 14 0 mm 0 551 inch hole and attach it to the socket on the back of the ViVOpay Kiosk III antenna The SMB con...

Page 12: ...stallation 2 3 Mounting the ViVOpay Kiosk III Controller Note The ViVOpay Kiosk III Controller must be mounted within 1 meter of the antenna If the antenna is mounted of a surface that opens such as a door make sure the controller and antenna are close enough that there is no tension on the cable when the enclosure is open If it is acceptable the installer can drill four holes for mounting the con...

Page 13: ...e installer 5 Tighten the nuts to hold the ViVOpay Kiosk III Controller in position so that it does not move 2 3 2 Mounting the ViVOpay Kiosk III Controller Using Mounting Tape 1 Position the ViVOpay Kiosk III Controller on the interior of the kiosk making sure that there is sufficient room for the antenna mounting surface to be fully opened 2 Attach double sided tape to the mounting surface 3 Pos...

Page 14: ...the cable is installed incorrectly upside down it will apply the wrong polarity to the LEDs and damage them 2 5 Connecting to USB Power The KIOSK III can be powered through the serial communications port or the two socket power connector If you are using USB data communications you must power the KIOSK III though the two socket power connector Connect 7 5 to 45VDC to the white two socket Molex con...

Page 15: ...4 pin Molex connector Non SRED SRED The RS 232 port has the following pinouts Pin Description Pin Description 1 Power ground 2 7 5v to 45VDC 3 Power ground 4 7 5v to 45VDC 5 No connection 6 Reserved 7 Reserved 8 Reserved 9 Signal ground 10 Signal ground 11 RS 232 Tx 12 RS 232 Rx 13 No connection 14 Reserved Pin 1 7 5v to 45VDC Pin 2 Ground USB Port RS 232 Port RS 232 Port USB Port ...

Page 16: ...ber 0511101451 with 50394 series crimps see www molex com for more information Pin 1 is indicated by a triangle diagram is socket side view of female connector If you are powering the Kiosk III from this connector wire the two power pins pins 2 and 4 together and the two power ground pins together pins 1 and 3 ...

Page 17: ...sponse but will at least test for end to end connectivity 2 8 Making a Purchase 1 After the transaction has been entered on the kiosk control panel the customer should present their card fob phone in close proximity so that maximum surface area is parallel to the antenna A single beep and all four LEDs briefly flashing indicates the card fob phone has been read correctly 3 Installation Points The ...

Page 18: ...eader Q How can RF interference affect contactless payment A RF interference can cause data errors If RF interference is present contactless payment devices may operate intermittently or inconsistently Q Where does RF interference come from A Radio frequency interference RFI can originate from a wide number of sources at the point of sale POS Some examples of sources of RF energy and RF interferen...

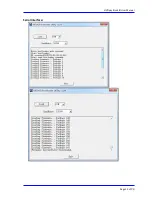
Page 19: ...208 001 or your own Mini USB cable and 140 2035 00 Firmware files including Boot Loader files for the desired firmware 5 2 Uploading Firmware for RS232 or USB 1 Move KIOSKIII_EData bin and KIOSKIII Bootloader Utility exe into the same folder 2 Check and confirm device is correctly connected to the power source and RS232 USB connection 3 If RS232 is the interface choice then please close all softwa...

Page 20: ...ViVOpay Kiosk III User Manual Page 20 of 24 Serial Interface ...

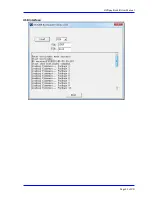
Page 21: ...ViVOpay Kiosk III User Manual Page 21 of 24 USB interface ...

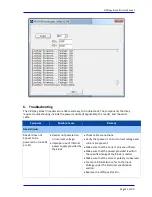
Page 22: ... powered on no LEDs are lit Reader not powered on or incorrect voltage Improper use of internal power supply provided by the kiosk Check cable connections Verify that power is on and correct voltage and current are present Make sure that the correct pins are utilized Make sure that the power provided is within the specified range of the Kiosk III reader Make sure that the correct polarity is obser...

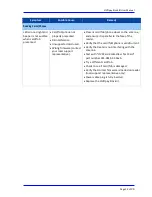
Page 23: ...sentative Present card fob phone closer to the antenna and ensure it is parallel to the face of the reader Verify that the card fob phone is valid current Verify that metal is not interfering with the antenna Test with ViVOcard Contactless Test Card part number 241 0015 03 Rev A Try a different card fob Check to see if card fob is damaged Verify that correct firmware is loaded on reader local supp...

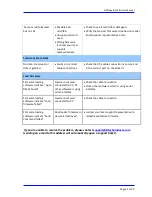
Page 24: ... III Load Firmware Firmware loading software indicate open RS232 failed Device is not well connected to PC Or other software is using serial interface Check the cable connection Close other software which is using serial interface Firmware loading software indicate Load firmware failed Device is not well connected to PC Check the cable connection Firmware loading software indicate Send Command fai...

Reviews: