ACT-408A-N270 User Manual
Page 39
2.10 Mounting the System
WARNING!
When mounting the flat panel PC onto an arm, onto the wall or into a wall, it
is better to have more than one person to help with the installation to make
sure the panel PC does not fall down and get damaged.
2.10.1 Wall Mounting
To mount the ACT-408A-N270 onto the wall, please follow the steps below.
Step 5:
Select the location on the wall for the wall-mounting bracket.
Step 6:
Carefully mark the locations of the four screw holes in the bracket on the wall.
Step 7:
Drill four pilot holes at the marked locations on the wall for the bracket retention
screws.
Step 8:
Align the wall-mounting bracket screw holes with the pilot holes.
Step 9:
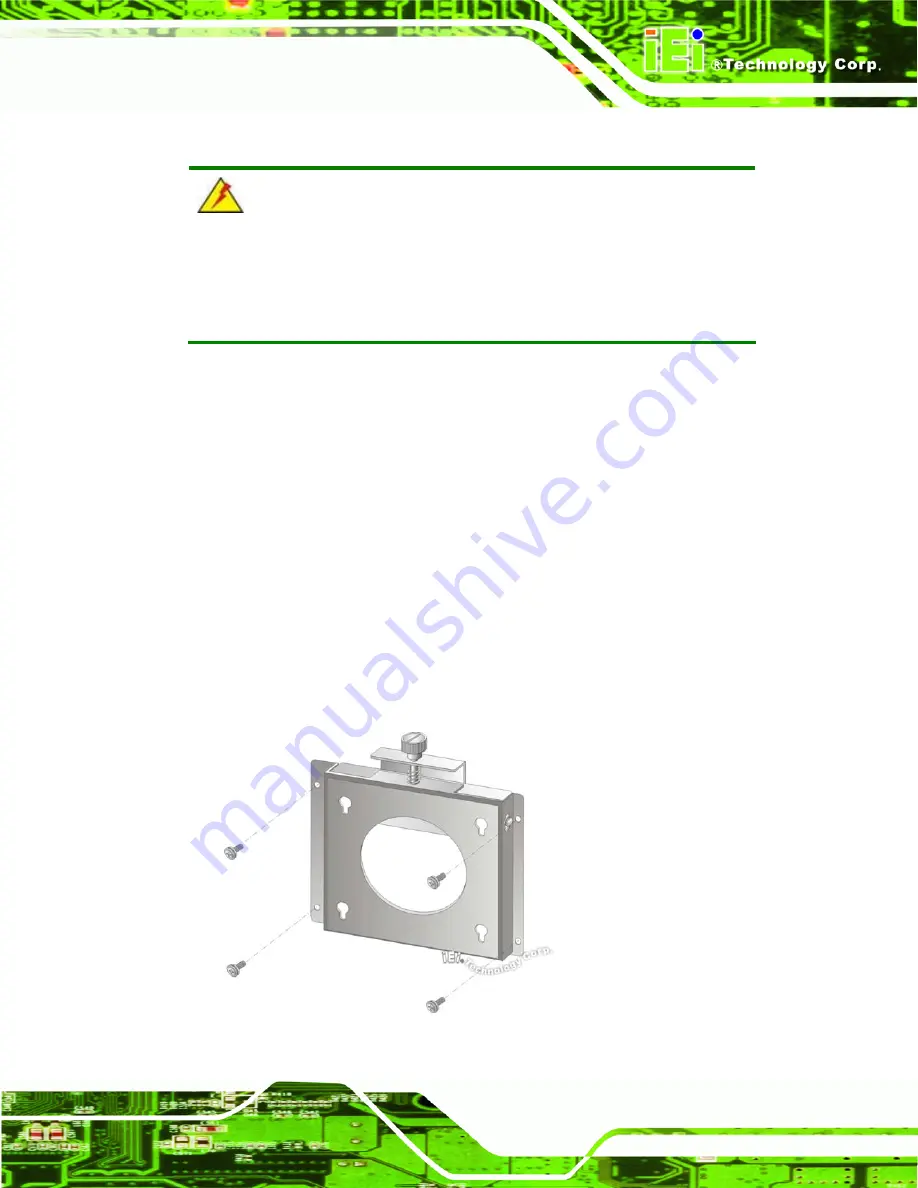
Secure the mounting-bracket to the wall by inserting the retention screws into
the four pilot holes and tightening them (
Figure 2-9
).
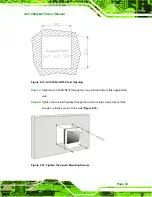
Figure 2-9: Wall-mounting Bracket
Summary of Contents for ACT-408A-N270
Page 12: ...ACT 408A N270 User Manual Page 12 Chapter 1 1 Introduction...
Page 22: ...ACT 408A N270 User Manual Page 22 Figure 1 8 ACT 408A N270 Dimensions mm...
Page 23: ...ACT 408A N270 User Manual Page 23 Chapter 2 2 Installation...
Page 49: ...ACT 408A N270 User Manual Page 49 Chapter 3 3 RFID Reader...
Page 64: ...ACT 408A N270 User Manual Page 64 Chapter 4 4 System Maintenance...
Page 72: ...ACT 408A N270 User Manual Page 72 Chapter 5 5 BIOS...
Page 115: ...ACT 408A N270 User Manual Page 115 Appendix A A External Connector Pinouts...
Page 120: ...ACT 408A N270 User Manual Page 120 Appendix B B Safety Precautions...
Page 124: ...ACT 408A N270 User Manual Page 124 Appendix C C BIOS Configuration Options...
Page 128: ...ACT 408A N270 User Manual Page 128 Appendix D D Watchdog Timer...
Page 131: ...ACT 408A N270 User Manual Page 131 Appendix E E Hazardous Materials Disclosure...


