AFL2-17AB-H61
P a g e 31
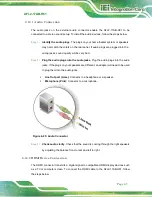
S te p 2:
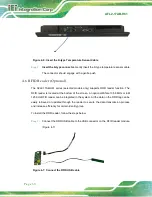
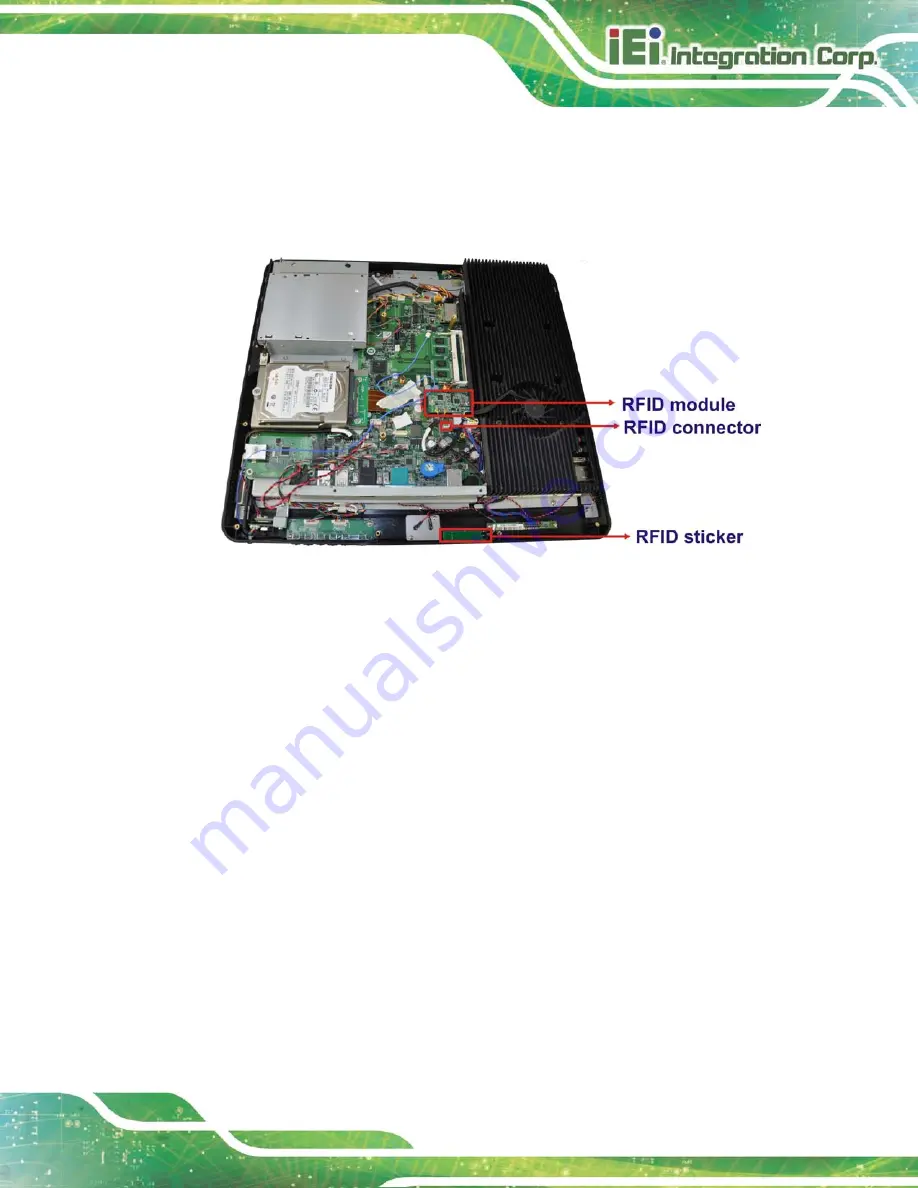
Connect the RFID connector of the RFID USB cable to the RFID connector on
the motherboard (RFID_USB1).
S te p 3:
Attach the sticker of the RFID module to the bottom of the panel.
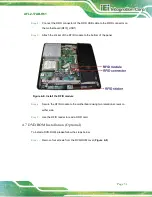
Figure 4-8: Install the RFID module
S te p 4:
Secure the RFID module to the motherboard using two retention screws on
either side.
S te p 5:
Use the RFID reader to read a RFID card.
4.7
DVD-ROM In s ta lla tio n (Op tio n a l)
To install a DVD-ROM, please follow the steps below.
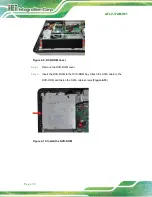
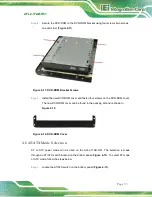
S te p 1:
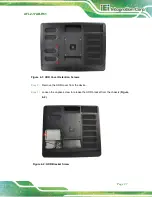
Remove four screws from the DVD-ROM cover (
).
Summary of Contents for AFL2-17AB-H61 Series
Page 15: ......
Page 17: ...AFL2 17AB H61 Page 1 1 Introduction Chapter 1...
Page 29: ...AFL2 17AB H61 Page 13 2 Detailed Specifications Chapter 2...
Page 35: ...AFL2 17AB H61 Page 19 3 Unpacking Chapter 3...
Page 40: ...AFL2 17AB H61 Page 24 4 Ins tallation Chapter 4...
Page 70: ...AFL2 17AB H61 Page 54 Chapter 5 5 Sys tem Motherboard...
Page 106: ...AFL2 17AB H61 Page 90 Figure 5 36 LCD panel Selection Jumper Location...
Page 107: ...AFL2 17AB H61 Page 91 6 Sys tem Maintenance Chapter 6...
Page 116: ...AFL2 17AB H61 Page 100 7 BIOS Setup Chapter 7...
Page 153: ...AFL2 17AB H61 Panel PC Page 137 8 Cooling Management Cons ole iCMC Chapter 7...
Page 162: ...AFL2 17AB H61 Panel PC Page 146 Appendix A A Regulatory Compliance...
Page 167: ...AFL2 17AB H61 Panel PC Page 151 B Safety Precautions Appendix B...
Page 173: ...AFL2 17AB H61 Panel PC Page 157 C BIOS Menu Options Appendix C...
Page 176: ...AFL2 17AB H61 Panel PC Page 160 D Hazardous Materials Dis clos ure Appendix D...

