AFL3-W10A/12A/W15A-BT Panel PC
Page 26
3.6 HDD Installation
NOTE:
The HDD drive bay is only available in the 12.1" and 15.6" models. For
the 10.1" model, please install mSATA module as the storage device.
To install the HDD into the system, please follow the steps below:
Step 1:
Remove the plastic back cover. See
Section 3.4
above.
Step 2:
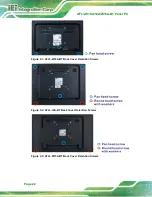
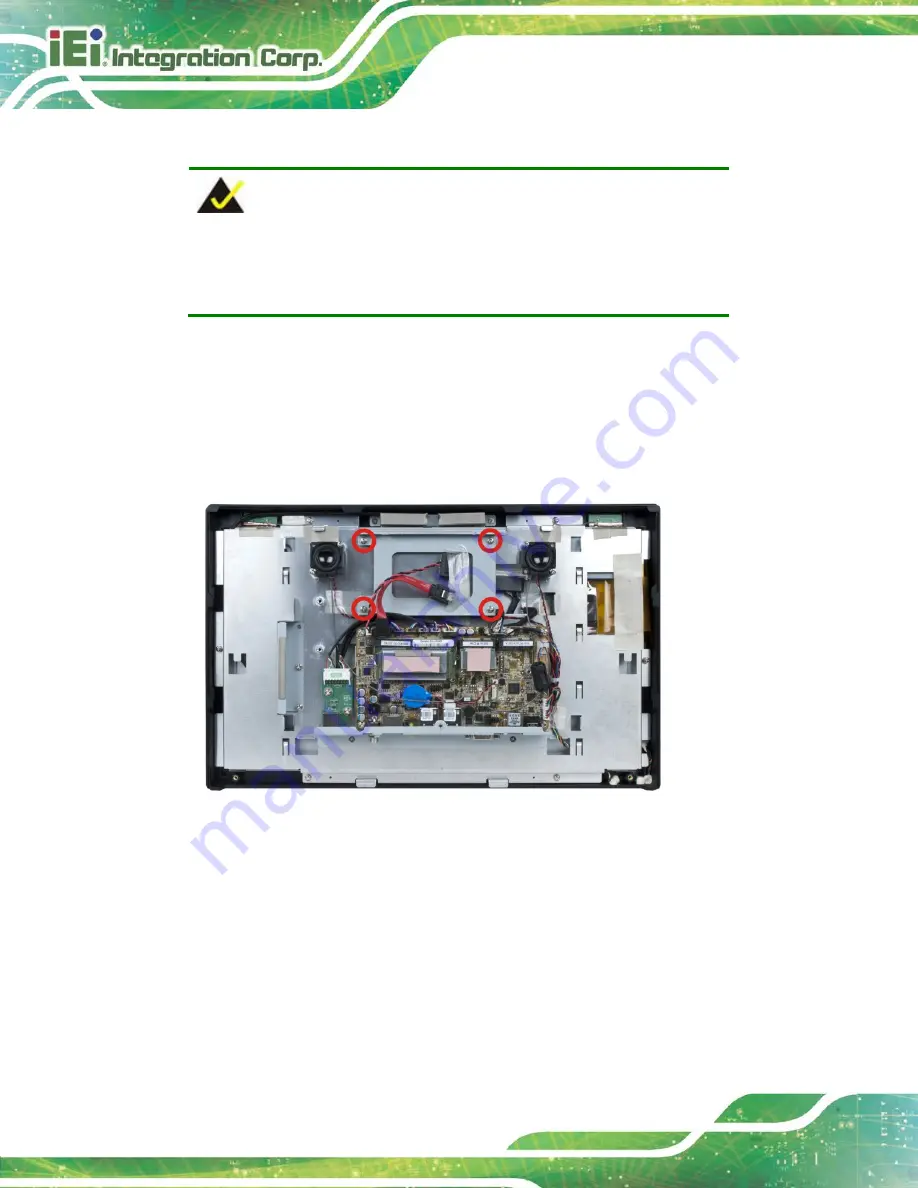
Remove the four HDD bracket retention screws and lift the HDD bracket off the
panel PC.
Figure 3-8: HDD Bracket Retention Screws
Step 3:
Attach the HDD brackets to the HDD. To do this, align the four retention screw
holes in the both sides of the HDD bracket with the retention screw holes on the
sides of the HDD. Insert four retention screws into the HDD bracket
).
Summary of Contents for AFL3-12A-BT
Page 15: ...AFL3 W10A 12A W15A BT Panel PC Page 1 1 Introduction Chapter 1...
Page 28: ...AFL3 W10A 12A W15A BT Panel PC Page 14 2 Unpacking Chapter 2...
Page 33: ...AFL3 W10A 12A W15A BT Panel PC Page 19 3 Installation Chapter 3...
Page 69: ...AFL3 W10A 12A W15A BT Panel PC Page 55 4 BIOS Setup Chapter 4...
Page 101: ...AFL3 W10A 12A W15A BT Panel PC Page 87 5 System Maintenance Chapter 5...
Page 106: ...AFL3 W10A 12A W15A BT Panel PC Page 92 6 Interface Connectors Chapter 6...
Page 121: ...AFL3 W10A 12A W15A BT Panel PC Page 107 Appendix A A Regulatory Compliance...
Page 126: ...AFL3 W10A 12A W15A BT Panel PC Page 112 B Safety Precautions Appendix B...
Page 132: ...AFL3 W10A 12A W15A BT Panel PC Page 118 C BIOS Menu Options Appendix C...
Page 135: ...AFL3 W10A 12A W15A BT Panel PC Page 121 Appendix D D Watchdog Timer...
Page 138: ...AFL3 W10A 12A W15A BT Panel PC Page 124 Appendix E E Error Beep Code...
Page 140: ...AFL3 W10A 12A W15A BT Panel PC Page 126 Appendix F F Hazardous Materials Disclosure...


