AFL3-12C-ULT3 Panel PC
Page 39
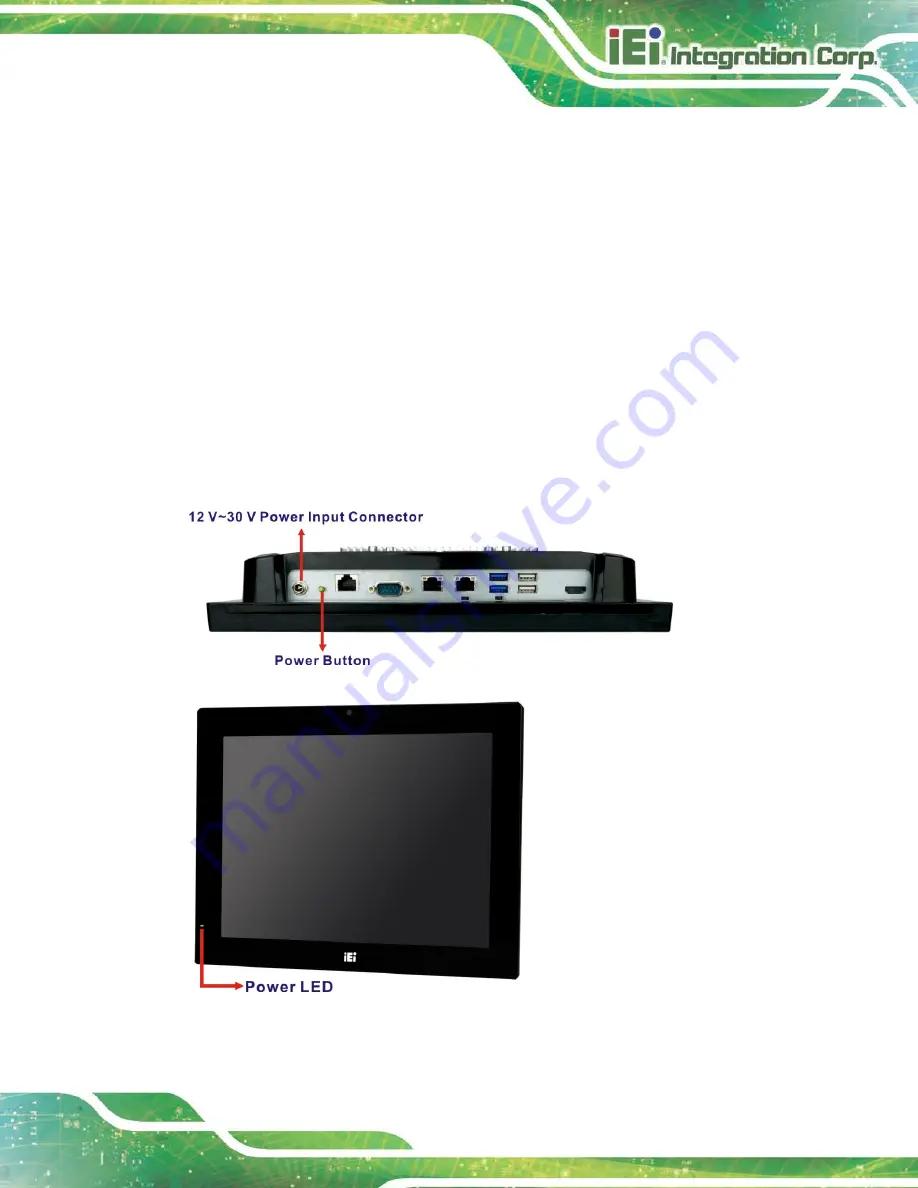
3.10 Powering On the System
To power on the system, follow the steps below:
Step 1:
Connect the power cord to the power adapter. Connect the other end of the
power cord to a power source.
Step 2:
Connect the power adapter to the power connector of the AFL3-12C-ULT3.
Step 3:
Locate the power button on the I/O panel.
Step 4:
ATX mode (default)
: long press the power button for 3~5 seconds to power up
the system. Once powered up, the power LED on the front panel turns on in
green.
AT mode
: the system turns on automatically.
Figure 3-24: Powering On the System
Summary of Contents for AFL3-12C-ULT3
Page 2: ...AFL3 12C ULT3 Panel PC Page II Revision Date Version Changes May 7 2018 1 00 Initial release...
Page 16: ......
Page 17: ...AFL3 12C ULT3 Panel PC Page 1 1 Introduction Chapter 1...
Page 26: ...AFL3 12C ULT3 Panel PC Page 10 2 Unpacking Chapter 2...
Page 31: ...AFL3 12C ULT3 Panel PC Page 15 3 Installation Chapter 3...
Page 61: ...AFL3 12C ULT3 Panel PC Page 45 4 BIOS Setup Chapter 4...
Page 95: ...AFL3 12C ULT3 Panel PC Page 79 5 System Maintenance Chapter 5...
Page 100: ...AFL3 12C ULT3 Panel PC Page 84 6 Interface Connectors Chapter 6...
Page 119: ...AFL3 12C ULT3 Panel PC Page 103 Appendix A A Regulatory Compliance...
Page 125: ...AFL3 12C ULT3 Panel PC Page 109 B Safety Precautions Appendix B...
Page 131: ...AFL3 12C ULT3 Panel PC Page 115 C BIOS Menu Options Appendix C...
Page 134: ...AFL3 12C ULT3 Panel PC Page 118 Appendix D D Watchdog Timer...
Page 137: ...AFL3 12C ULT3 Panel PC Page 121 Appendix E E Hazardous Materials Disclosure...


