Page 69
Step 3:
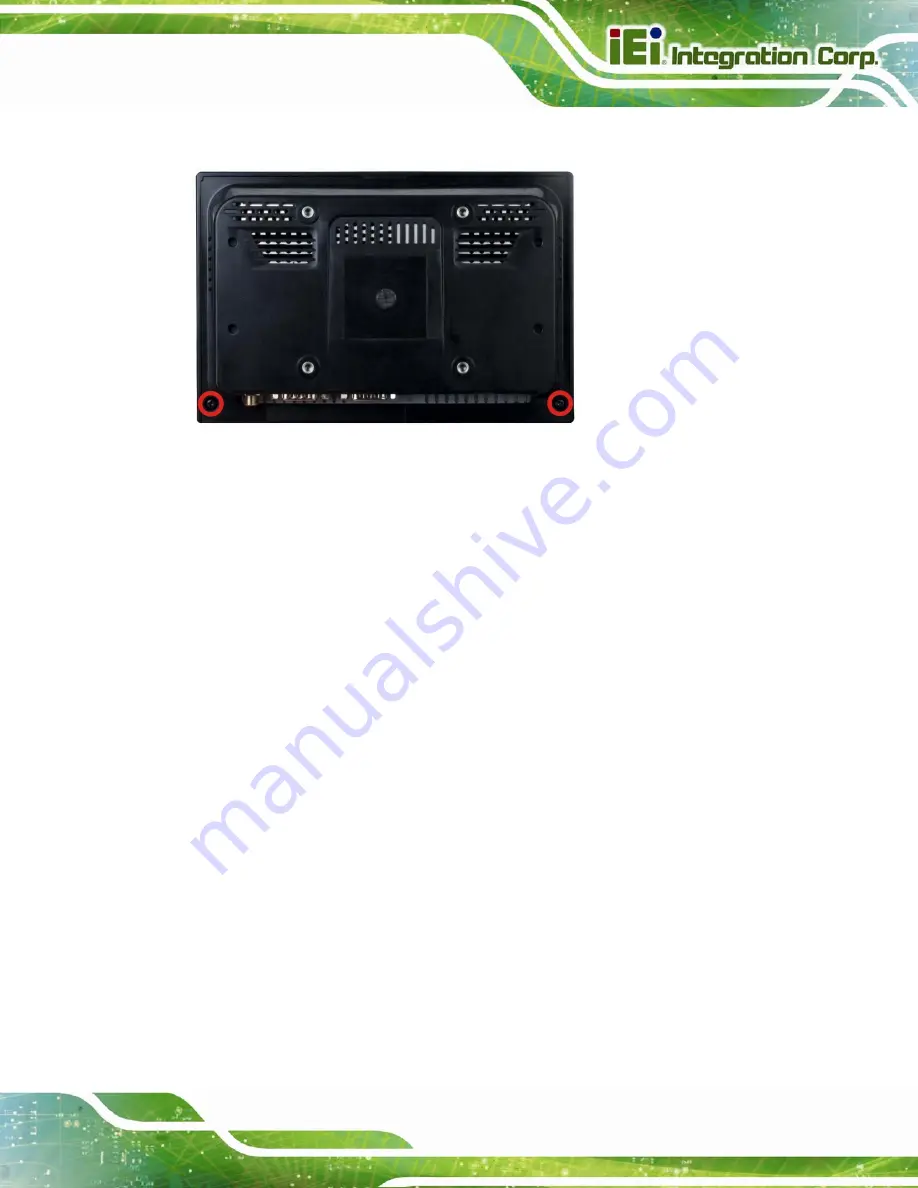
Remove the two retention screws from the back cover (
Figure 5-1: Back Cover Retention Screws
Step 4:
Carefully separate the back cover from the chassis and lift the cover of the
device
Step 0:
5.5 WLAN Card Replacement
The AFL3-W07A-BT-N1 has one WLAN card slot. To replace the WLAN card, follow the
instructions below.
Step 1:
Follow all anti-static procedures. See
Turn off the power. See
Section
Section
4
).
Summary of Contents for AFL3-W07A-BT-N1
Page 12: ......
Page 13: ...AFL3 W07A BT N1 Panel PC Page 1 1 Introduction Chapter 1...
Page 17: ...AFL3 W07A BT N1 Panel PC Page 5 Figure 1 4 Bottom Panel...
Page 21: ...AFL3 W07A BT N1 Panel PC Page 9 2 Unpacking Chapter 2...
Page 25: ...AFL3 W07A BT N1 Panel PC Page 13 3 Installation Chapter 3...
Page 50: ...AFL3 W07A BT N1 Panel PC Page 38 4 BIOS Setup Chapter 4...
Page 78: ...AFL3 W07A BT N1 Panel PC Page 66 5 System Maintenance Chapter 5...
Page 84: ...AFL3 W07A BT N1 Panel PC Page 72 6 Interface Connectors Chapter 6...
Page 95: ...AFL3 W07A BT N1 Panel PC Page 83 A Safety Precautions Appendix A...
Page 100: ...AFL3 W07A BT N1 Panel PC Page 88 B BIOS Menu Options Appendix B...
Page 103: ...AFL3 W07A BT N1 Panel PC Page 91 Appendix C C Watchdog Timer...
Page 106: ...AFL3 W07A BT N1 Panel PC Page 94 D Hazardous Materials Disclosure Appendix D...


