IMB-9454G-R40
Page 67
pass through the pre-drilled holes on the PCB.
Step 3:
Mount the cooling kit
. Gently place the cooling kit on top of the CPU. Make
sure the four threaded screws on the corners of the cooling kit properly pass
through the predrilled holes on the bottom of the PCB.
Step 4:
Secure the cooling kit
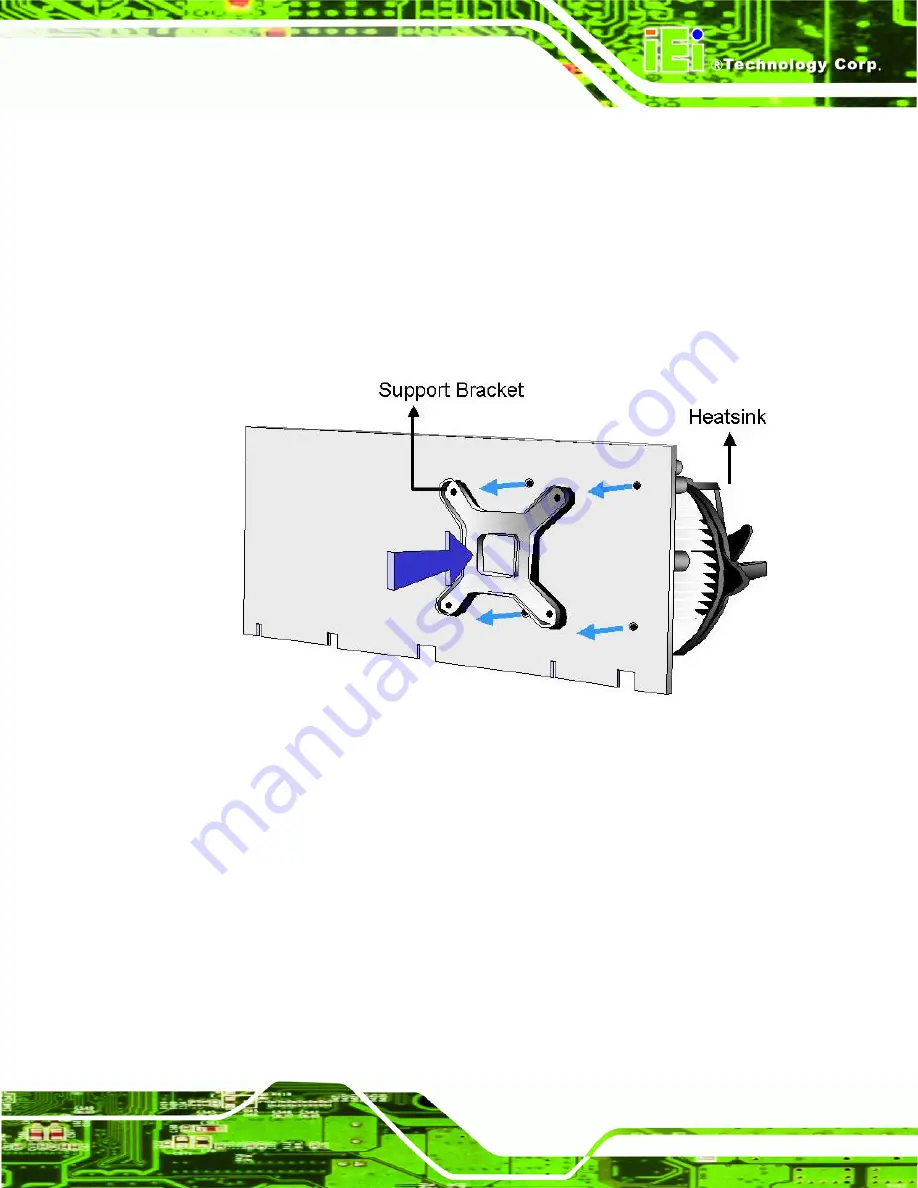
. From the solder side of the PCB, align the support
bracket to the screw threads on heat sink that were inserted through the PCB
holes. (See
Figure 4-6
)
Figure 4-6: Securing the Heat sink to the PCB Board
Step 5:
Tighten the screws
. Use a screwdriver to tighten the four screws. Tighten each
nut a few turns at a time and do not over-tighten the screws.
Step 6:
Connect the fan cable
. Connect the cooling kit fan cable to the fan connector
on the IMB-9454G. Carefully route the cable and avoid heat generating chips
and fan blades.
Step 0:
Summary of Contents for IMB-9454G-R40
Page 15: ...1 1 1 IMB 9454G R40 Page 1 1 Introduction Chapter 1...
Page 21: ...IMB 9454G R40 Page 7 2 Detailed Specifications Chapter 2...
Page 33: ...IMB 9454G R40 Page 19 3 Connectors and Jumpers Chapter 3...
Page 72: ...Page 58 IMB 9454G R40 Page 58 4 Installation and Configuration Chapter 4...
Page 90: ...Page 76 IMB 9454G R40 Page 76 5 AMI BIOS Setup Chapter 5...
Page 134: ...Page 120 IMB 9454G R40 Page 120 6 Software Drivers Chapter 6...
Page 153: ...IMB 9454G R40 Page 139 A BIOS Configuration Options Appendix A...
Page 157: ...IMB 9454G R40 Page 143 B Watchdog Timer Appendix B...
Page 160: ...Page 146 IMB 9454G R40 Page 146 C External AC 97 Audio CODEC Appendix C...


