IMBA-Q670 ATX Motherboard
Page 55
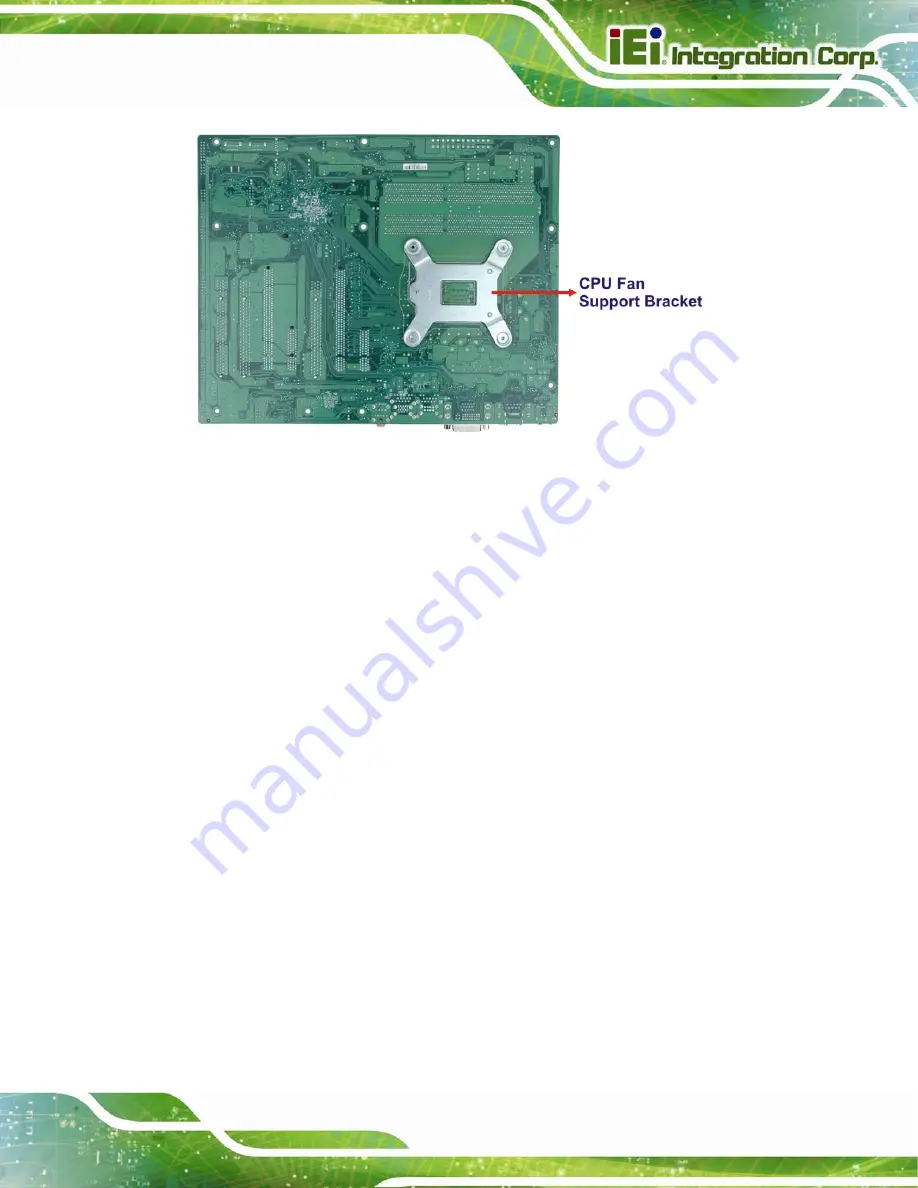
Figure 4-6: Cooling Kit Support Bracket
Step 2:
Place the cooling kit onto the socket LGA1155 CPU
. Make sure the CPU
cable can be properly routed when the cooling kit is installed.
Step 3:
Mount the cooling kit
. Gently place the cooling kit on top of the CPU. Make
sure the four threaded screws on the corners of the cooling kit properly pass
through the holes of the cooling kit bracket.
Step 4:
Secure the cooling kit
by fastening the four retention screws of the cooling kit.
Step 5:
Connect the fan cable
. Connect the cooling kit fan cable to the fan connector
on the IMBA-Q670. Carefully route the cable and avoid heat generating chips
and fan blades.
Summary of Contents for IMBA-Q670
Page 14: ...IMBA Q670 ATX Motherboard Page xiv Figure B 43 Disable Automatically Restart 182...
Page 18: ......
Page 19: ...IMBA Q670 ATX Motherboard Page 1 Chapter 1 1 Introduction...
Page 27: ...IMBA Q670 ATX Motherboard Page 9 Chapter 2 2 Packing List...
Page 32: ...IMBA Q670 ATX Motherboard Page 14 Chapter 3 3 Connectors...
Page 66: ...IMBA Q670 ATX Motherboard Page 48 Chapter 4 4 Installation...
Page 89: ...IMBA Q670 ATX Motherboard Page 71 Chapter 5 5 BIOS...
Page 132: ...IMBA Q670 ATX Motherboard Page 114 6 Software Drivers Chapter 6...
Page 160: ...IMBA Q670 ATX Motherboard Page 142 Appendix A A BIOS Options...
Page 163: ...IMBA Q670 ATX Motherboard Page 145 Appendix B B One Key Recovery...
Page 171: ...IMBA Q670 ATX Motherboard Page 153 Figure B 5 Partition Creation Commands...
Page 205: ...IMBA Q670 ATX Motherboard Page 187 Appendix C C Terminology...
Page 209: ...IMBA Q670 ATX Motherboard Page 191 Appendix D D Digital I O Interface...
Page 212: ...IMBA Q670 ATX Motherboard Page 194 Appendix E E Watchdog Timer...
Page 215: ...IMBA Q670 ATX Motherboard Page 197 Appendix F F Intel Matrix Storage Manager...
Page 219: ...IMBA Q670 ATX Motherboard Page 201 Appendix G G Hazardous Materials Disclosure...


